ZE-COMETC
ONLINE
// ZE-COME TC // EDISI 2026 // v2.0

BOOK PERAKITAN

> Modul Lengkap • Detail • Mendalam • Bersumber Resmi_

Digital Textbook — Komputer, Dasar, Komponen, Perakitan, OS, Jaringan, Keamanan

ZE-COME TC

Instruktur: Abdur Rozak, S.Kom.

8 BAB 60+ SECTION 15+ TABEL 25 FAQ 65+ ISTILAH SOURCES RESMI
BAB 1

PENGENALAN KOMPUTER

Definisi, sejarah, generasi, klasifikasi, dan tren komputasi modern

1.1 Definisi Komputer

Komputer adalah mesin elektronik yang bisa memproses data menjadi informasi berguna sesuai instruksi program yang diberikan. Kata "komputer" asalnya dari bahasa Latin computare (menghitung). Intinya, komputer menerima input, memproses data, menyimpan, dan menghasilkan output.

Komputer modern bekerja secara digital — menggunakan sinyal listrik yang direpresentasikan sebagai bilangan biner (0 dan 1). Setiap data — teks, gambar, suara, video — disimpan dan diproses dalam bentuk biner. Satuan terkecil data adalah bit (binary digit), dan 8 bit membentuk 1 byte.

ANALOGI
Bayangkan komputer seperti dapur restoran: Input = bahan mentah masuk (keyboard, mouse), CPU = koki memasak (memproses data), RAM = meja kerja koki (data sementara), Storage = kulkas penyimpanan (data permanen), Output = hidangan siap (monitor, printer). Semakin besar meja (RAM), semakin banyak bahan yang bisa dikelola sekaligus!
// KARAKTERISTIK KOMPUTER Elektronik (komponen IC/microprocessor) • Otomatis (kerja sesuai program) • Cepat (GHz — miliar operasi/detik) • Akurat (sesuai input) • Kapasitas besar (GB/TB) • Dapat berkomunikasi (jaringan/internet)

1.2 Sejarah Komputer

Evolusi komputer dari alat hitung manual hingga mesin elektronik modern mencakup beberapa tonggak penting:

  1. Abacus (±3000 SM) — alat hitung manual pertama, menggunakan manik-manik pada rangka kayu. Origin: Mesopotamia.
  2. Pascaline (1642) — Blaise Pascal membuat kalkulator mekanik pertama dengan roda gigi untuk penjumlahan/pengurangan.
  3. Difference Engine (1822) — Charles Babbage ("Bapak Komputer") merancang mesin hitung mekanik otomatis untuk tabel polinomial.
  4. Analytical Engine (1837) — Babbage merancang komputer mekanik serbaguna dengan ALU, memori, kontrol — konsep arsitektur modern.
  5. Ada Lovelace (1843) — programmer pertama, menulis algoritma untuk Analytical Engine.
  6. ENIAC (1946) — Electronic Numerical Integrator and Computer, komputer elektronik pertama. 18.000 tabung vakum, berat 30 ton, 30 ton, University of Pennsylvania.
  7. Transistor (1947) — Bell Labs (Bardeen, Brattain, Shockley) menemukan transistor, menggantikan tabung vakum.
  8. Integrated Circuit (1958) — Jack Kilby (Texas Instruments) dan Robert Noyce (Fairchild) menciptakan IC.
  9. Intel 4004 (1971) — microprocessor pertama, 2.300 transistor, 740 KHz, 4-bit. Dirancang oleh Federico Faggin dan Marcian Hoff.
  10. IBM PC (1981) — PC komersial pertama berbasis Intel 8088, standar arsitektur x86.
  11. World Wide Web (1989) — Tim Berners-Lee di CERN menciptakan WWW, mem democratize akses informasi.
  12. iPhone (2007) — Apple meluncurkan smartphone modern, revolusi mobile computing.
Sumber: Computer History Museum (computerhistory.org), IEEE Computer Society, Intel Museum

1.3 Generasi Komputer

Komputer diklasifikasikan dalam 5 generasi berdasarkan komponen utama:

GenPeriodeKomponenContohKarakteristik
11946-1959Tabung vakumENIAC, UNIVAC IBesar (ruangan), panas, konsumsi listrik tinggi, mahal
21959-1965TransistorIBM 1401, PDP-1Lebih kecil, hemat, reliable
31965-1971IC (SSI/MSI)IBM System/360Mini, multi-user, komersial
41971-sekarangMicroprocessor (LSI/VLSI)PC, laptop, smartphonePersonal, murah, networking
5Sekarang+AI, paralel, quantumAI chip (NPU/TPU), quantumCerdas, paralel masif, kognitif
Sumber: IEEE Annals of the History of Computing, Computer History Museum

1.4 Klasifikasi Komputer

Berdasarkan Ukuran & Kapasitas

TipeUkuranPenggunaanContoh
MicrocomputerPersonalRumah, kantorPC, laptop, smartphone
WorkstationDesktop high-endEngineering, CADDell Precision, HP Z
MinicomputerMediumWorkgroup, labVAX, IBM AS/400
MainframeBesar (rak)Enterprise, bankIBM zSeries
SupercomputerSangat besarRiset, cuaca, militerFugaku, Frontier, Cray

Berdasarkan Data yang Diproses

  • Analog — data kontinu (suhu, kecepatan, sinyal). Contoh: speedometer, termometer raksa.
  • Digital — data diskrit (biner 0/1). Komputer modern. Presisi tinggi.
  • Hybrid — gabungan analog + digital. Contoh: instrumen medis, sistem industri.

1.5 Komponen Fungsional (Model IPO)

Setiap komputer memiliki komponen fungsional yang dikenal sebagai model IPO (Input-Process-Output) plus Storage:

  1. Input Device — menerima data dari user: keyboard, mouse, scanner, mikrofon, kamera, sensor.
  2. Process (CPU) — pemroses instruksi: ALU (aritmatika/logika) + Control Unit (koordinasi) + Register (penyimpan cepat).
  3. Output Device — menampilkan hasil: monitor, printer, speaker, proyektor, actuator.
  4. Storage — penyimpanan data: RAM (volatile, cepat) dan SSD/HDD (non-volatile, permanen).
// DIAGRAM: MODEL IPO KOMPUTER

INPUT
→

PROCESS
→

OUTPUT
STORAGE (penyimpanan)
Data mengalir: Input → CPU proses → Output. Storage menyimpan data permanen yang bisa diakses kapan saja.
// MODEL IPO Input → Process → Output, dengan Storage sebagai pendukung. Contoh: ketik keyboard (input) → CPU proses → tampil di monitor (output), data tersimpan di SSD.

1.6 Tren Komputasi Modern

  • Cloud Computing — komputasi via internet (AWS, Azure, GCP). SaaS, PaaS, IaaS.
  • Edge Computing — proses data di tepi jaringan (IoT device), mengurangi latensi.
  • AI/Machine Learning — komputasi kognitif, neural network. GPU/NPU acceleration.
  • Internet of Things (IoT) — miliaran perangkat terhubung: smart home, industri 4.0, wearable.
  • Quantum Computing — komputasi kuantum (qubit), untuk masalah kompleks (IBM, Google).
  • Container & Microservices — Docker, Kubernetes, arsitektur modular.
  • 5G & Beyond — jaringan super cepat, low-latency, enabling AR/VR/autonomous.

1.7 Sejarah Internet & World Wide Web

Internet adalah jaringan global yang menghubungkan miliaran perangkat. Berawal dari ARPANET (1969) — proyek militer AS untuk komunikasi tahan bencana. Pada 1983, TCP/IP diadopsi sebagai protokol standar.

World Wide Web (WWW) diciptakan oleh Tim Berners-Lee di CERN (1989). WWW bukan internet — WWW adalah layanan yang berjalan di atas internet (via HTTP). Internet = infrastruktur jaringan; WWW = sistem dokumen hyperlink.

  • 1969 — ARPANET, 4 node pertama (UCLA, SRI, UCSB, Utah)
  • 1971 — Email pertama oleh Ray Tomlinson (simbol @)
  • 1983 — TCP/IP menjadi standar (lahirnya "Internet")
  • 1989 — Tim Berners-Lee proposing WWW di CERN
  • 1991 — Website pertama live di CERN
  • 1993 — Mosaic browser (grafis, populernya web)
  • 1995 — Commercialisasi internet (Amazon, eBay lahir)
  • 2004 — Web 2.0 (Facebook, YouTube era user-generated content)
  • 2007 — iPhone, mobile internet era
  • 2020s — Web3, AI internet, IoT (miliaran perangkat terhubung)
Sumber: Internet Society (internetsociety.org), Computer History Museum, W3C

1.8 Era Komputasi Modern

Komputasi modern berkembang melampaui PC tradisional. Beberapa tren dominan:

  • Cloud Computing — komputasi via internet (AWS, Azure, GCP). Model: SaaS (software), PaaS (platform), IaaS (infrastructure). Bayar sesuai pakai (pay-per-use).
  • Edge Computing — proses data di tepi jaringan (IoT device, smartphone). Kurangi latensi, hemat bandwidth cloud.
  • Artificial Intelligence (AI) — machine learning, deep learning, neural network. GPU/NPU acceleration. Contoh: ChatGPT, Gemini, computer vision.
  • Internet of Things (IoT) — miliaran perangkat terhubung: smart home (lampu, kulkas), wearable (smartwatch), industri 4.0 (sensor pabrik), smart city.
  • Quantum Computing — komputasi dengan qubit (superposition + entanglement). Untuk masalah kompleks: cryptography, drug discovery, optimization. Vendor: IBM, Google, Rigetti.
  • 5G & Beyond — jaringan seluler generasi 5 (10-20 Gbps, low latency 1ms). Enable: AR/VR, autonomous vehicle, remote surgery.
  • Augmented/Virtual Reality (AR/VR) — Apple Vision Pro, Meta Quest. Immersive computing.
ANALOGI: CLOUD COMPUTING
Cloud seperti PLN (listrik): tidak perlu beli generator sendiri, tinggal colok dan pakai, bayar sesuai pemakaian. Cloud = "listrik komputasi" — bayar sesuai CPU-hour/storage yang dipakai!

1.9 Dampak Sosial & Etika Komputer

Komputer mengubah masyarakat secara mendalam. Penting memahami dampak positif dan negatif:

Dampak Positif

  • Akses informasi — demokratisasi pengetahuan (Wikipedia, Google)
  • Komunikasi — real-time global (email, video call, social media)
  • Efisiensi — otomasi, produktivitas, e-government
  • Edukasi — e-learning, MOOC, akses pendidikan merata
  • Kesehatan — telemedicine, AI diagnosis, record digital

Dampak Negatif & Tantangan

  • Digital divide — kesenjangan akses teknologi (kota vs desa)
  • Privasi — data pribadi dikumpulkan, dijual, disalahgunakan
  • Cybercrime — penipuan online, hacking, ransomware
  • Hoax/misinformation — fake news, deepfake, propaganda
  • Addiction — social media addiction, gaming disorder
  • Lingkungan — e-waste, konsumsi energi data center

Etika Komputer

  • Hak kekayaan intelektual — hormati copyright, gunakan open source dengan benar
  • Privacy — jangan akses data orang tanpa izin
  • Security — report vulnerability, tidak eksploit
  • Netiquette — sopan santun online, no harassment/cyberbullying
Sebagai teknisi/IT professional, bagaimana Anda memastikan teknologi yang Anda bangun bermanfaat dan tidak merugikan masyarakat?
BAB 2

DASAR KOMPUTER

Arsitektur, CPU, siklus instruksi, sistem bilangan, bus, dan hierarki memori

2.1 Arsitektur von Neumann vs Harvard

Arsitektur von Neumann (1945, John von Neumann) adalah model dasar komputer modern. Konsep utama: stored-program — program (instruksi) dan data disimpan di memori yang sama, dieksekusi CPU berurutan.

Arsitektur Harvard — memisahkan memori instruksi dan memori data, dengan bus terpisah. Memungkinkan akses paralel, lebih cepat, namun lebih kompleks. Dipakai di DSP, mikrokontroler (AVR, ARM Cortex-M), dan cache CPU modern (L1 instruction cache terpisah dari L1 data cache).

Aspekvon NeumannHarvard
MemoriSatuan (program+data)Pisah (instr+data)
BusTunggalPisah (2 bus)
EksekusiSequentialParalel
KompleksitasRendahTinggi
ContohPC modern (x86)AVR, ARM Cortex-M
// VON NEUMANN BOTTLENECK (KELEMAHAN) CPU dan memori berbagi bus yang sama, sehingga eksekusi sequential tidak bisa paralel penuh. Solusi modern: cache L1 terpisah (Harvard modified), pipeline, superscalar, out-of-order execution.
ANALOGI: CPU SEBAGAI KOKI
Bayangkan CPU sebagai koki di dapur: ALU = tangan koki yang mengiris & mengaduk (operasi hitung), Control Unit = otak koki memerintah "sekarang iris bawang, lalu tumis" (atur urutan), Register = tangan koki memegang bahan yang sedang dipotong (data aktif), Cache L1 = celemek dengan pisau siap pakai, Cache L2/L3 = rak bumbu di dekat kompor, RAM = kulkas besar di sudut dapur. Semakin dekat bahan ke koki, semakin cepat diakses!
Sumber: IEEE Computer Society, "Computer Architecture: A Quantitative Approach" (Hennessy & Patterson)

2.2 Central Processing Unit (CPU)

CPU adalah otak komputer yang menjalankan instruksi program. Komponen utama:

  • ALU (Arithmetic Logic Unit) — operasi aritmatika (+, -, ×, ÷) dan logika (AND, OR, NOT, XOR, shift).
  • Control Unit (CU) — decode instruksi, kontrol timing, koordinasi antar komponen via sinyal kontrol.
  • Register — memori super cepat di dalam CPU (<1ns). Contoh: Program Counter (PC), Instruction Register (IR), Accumulator, Status Register.
  • Cache — L1 (32-64KB, <1ns), L2 (256KB-2MB, 3-10ns), L3 (8-64MB, 10-40ns). Hierarki: lebih besar = lebih lambat.
  • MMU (Memory Management Unit) — translasi virtual ke physical address, paging, protection.
  • Branch Predictor — prediksi percabangan untuk efisiensi pipeline.

Spesifikasi CPU Modern

ParameterPenjelasanContoh
Clock SpeedKecepatan eksekusi (GHz)3.6 GHz base, 5.2 GHz boost
CoreUnit pemroses fisik6-core, 8-core, 16-core
ThreadEksekusi paralel virtual (SMT/HT)12-thread (6c/12t)
Cache L1/L2/L3Memori cepat berjenjang32KB/1MB/16MB
TDPThermal Design Power (Watt)65W, 105W, 125W
LithographyUkuran transistor (nm)Intel 4, TSMC 5nm, 3nm
Instruction SetSet instruksi yang didukungx86-64, AVX-512, SSE4
Sumber: Intel ARK (ark.intel.com), AMD Specifications (amd.com), CompTIA A+ 220-1101

2.3 Siklus Instruksi (Instruction Cycle)

CPU mengeksekusi setiap instruksi melalui 4 tahap berurutan:

  1. Fetch — ambil instruksi dari memori (alamat di Program Counter) ke Instruction Register.
  2. Decode — Control Unit terjemahkan instruksi menjadi sinyal kontrol. Identifikasi opcode + operand.
  3. Execute — ALU/CU jalankan operasi: aritmatika, logika, I/O, atau branch.
  4. Write-back — simpan hasil eksekusi ke register atau memori. Update Program Counter.

CPU modern menggunakan pipeline — beberapa instruksi diproses paralel di tahap berbeda (misal: instr-1 execute, instr-2 decode, instr-3 fetch). Meningkatkan throughput drastis. Pipeline depth modern: 14-20 tahap.

Teknik lanjutan: Superscalar (multiple ALU paralel), Out-of-Order Execution (OoO) (eksekusi instruksi tidak berurutan jika tidak ada dependency), Speculative Execution (eksekusi prediksi branch), Hyper-Threading/SMT (2 thread per core).

// ANIMASI: SIKLUS INSTRUKSI CPU
FETCH
→
DECODE
→
EXECUTE
→
WRITE
Siklus berputar: Fetch (ambil instruksi) → Decode (terjemahkan) → Execute (jalankan) → Write-back (simpan hasil). Tiap tahap menyala bergantian (animasi 4 detik).
INGAT: CPU modern memproses instruksi berurutan melalui 4 tahap ini. Pipeline membuat beberapa instruksi diproses paralel — seperti assembly line pabrik!
Sumber: "Computer Organization and Design" (Patterson & Hennessy), MIPS Architecture Reference

2.4 Sistem Bilangan

Komputer menggunakan 4 sistem bilangan utama:

SistemBasisDigitContohNilai Desimal
Biner20, 11010₂10
Oktal80-712₈10
Desimal100-910₁₀10
Heksadesimal160-9, A-FA₁₆10

Konversi Bilangan

  • Desimal → Biner — bagi 2 berulang, baca sisa dari bawah. Contoh: 25 ÷ 2 = 12 sisa 1, 12 ÷ 2 = 6 sisa 0, 6 ÷ 2 = 3 sisa 0, 3 ÷ 2 = 1 sisa 1, 1 ÷ 2 = 0 sisa 1 → 11001₂
  • Biner → Desimal — jumlahkan (digit × 2^posisi). 11001₂ = 1×16 + 1×8 + 0×4 + 0×2 + 1×1 = 25₁₀
  • Biner → Hex — kelompokkan 4 bit dari kanan. 1100 1101 → CD₁₆
  • Hex → Biner — tiap digit hex = 4 bit. A₁₆ = 1010₂, F₁₆ = 1111₂
// ANIMASI: BINARY COUNTER (4-bit)
0
0
0
0
4 bit = 16 kombinasi (0-15). Bit menyala (cyan) = 1, mati = 0. Komputer menghitung dengan pola ini!
Mengapa komputer pakai biner? Karena komponen elektronik hanya punya 2 keadaan: ON (ada tegangan = 1) dan OFF (tidak ada tegangan = 0). Ini paling reliable dan cepat!
// ASCII & UNICODE Setiap karakter direpresentasikan sebagai angka. ASCII (7-bit, 128 karakter) — A=65, a=97, 0=48. Unicode UTF-8 (8-bit variabel, 1.4M+ karakter) mendukung semua bahasa dunia + emoji.

2.5 Satuan Data

SatuanNilaiSkalaContoh
Bit (b)0 atau 1-1 digit biner
Byte (B)8 bit-1 karakter ASCII
Kilobyte (KB)1.024 B10³Teks pendek, ikon
Megabyte (MB)1.024 KB10⁶Foto JPG, lagu MP3
Gigabyte (GB)1.024 MB10⁹Film HD, RAM PC
Terabyte (TB)1.024 GB10¹²HDD/SSD besar
Petabyte (PB)1.024 TB10¹⁵Server, data center
// BINARY VS DECIMAL PREFIX Binary (base 2): 1 KB = 1024 B (KiB). Decimal (base 10): 1 KB = 1000 B. Manufacturer storage pakai decimal (1TB = 1000GB), OS pakai binary (1TB = 931GiB). Itulah kenapa HDD 1TB tampil ~931GB di Windows.

2.6 Bus Sistem

Bus adalah jalur komunikasi yang menghubungkan komponen komputer. Tiga jenis bus utama:

  • Address Bus — membawa alamat memori/I/O dari CPU. Unidirectional (CPU → memori). Lebar bus menentukan kapasitas alamat: 32-bit = 4GB max, 64-bit = 16 EB.
  • Data Bus — membawa data antara CPU ↔ RAM ↔ I/O. Bidirectional. Lebar: 8/16/32/64-bit.
  • Control Bus — sinyal kontrol: Read/Write, Clock, Interrupt, Reset, Bus Request. Bidirectional.

Standar bus modern: PCIe (PCI Express) untuk GPU/SSD, DMI (Direct Media Interface) CPU-chipset, SPI, I²C, USB.

2.7 Hierarki Memori

Memori tersusun dari tercepat-terkecil-mahal ke terlambat-terbesar-murah:

LevelKapasitasLatensiBandwidthHarga/GB
Register~Byte<1 ns-$$$$$
Cache L132-64 KB1-2 ns1 TB/s$$$$
Cache L2256KB-2MB3-10 ns500 GB/s$$$
Cache L38-64 MB10-40 ns200 GB/s$$
RAM DDR58-128 GB50-100 ns50-80 GB/s$
SSD NVMe250GB-8TB10-100 μs7-14 GB/s$
HDD SATA1-20 TB5-15 ms100-200 MB/s$

ANALOGI: HIERARKI MEMORI
Bayangkan akses data seperti mencari bahan masak: Register = bahan di tangan (instan), Cache L1 = di celemek (sekon), Cache L2 = di meja (detik), Cache L3 = di rak dekat (beberapa detik), RAM = di kulkas (menit), SSD = di gudang (jam), HDD = di pasar (hari). Semakin dekat = semakin cepat tapi semakin mahal!
// DIAGRAM: HIERARKI MEMORI (CEPAT → LAMBAT)
Register<1ns | ~Byte
Cache L11-2ns | 32-64KB
Cache L2/L33-40ns | MB
RAM DDR550-100ns | GB
SSD / HDDμs-ms | TB
Piramida: semakin ke atas = semakin cepat, kecil, mahal. Semakin ke bawah = semakin lambat, besar, murah.
Prinsip locality of reference: data yang baru diakses kemungkinan besar diakses lagi (temporal), dan data di sekitarnya kemungkinan diakses (spatial). Cache memanfaatkan ini untuk efisiensi.

2.8 Port dan Konektor

PortFungsiKecepatan
USB-A 3.2Universal serial bus5-20 Gbps
USB-C 4Reversible, power+data+display40 Gbps
HDMI 2.1Audio + video digital48 Gbps (8K60)
DisplayPort 2.1Video digital (PC)80 Gbps
Ethernet RJ-45Jaringan kabel1/2.5/5/10 Gbps
3.5mm Audio JackAnalog audio-
Thunderbolt 4USB-C + PCIe + DisplayPort40 Gbps
Sumber: USB-IF (usb.org), HDMI Forum (hdmi.org), VESA DisplayPort (vesa.org)

2.9 Logic Gates (Gerbang Logika)

Logic gates adalah blok dasar sirkuit digital. Setiap gate menghasilkan output biner (0/1) berdasarkan input biner. Dibangun dari transistor. CPU, RAM, GPU — semua dibangun dari jutaan/miliaran logic gates.

GateSimbolInput A, BOutputContoh
AND∧1 AND 111 ∧ 0 = 0
OR∨1 OR 010 ∨ 0 = 0
NOT¬NOT 10¬0 = 1
NAND⊼NOT(AND)01 ⊼ 1 = 0
NOR⊽NOT(OR)00 ∨ 0 = 1
XOR⊕1 XOR 101 ⊕ 0 = 1
XNOR⊙NOT(XOR)11 ⊙ 1 = 1

NAND gate disebut "universal gate" — semua gate lain bisa dibangun hanya dari NAND. Ini penting dalam manufaktur chip: hanya butuh satu jenis gate.

ANALOGI: LOGIC GATES
AND = "Harus ada KTP DAN kartu keluarga baru bisa daftar" (keduanya harus benar). OR = "Bayar tunai ATAU transfer" (salah satu cukup). NOT = "Tidak boleh pakai HP di ujian" (kebalikan). XOR = "Pilih ayam ATAU ikan, tidak boleh keduanya" (exactly one)!

2.10 Flip-Flop & Memory Element

Flip-flop adalah sirkuit yang menyimpan 1 bit data. Dibangun dari logic gates (biasanya NAND/NOR). Flip-flop adalah blok dasar memori — register, cache, RAM semua dibangun dari flip-flop (atau variasinya).

  • SR Flip-Flop — Set-Reset. Input S=1 set output 1, R=1 reset output 0. S=R=1 = forbidden.
  • JK Flip-Flop — versi improved SR, tidak ada forbidden state. J=K=1 = toggle.
  • D Flip-Flop — Data/Delay. Output mengikuti input saat clock edge. Paling umum untuk register.
  • T Flip-Flop — Toggle. Output berbalik setiap clock pulse. Untuk counter.

Register = kumpulan D flip-flop (mis. 32/64 bit). Counter = rangkaian T flip-flop. SRAM (cache) = flip-flop berbasis 6 transistor. DRAM (RAM utama) = capacitor + 1 transistor (lebih murah, lebih padat, tapi perlu refresh).

2.11 Instruction Set Architecture (ISA)

ISA (Instruction Set Architecture) adalah set instruksi yang dipahami CPU. Menentukan bagaimana software berkomunikasi dengan hardware. Dua filosofi utama:

AspekCISCRISC
PhilosophyComplex, banyak instruksiReduced, instruksi sederhana
Instruksi100-1000+~50-100
EksekusiVariable cycles (1-20)Fixed 1 cycle (umumnya)
Contohx86 (Intel, AMD)ARM, RISC-V, MIPS
PowerTinggiRendah (efficient)
Use casePC, serverMobile, IoT, embedded

Modern: Intel/AMD x86-64 eksternal CISC tapi internal decode ke micro-operations (RISC-like). ARM dominan mobile (smartphone, tablet, Apple Silicon M-series). RISC-V — open source ISA, growing untuk IoT dan custom chip.

Sumber: ARM Architecture Reference Manual, Intel SDM, RISC-V ISA Specification
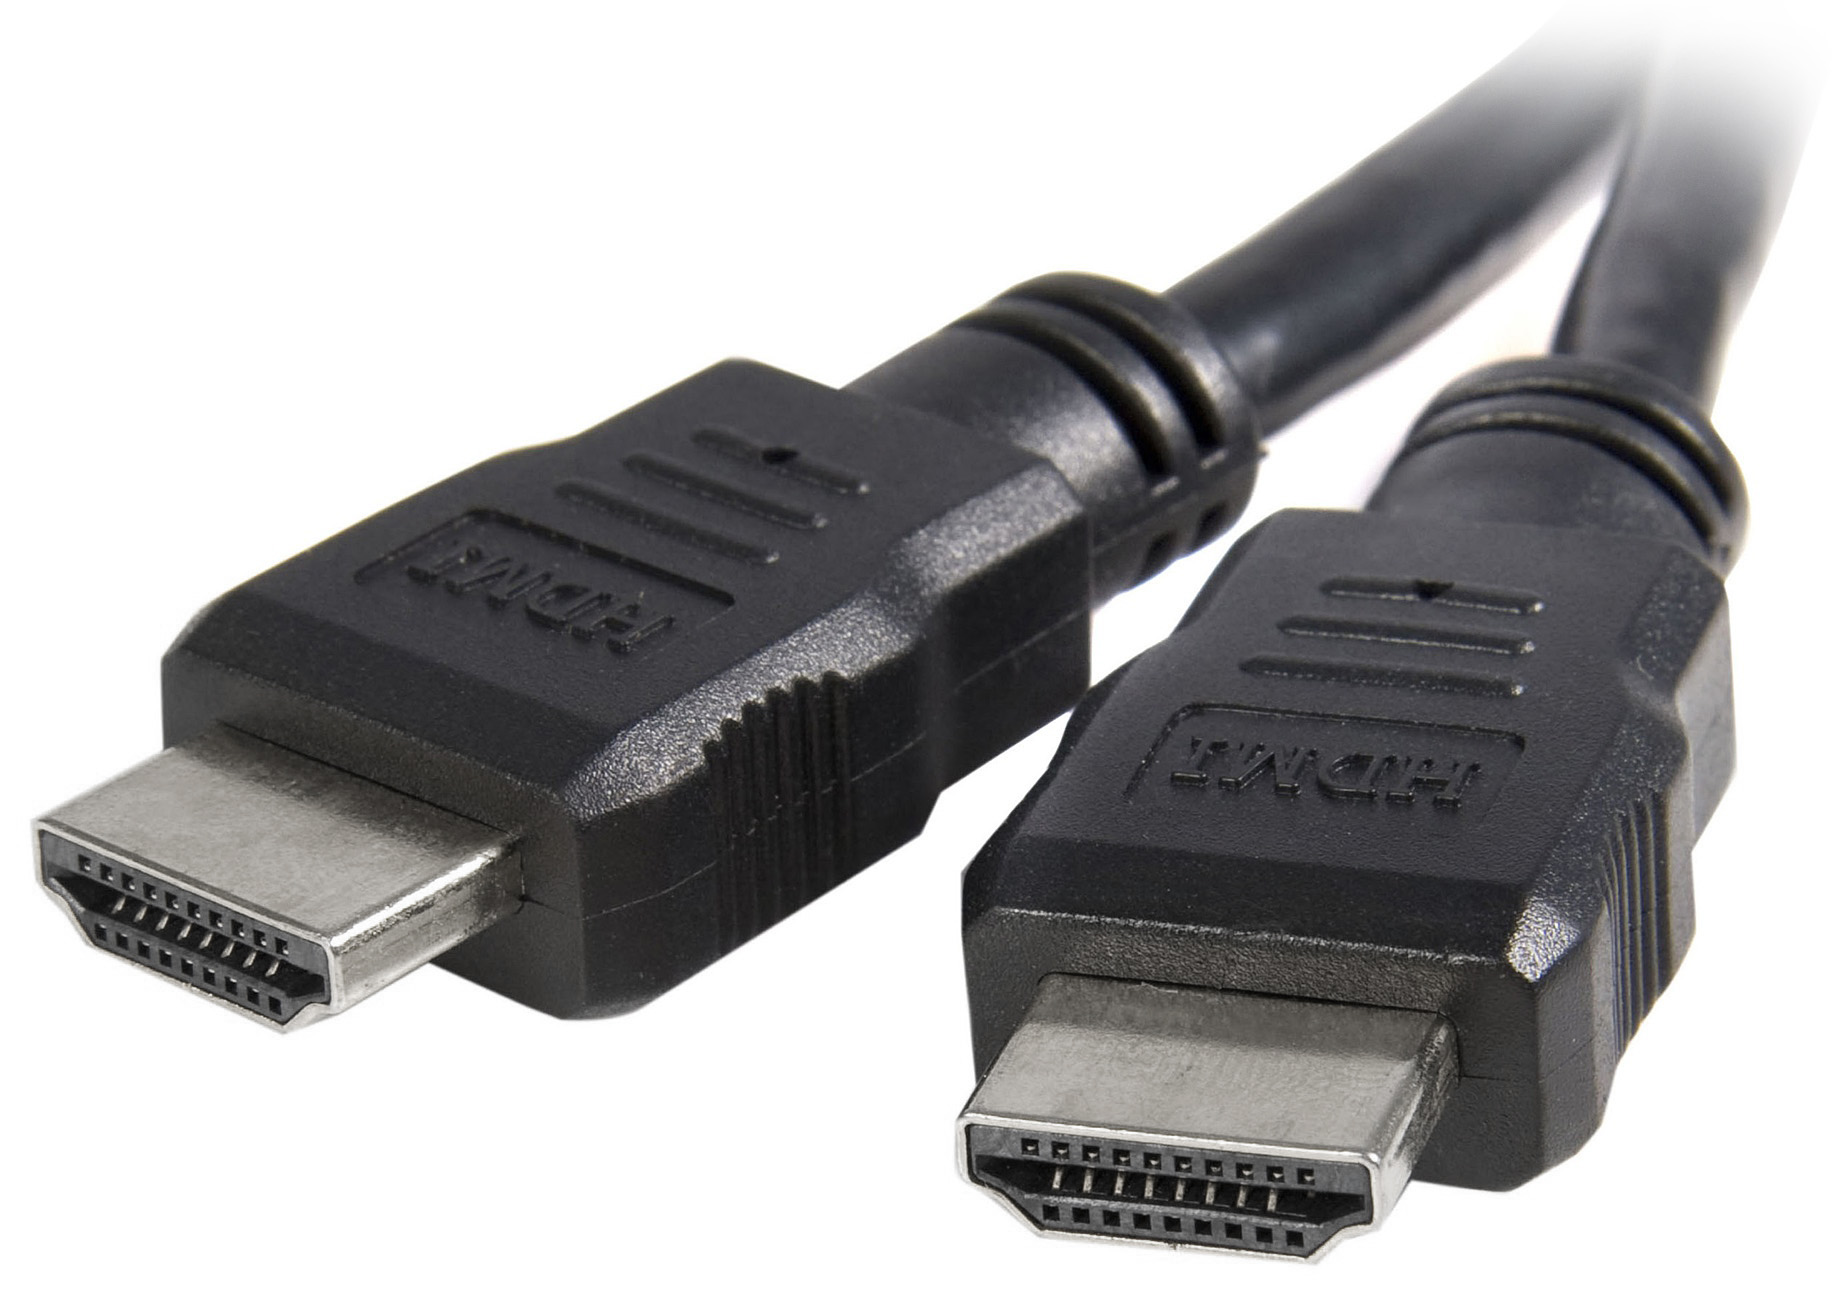
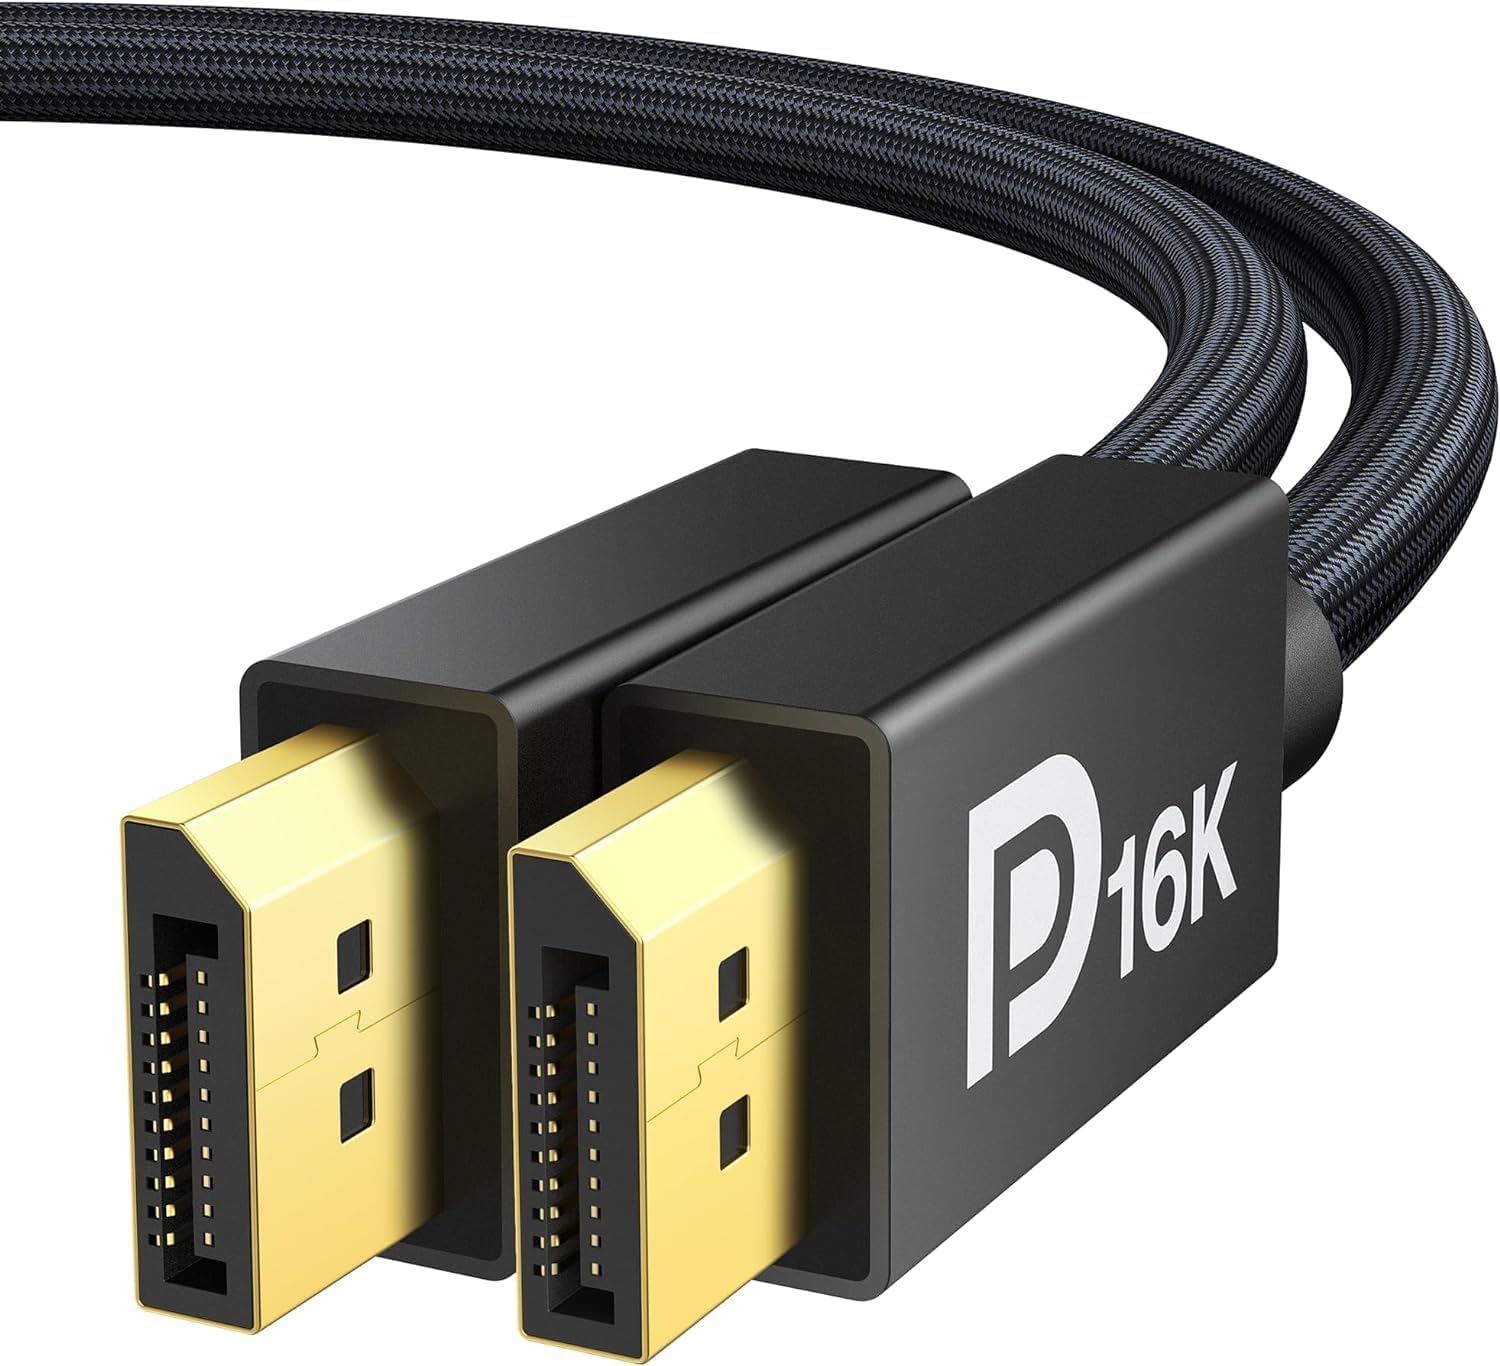
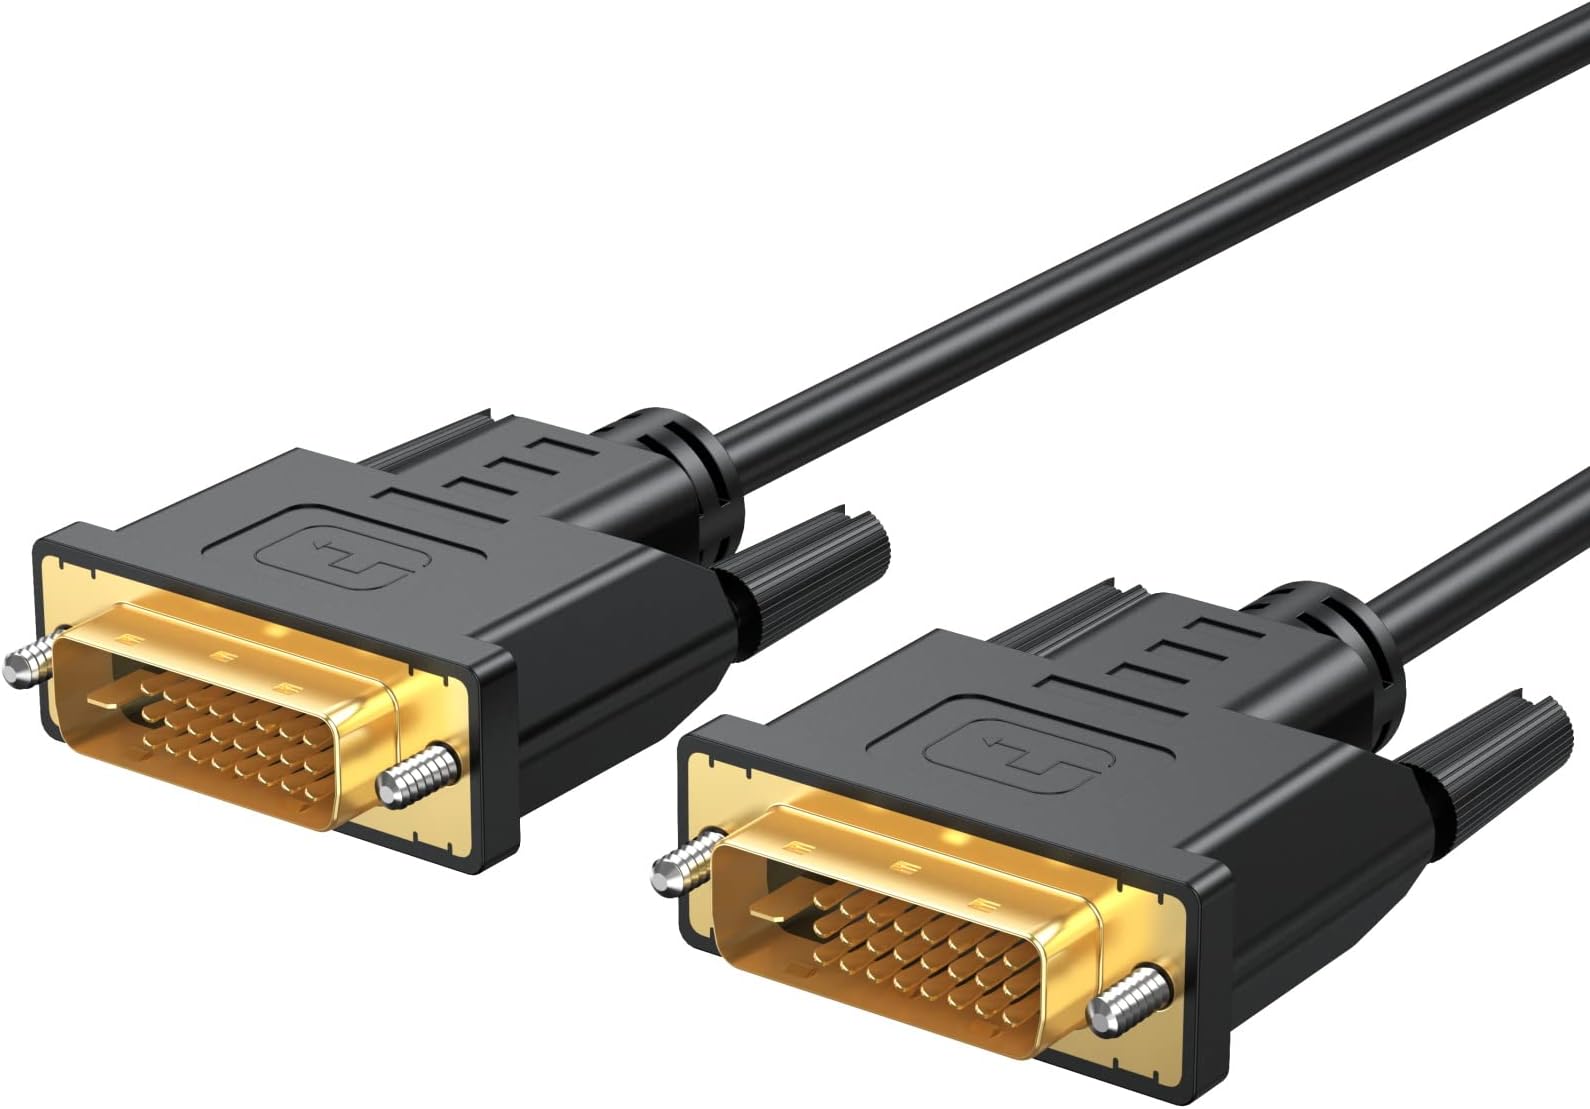
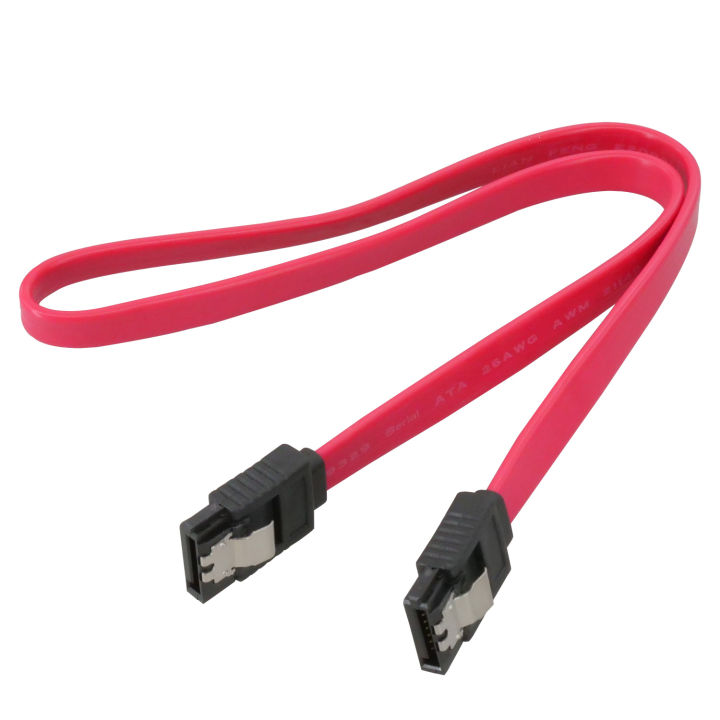
// GAMBAR: JENIS KABEL & PORT
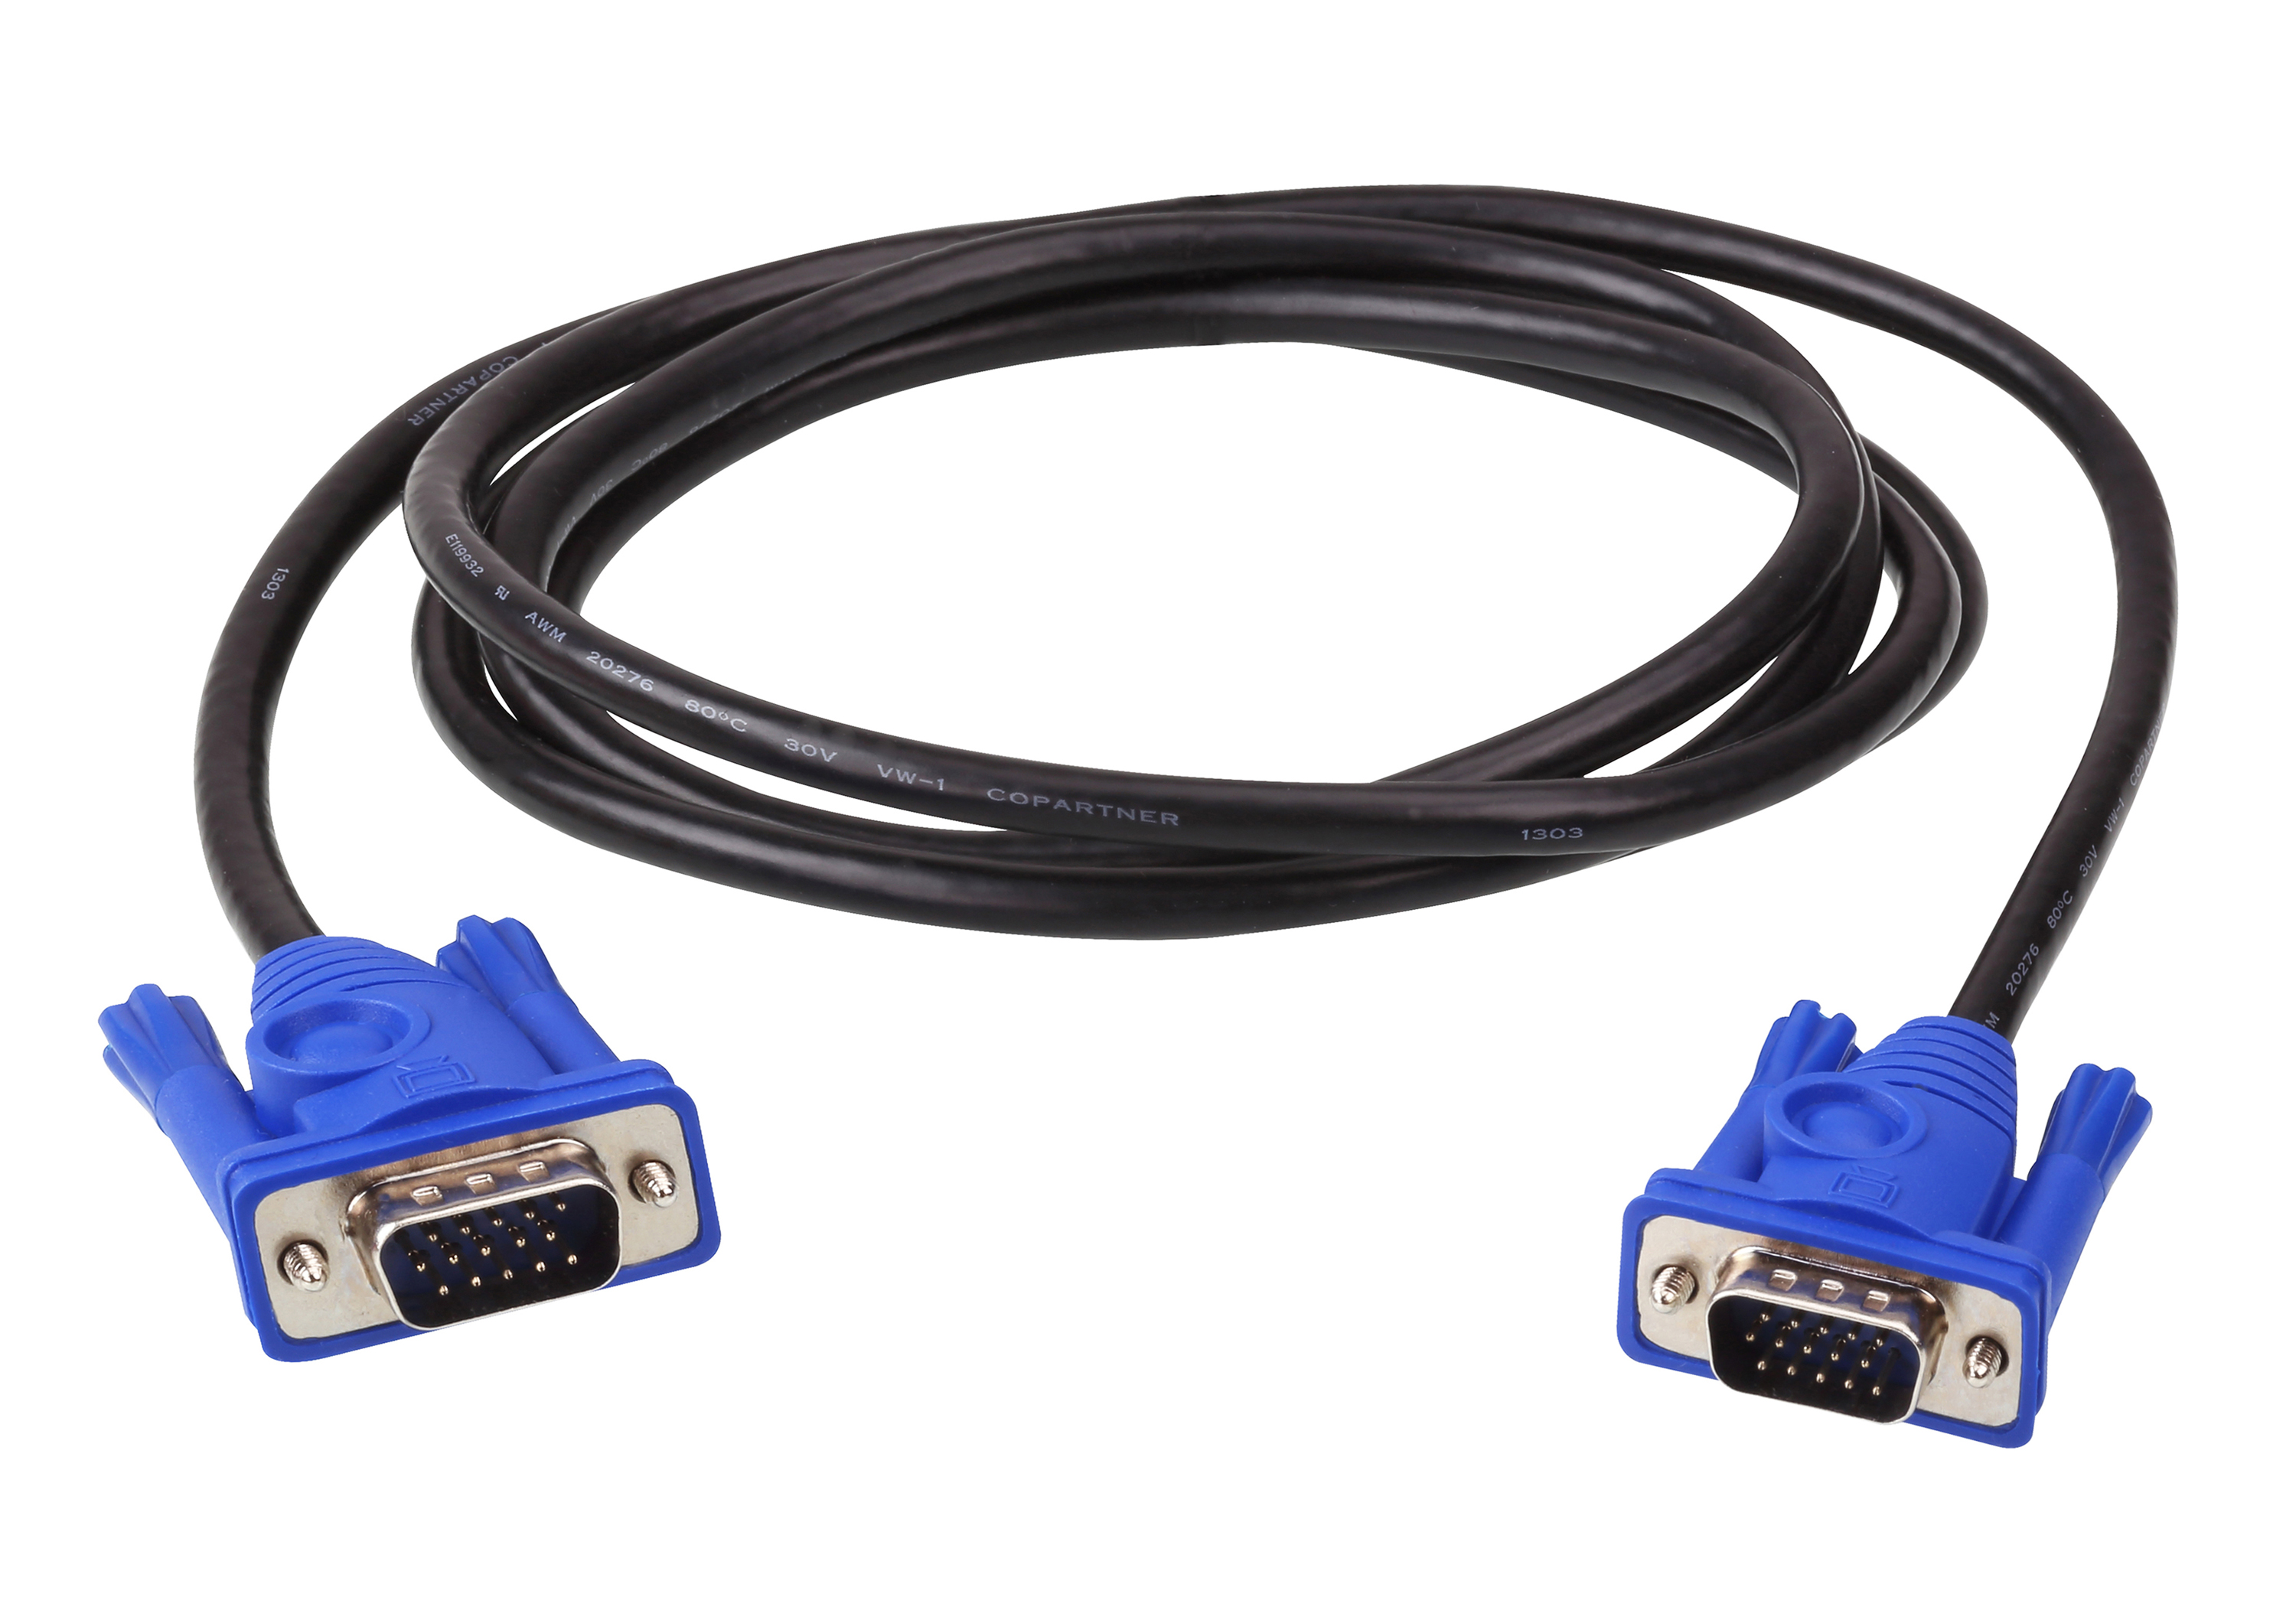
VGAVGA (D-Sub)
HDMIHDMI
DPDisplayPort
DVIDVI
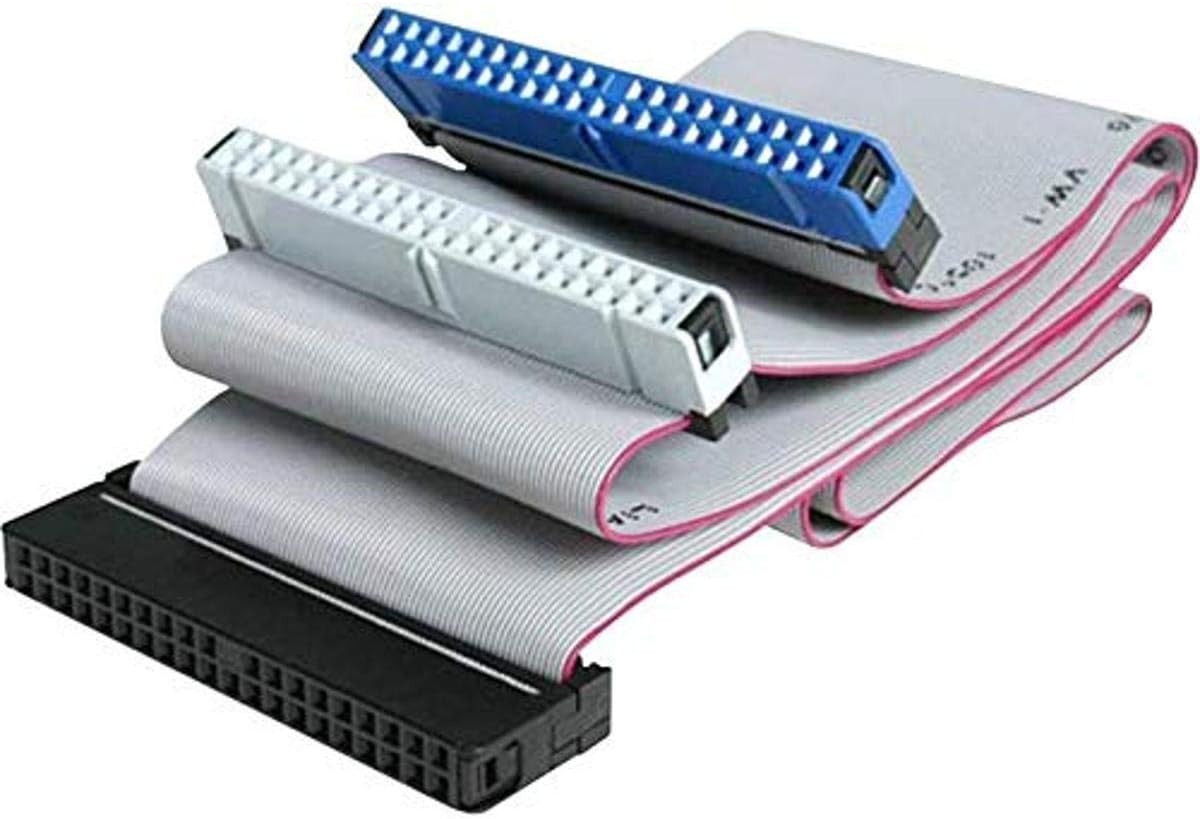
SATASATA Data
ATAATA (Legacy)
BAB 3

KOMPONEN KOMPUTER

Pembahasan mendalam tiap komponen: cara kerja, teknologi, spesifikasi, cara memilih, dan tips

3.1 Motherboard

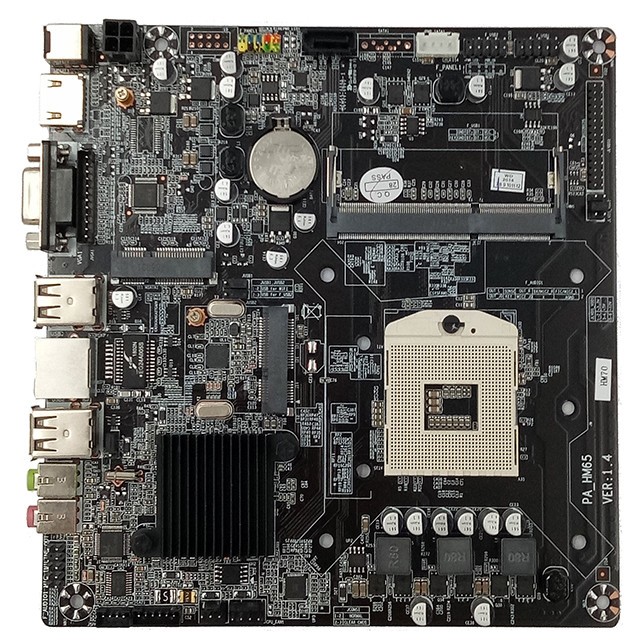
Motherboard

Motherboard (mainboard/system board) adalah papan sirkuit utama yang menghubungkan semua komponen: CPU, RAM, GPU, storage, dan peripheral. Disebut juga backbone komputer karena semua komunikasi antar komponen melewati motherboard.

Cara Kerja Motherboard

Motherboard fungsinya sebagai jalur komunikasi (bus) antar komponen. Sinyal listrik mengalir melalui trace (jalur tembaga) yang menghubungkan socket CPU, slot RAM, slot PCIe, slot storage, dan port I/O. Chipset (Northbridge/Southbridge atau terintegrasi) mengatur aliran data antar komponen.

Saat power on, motherboard mengirim sinyal Power Good dari PSU, lalu BIOS/UEFI melakukan POST (Power-On Self Test) — mengecek CPU, RAM, GPU, storage. Jika semua OK, BIOS mencari bootloader OS di storage dan memuatnya ke RAM.

Komponen Utama Motherboard

  • Socket CPU — tempat processor. Intel: LGA (Land Grid Array, pin di socket). AMD: AM5 juga LGA, AM4 PGA (pin di CPU).
  • Slot DIMM — tempat RAM. DDR4/DDR5 (notch berbeda, anti-tukar).
  • Chipset — IC pengatur aliran data. Menentukan fitur (overclock, USB count, PCIe lanes).
  • Slot PCIe — untuk GPU (x16), SSD NVMe (x4), network card (x1). Generasi: Gen 3/4/5.
  • Slot M.2 — SSD NVMe/SATA kecil. Key M (NVMe), B (SATA), M+B (dual).
  • VRM (Voltage Regulator Module) — regulasi tegangan 12V PSU → ~1.2V CPU. Phase: 8+2, 12+2, 16+2. Lebih banyak phase = lebih stabil, lebih dingin.
  • CMOS Battery (CR2032) — simpan pengaturan BIOS saat power off. Umur ~5 tahun.
  • I/O Shield — panel belakang: USB, LAN, audio, HDMI/DP, PS/2.
  • Debug LED (Q-LED) — 4 LED (CPU/DRAM/VGA/BOOT) untuk troubleshooting POST.
  • RGB Header — 12V (4-pin, RGB) atau 5V (3-pin, ARGB addressable).

Chipset Tier (Intel vs AMD)

IntelAMDTierFitur
Z790X670EnthusiastFull overclock, max PCIe lanes, max USB
B760B650MainstreamNo CPU overclock (Intel), good value
H770-MidMore features than B, no OC
H710A620EntryBasic, budget, limited features

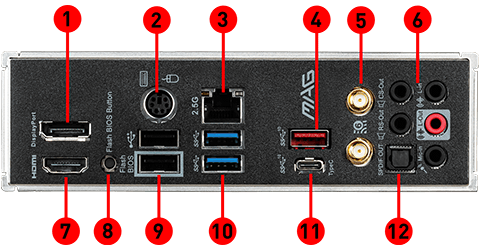
Back Panel I/O Motherboard

// DIAGRAM: BACK PANEL I/O MOTHERBOARD
Back Panel I/O Ports
Bagian belakang motherboard (I/O Shield) — 12 port penting
1. DisplayPort
2. PS/2 Combo Port
3. 2.5G LAN Port
4. USB 3.2 Gen 2 10Gbps (Type-A)
5. Wi-Fi / Bluetooth
6. HD Audio Connectors
7. HDMI Port
8. Flash BIOS Button
9. USB 2.0 Port
10. USB 3.2 Gen 1 5Gbps (Type-A)
11. USB 3.2 Gen 2 10Gbps (Type-C)
12. Optical S/PDIF OUT

Form Factor Motherboard

Form FactorUkuranPCIe SlotsUntuk
E-ATX305×330mm7+Workstation, HEDT, multi-GPU
ATX305×244mm4-7PC desktop standar, gaming
M-ATX244×244mm2-4PC compact, value
Mini-ITX170×170mm1-2PC kecil, HTPC, SFF build

Cara Memilih Motherboard

  1. Socket sesuai CPU — LGA 1700 (Intel 12-14th), LGA 1851 (Core Ultra), AM5 (Ryzen 7000/9000), AM4 (Ryzen 1000-5000).
  2. Chipset sesuai kebutuhan — Z/X untuk overclock, B untuk mainstream, H/A untuk budget.
  3. VRM quality — untuk CPU high-end, pilih VRM phase banyak (12+2+) dengan heatsink.
  4. Slot M.2 cukup — minimum 2 slot NVMe (Gen4/Gen5). Cek bandwidth sharing dengan GPU.
  5. Port I/O — USB-C, WiFi 6/7 built-in, 2.5G LAN, audio quality.
  6. BIOS features — BIOS FlashBack (update tanpa CPU), Q-LED debug, fan header cukup.
  7. Form factor sesuai casing — ATX butuh casing Mid-Tower+, Mini-ITX untuk SFF.
Sumber: Intel Desktop Board Specification, AMD Motherboard Compatibility Guide, ASUS/MSI/Gigabyte Documentation

3.2 Processor (CPU)

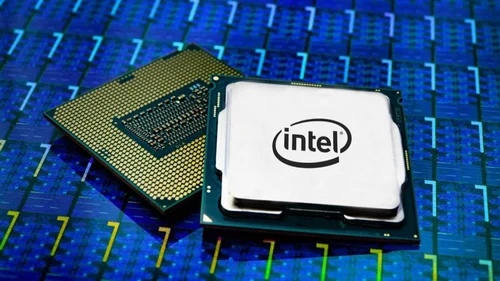
CPU Processor

CPU (Central Processing Unit) adalah otak komputer yang menjalankan instruksi program. CPU membaca data dari RAM, memprosesnya, dan menulis hasil kembali. Kecepatan modern: miliaran instruksi per detik (GHz).

ANALOGI: CPU = OTAK MANUSIA
CPU seperti otak kita: ALU = bagian yang berhitung & memutuskan, Control Unit = bagian yang mengatur "lakukan ini dulu, itu kemudian", Cache = ingatan instan (nomor telepon yang baru dihafal), RAM = ingatan jangka pendek, Storage = buku catatan. Clock speed = kecepatan berpikir (GHz = miliar pikiran/detik)!

Cara Kerja CPU

CPU mengeksekusi instruksi melalui siklus instruksi (Fetch → Decode → Execute → Write-back). Setiap core bisa ngekekusi instruksi sendiri-sendiri. CPU modern menggunakan pipeline (paralel tahap), superscalar (multiple ALU), dan out-of-order execution untuk efisiensi.

Data instruksi disimpan di cache (memori cepat di CPU). Saat CPU butuh data, cek L1 → L2 → L3 → RAM. Cache hit = data ditemukan di cache (cepat). Cache miss = ambil dari RAM (lambat). Prinsip locality of reference membuat cache efektif.

Arsitektur CPU Modern

  • Core — unit pemroses fisik. Multi-core (6/8/12/16) = paralel processing.
  • Thread (SMT/HT) — 1 core = 2 thread virtual. AMD: SMT, Intel: Hyper-Threading. Boost multitasking 15-30%.
  • Cache L1 — 32-64KB/core, <1ns. Instruksi + data terpisah (Harvard modified).
  • Cache L2 — 256KB-2MB/core, 3-10ns. Per-core.
  • Cache L3 — 8-64MB shared, 10-40ns. Shared antar core.
  • IMC (Integrated Memory Controller) — kontrol RAM langsung dari CPU (sejak Nehalem 2008).
  • PCIe Lanes — CPU punya lane sendiri (biasanya 16x untuk GPU + 4x untuk NVMe).
  • iGPU — GPU terintegrasi di CPU (Intel UHD/Iris, AMD Radeon Graphics).

Spesifikasi CPU yang Perlu Dipahami

SpecPenjelasanContoh
Base ClockKecepatan default (GHz)3.6 GHz
Boost ClockKecepatan maksimum (auto, tergantung suhu/power)5.2 GHz
Core/ThreadUnit fisik/virtual8 core / 16 thread
Cache L3Shared cache32MB
TDPThermal Design Power (Watt) — dasar pilih cooler & PSU105W
LithographyUkuran transistor (nm)TSMC 5nm, Intel 4
Instruction SetSet instruksi yang didukungx86-64, AVX-512, SSE4.2
SocketTipe socket motherboardLGA 1700, AM5

Intel vs AMD (2024-2026)

VendorSocketGenerasiContohCore/ThreadTDPKeunggulan
IntelLGA 170012/13/14th geni5-13400, i7-13700K, i9-14900K10/16 - 24/3265-253WStrong single-core, hybrid P/E core
IntelLGA 1851Core Ultra 200SUltra 5 245K, Ultra 7 265K, Ultra 9 285K14/14 - 24/24125-250WNPU for AI, efficient
AMDAM5Ryzen 7000/9000R5 7600, R7 7700X, R9 7950X, R9 9950X6/12 - 16/3265-170WEfficient, 3D V-Cache gaming
AMDAM5Ryzen X3D7800X3D, 7950X3D8/16 - 16/32120-170WBest gaming CPU (3D V-Cache)

Evolusi CPU: Generasi ke Generasi

1971
Intel 4004
4-bit • 740 KHz
2,300 transistor
10μm process
MICROPROCESSOR PERTAMA
1978
Intel 8086
16-bit • 5 MHz
29,000 transistor
x86 architecture
LAHIRNYA x86
1985
Intel 80386
32-bit • 16-33 MHz
275,000 transistor
Protected mode
32-BIT ERA
1993
Pentium
32-bit • 60-300 MHz
3.1M transistor
Superscalar
BRAND PENTIUM
2000
Pentium 4
32-bit • 1.3-3.8 GHz
42M-178M transistor
NetBurst, HT
GHz ERA
2006
Core 2 Duo
64-bit • 1.8-3.3 GHz
291M transistor
Dual-core, 65nm
CORE ARCHITECTURE
2008
Core i7 (Nehalem)
4-core/8-thread
2.6-3.3 GHz
IMC, QPI
i3/i5/i7 TIER
2011
Sandy Bridge
4c/8t • 3.4 GHz
995M transistor
iGPU integrated
iGPU BUILT-IN
2017
Coffee Lake
6c/12t • 3.7-4.7 GHz
14nm++ process
6-CORE MAINSTREAM
2020
Core i9-10900K
10c/20t • 3.7-5.3 GHz
14nm, 125W TDP
10-CORE
2021
Alder Lake (12th)
P+E Core • 16c/24t
10nm (Intel 7)
DDR5, PCIe 5.0
HYBRID ARCHITECTURE
2023
Raptor Lake (13/14th)
24c/32t • up to 6.0 GHz
Intel 7 process
253W TDP
6 GHz BOOST
2024
Core Ultra 200S
P+E+LP Core
Intel 20A process
NPU built-in
AI ERA + NPU
2,300→
Transistor 4004 (1971)
40B+
Transistor Core Ultra (2024)
8,000x
Clock speed boost
1969
AMD Founded
Second-source
for Intel x86
DIDIRIKAN
1991
Am386
32-bit • 40 MHz
Intel-compatible
855K transistor
CPU PERTAMA
1997
K6
32-bit • 233-400 MHz
Pentium MMX rival
8.8M transistor
PENTIUM RIVAL
1999
Athlon
32-bit • 500-1.4 GHz
First to 1 GHz
22M transistor
FIRST TO 1 GHz
2003
Athlon 64
64-bit • 2.0-2.8 GHz
AMD64 (x86-64)
IMC built-in
64-BIT x86
2007
Phenom
4-core • 2.2-2.6 GHz
Native quad-core
65nm
NATIVE QUAD
2011
FX-8350 (Bulldozer)
8-core • 4.0-4.2 GHz
Shared FPU
32nm
8-CORE (shared)
2017
Ryzen 7 1800X
8c/16t • 3.6-4.0 GHz
Zen architecture
14nm, 95W
RYZEN COMEBACK
2019
Ryzen 9 3950X
16c/32t • 3.5-4.7 GHz
Zen 2, 7nm
105W TDP
16-CORE
2020
Ryzen 5000 (Zen 3)
8c/16t • 4.8-5.0 GHz
19% IPC uplift
7nm, 105W
GAMING KING
2022
Ryzen 7000 (Zen 4)
16c/32t • 5.7 GHz boost
AM5 socket
DDR5, PCIe 5.0
AM5 + DDR5
2023
Ryzen 7 7800X3D
8c/16t • 5.0 GHz
96MB 3D V-Cache
Best gaming CPU
3D V-CACHE GAMING
2024
Ryzen 9000 (Zen 5)
16c/32t • 5.7 GHz
16% IPC uplift
4nm process
ZEN 5
855K→
Transistor Am386 (1991)
12B+
Transistor Ryzen 9 (2024)
14,000x
Transistor growth
ANALOGI: EVOLUSI CPU
Bayangkan evolusi CPU seperti evolusi mobil: 4004 = mobil kayu mainan (4-bit, pelan), 8086 = sepeda motor (16-bit), Pentium = sedan standar (32-bit), Core i7 = mobil sport (multi-core), Ryzen/Intel modern = mobil F1 dengan AI autopilot (16+ core, 5+ GHz, NPU)!

Teknologi CPU Modern

  • 3D V-Cache (AMD) — cache L3 vertikal stacked, 96MB untuk gaming. Ryzen 7800X3D = best gaming CPU.
  • Hybrid Architecture (Intel) — P-Core (performance, high clock) + E-Core (efficiency, low power). Alder Lake+ (12th gen+).
  • NPU (Neural Processing Unit) — akselerasi AI on-chip. Intel Core Ultra (Meteor Lake+), AMD Ryzen AI (7040/8040 series).
  • AVX-512 — instruksi vektor 512-bit untuk scientific workload. Didukung select CPU.
  • Turbo Boost Max 3.0 — boost otomatis core terbaik (Intel). Precision Boost 2 (AMD).

Cara Memilih CPU

  1. Use case: Gaming → single-core strong (7800X3D, i5-13600K). Productivity → multi-core (R9 7950X, i9-14900K). Office → budget (R5 7600, i3-12100).
  2. Budget: Entry <$150, Mid $150-300, High $300-500, Enthusiast $500+.
  3. Socket longevity: AM5 mendukung multi-generasi (7000/9000+). Intel ganti socket tiap 2 gen.
  4. iGPU vs dedicated: Jika tidak gaming/edit, CPU dengan iGPU cukup (hemat GPU cost).
  5. Cooler included: Box CPU biasanya include cooler (kecuali X/K series). Aftermarket lebih baik.
Sumber: Intel ARK (ark.intel.com), AMD Specifications (amd.com/en/products/specs), PassMark, UserBenchmark

3.3 RAM (Memory)

RAM Memory

RAM (Random Access Memory) adalah memori volatile yang menyimpan data sementara saat komputer aktif. "Random access" = akses ke lokasi manapun sama cepat. Data hilang saat power off.

Cara Kerja RAM

RAM menggunakan DRAM (Dynamic RAM) — setiap sel menyimpan 1 bit data dalam capacitor + transistor. Capacitor bocor seiring waktu, sehingga harus di-refresh ribuan kali per detik (~16ms). Inilah kenapa RAM butuh daya konstan untuk menyimpan data.

Saat CPU butuh data: cek cache L1→L2→L3 → RAM → storage. RAM ~100ns (100x lebih lambat dari cache, 1000x lebih cepat dari SSD). Memory controller (di CPU sejak 2008) mengatur read/write ke RAM.

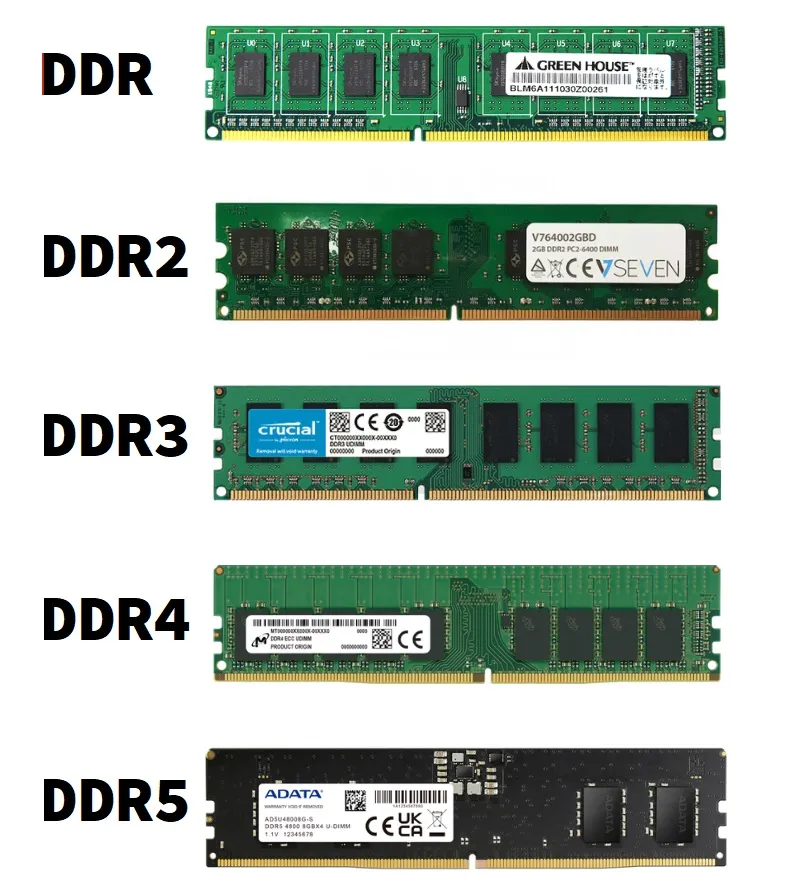
Generasi DDR (JEDEC Standard)

GenTahunStandarSpeedVoltBandwidthImprovement
DDR32007JESD79-3800-2133 MT/s1.5V6.4-17 GB/s8-bit prefetch
DDR42014JESD79-42133-3200 MT/s1.2V17-25.6 GB/sLower volt, higher density
DDR52020JESD79-54800-8800 MT/s1.1V38.4-70.4 GB/sOn-die ECC, dual 32-bit channel, PMIC on module

Spesifikasi RAM yang Perlu Dipahami

  • Speed (MT/s) — MegaTransfers per second. DDR5-6000 = 6000 MT/s. Higher = lebih cepat data transfer.
  • Timing (CL-tRCD-tRP-tRAS) — latency dalam clock cycle. Lower = lebih responsif. DDR4 CL16, DDR5 CL30. Contoh: 16-18-18-36.
  • Channel — Dual channel = 2 stick paralel, double bandwidth (128-bit vs 64-bit). Boost 10-20%.
  • XMP (Intel) / EXPO (AMD) — profil overclock manufacturer. Aktifkan di BIOS untuk full speed. Tanpa XMP, RAM jalan di JEDEC default (DDR5-4800).
  • ECC (Error Correction Code) — deteksi & koreksi error bit. Untuk server/workstation. Tidak semua CPU/mobo support.
  • Form factor: DIMM (desktop, ~133mm), SO-DIMM (laptop, ~67mm), CAMM2 (ultra-thin laptop, baru 2024+).
  • Heat spreader — aluminium/copper untuk dissipasi panas. RGB optional (estetika).

Kapasitas RAM Rekomendasi

KapasitasUse CaseContoh
8GBBasic office, web, light task1x8GB atau 2x4GB
16GBGaming standar, productivity, multitasking2x8GB dual channel
32GBContent creation (video 1080p, 3D), VM, heavy multitasking2x16GB
64GBVideo 4K/8K, AI/ML training, multi-VM pro2x32GB atau 4x16GB
128GB+Workstation, server, HEDT4x32GB atau 8x16GB (RDIMM)
ANALOGI: DUAL CHANNEL RAM
Bayangkan RAM sebagai jalur tol: Single channel = 1 jalur (macet jika banyak mobil). Dual channel = 2 jalur (lebih lancar, throughput 2x). Mobil = data. Inilah kenapa 2x8GB dual-channel lebih cepat dari 1x16GB single-channel!
Single Channel
1 stick RAM
64-bit bandwidth
~25 GB/s (DDR4-3200)
Dual Channel
2 stick RAM (berpasangan)
128-bit bandwidth
~51 GB/s (DDR4-3200)

Evolusi RAM: Generasi ke Generasi

DRAM
19701 KB
Dynamic RAM
SDR
1996133 MB/s
SDRAM
DDR
20002.1 GB/s
DDR-400
D2
20036.4 GB/s
DDR2-800
D3
200717 GB/s
DDR3-2133
D4
201425.6 GB/s
DDR4-3200
D5
202070 GB/s
DDR5-8800
Detail Evolusi DDR (klik untuk expand)
DRAM (1970) — Intel 1103, 1-bit cell, 1KB module. Dynamic (capacitor refresh).
FPM/EDO (1990-1995) — Fast Page Mode / Extended Data Out. 72-pin SIMM, 32-bit.
SDRAM (1996) — Synchronous DRAM, sinkron dengan clock CPU. 168-pin DIMM, 64-bit. PC100/PC133.
DDR (2000) — Double Data Rate, transfer di rising+falling edge. 184-pin, 2.5V. DDR-400 = 3.2 GB/s.
DDR2 (2003) — 4-bit prefetch, 1.8V, 240-pin. DDR2-800 = 6.4 GB/s. 2x faster than DDR.
DDR3 (2007) — 8-bit prefetch, 1.5V (DDR3L 1.35V). DDR3-2133 = 17 GB/s. JEDEC JESD79-3.
DDR4 (2014) — 1.2V, 288-pin, 16-bit bank groups. DDR4-3200 = 25.6 GB/s. Higher density (up to 128GB/module).
DDR5 (2020) — 1.1V, on-die ECC, PMIC on module, dual 32-bit channel. DDR5-8800 = 70.4 GB/s. JEDEC JESD79-5.
DDR6 (coming ~2026) — Target 176 GB/s, 1.1V, LPDDR6 mobile variant. Next-gen standard.
1 KB→
DRAM (1970)
128 GB
DDR5 module (2024)
131,000x
Capacity growth
// DUAL CHANNEL WAJIB Selalu pasang RAM berpasangan (2 stick) di slot warna sama (A2+B2). Dual channel = double bandwidth vs single channel. 2x8GB dual-channel jauh lebih cepat dari 1x16GB single-channel.
Sumber: JEDEC Solid State Technology Association (jedec.org), Standard JESD79-5 (DDR5), Crucial/Kingston Documentation

3.4 ROM BIOS / UEFI

BIOS (Basic Input/Output System) — firmware lama (1980s), 16-bit, text mode, MBR partition (disk <2.2TB). UEFI (Unified Extensible Firmware Interface) — pengganti modern (2000s+), 32/64-bit, GUI+mouse, GPT partition (disk >2.2TB), Secure Boot, fast boot.

Fungsi BIOS/UEFI

  • POST (Power-On Self Test) — cek CPU, RAM, GPU, storage saat power on. Hasil: beep code atau debug LED.
  • Boot loader — cari OS di boot device (priority), muat bootloader ke RAM.
  • Setup utility — konfigurasi: boot priority, clock, voltage, fan curve, XMP/EXPO.
  • Hardware initialization — inisialisasi chipset, VRM, RAM training, USB.
  • Secure Boot — verifikasi signature bootloader, cegah malware boot. Wajib Windows 11.
  • TPM 2.0 — Trusted Platform Module, chip kriptografi. Intel PTT, AMD fTPM. Wajib Windows 11.

BIOS vs UEFI

FiturBIOS (Legacy)UEFI
Bit16-bit32/64-bit
UIText mode, keyboard onlyGUI, mouse support
PartitionMBR (disk <2.2TB)GPT (disk >2.2TB)
Boot speedSlowFast (skip POST)
Secure BootTidakYa
Network bootLimitedPXE, HTTP boot
Sumber: UEFI Specification (uefi.org), Microsoft Windows 11 Requirements

3.5 Storage

SSDHDDM.2 NVMe

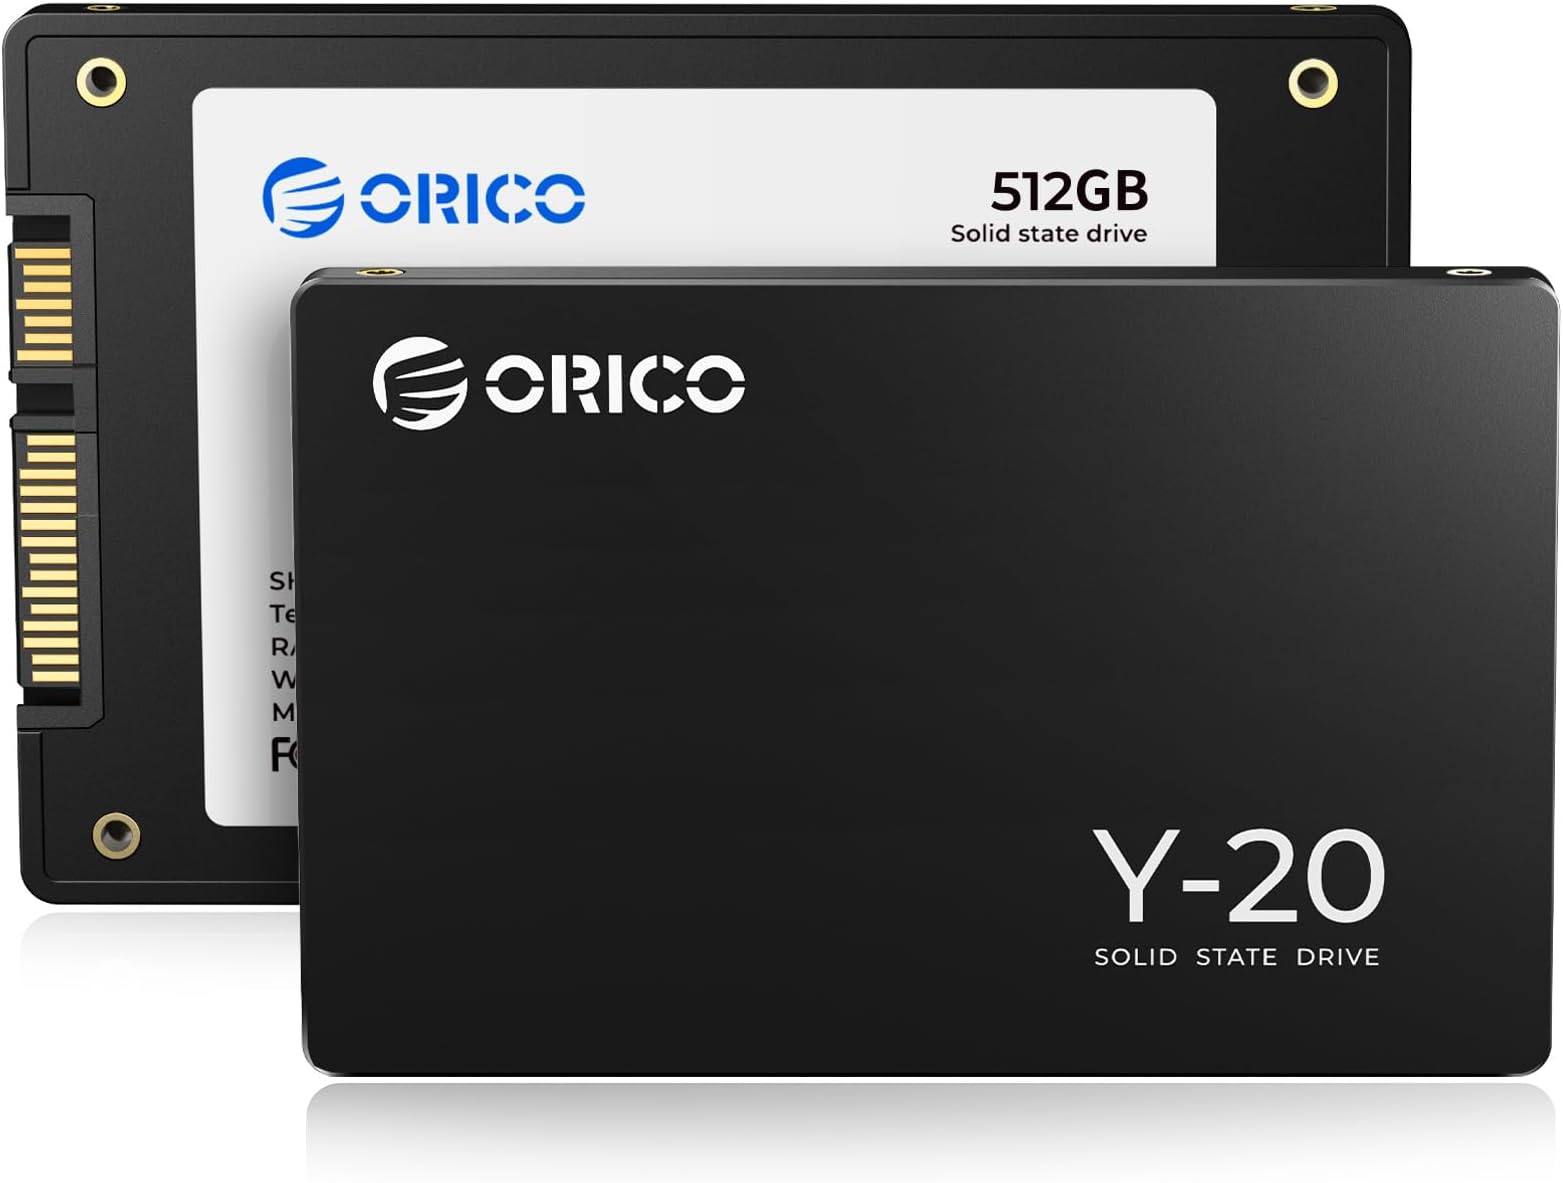
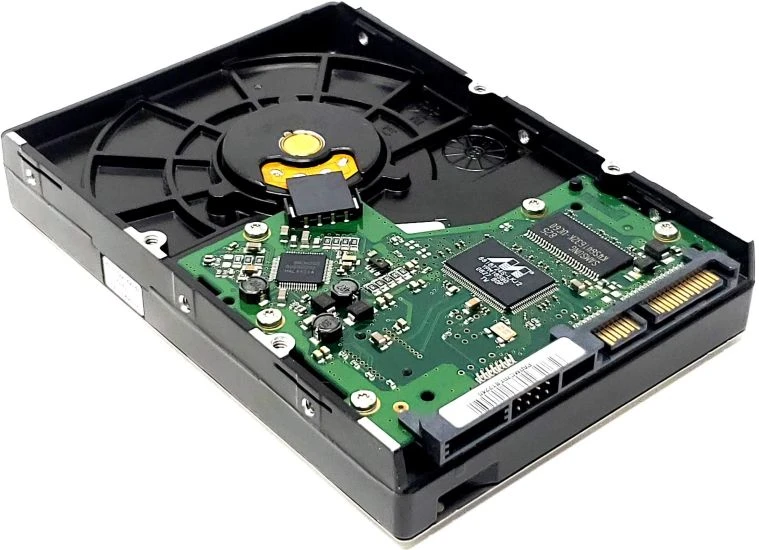
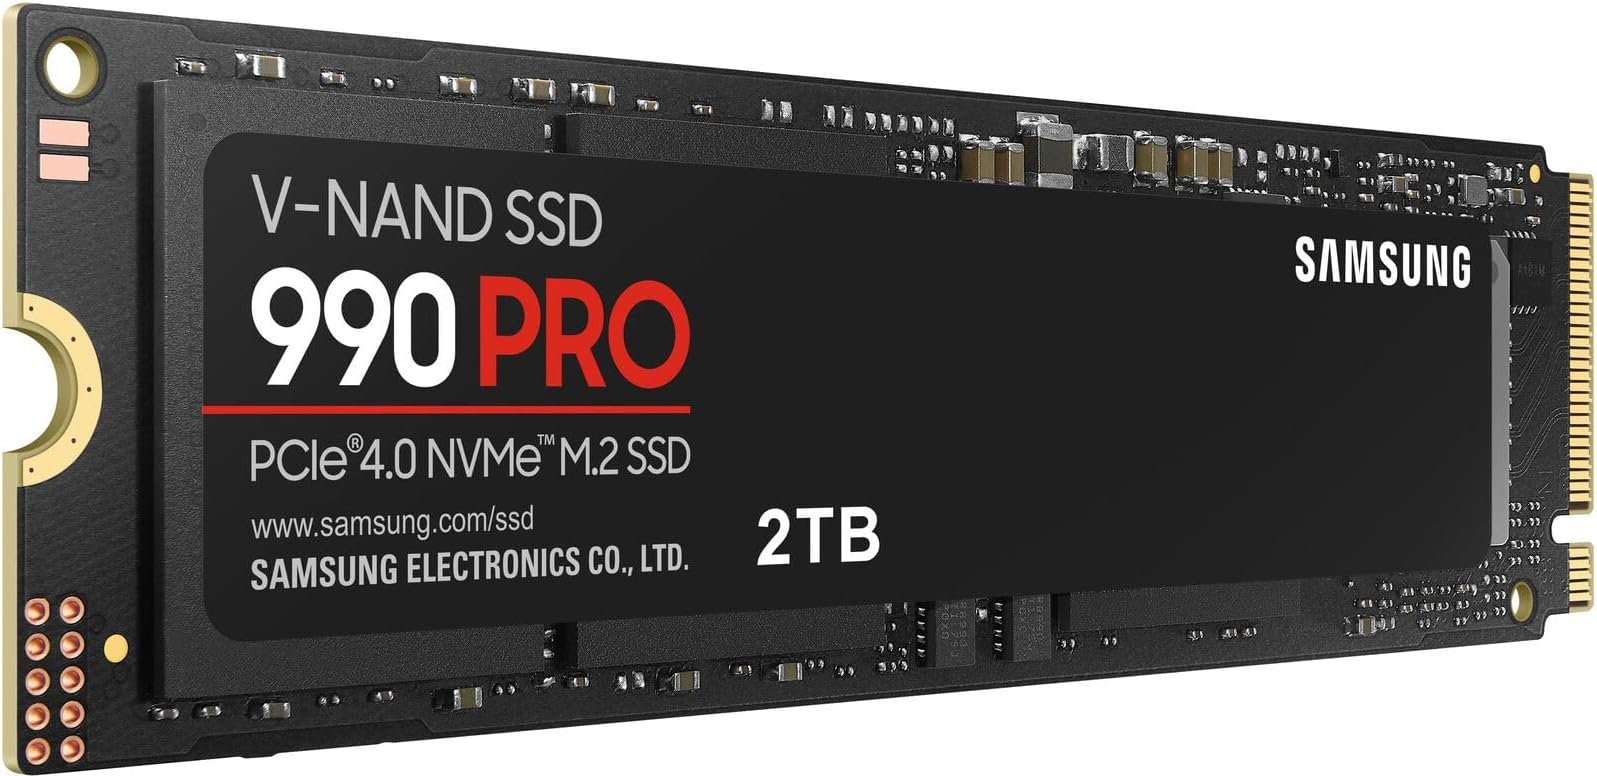
Storage menyimpan data permanen (non-volatile). Tiga teknologi utama: HDD (magnetik), SSD SATA (flash), NVMe (flash via PCIe).

Cara Kerja HDD

HDD (Hard Disk Drive) — menggunakan piringan magnetik (platter) berputar 5400/7200/10000 RPM. Read/write head melayang di atas platter (nanometer, tidak menyentuh). Data disimpan sebagai polaritas magnetik di sektor platter.

Kecepatan HDD terbatas oleh mekanik: seek time (head move) ~5-10ms, rotational latency (putar platter) ~3-6ms. Bandwidth: 100-200 MB/s. HDD rentan shock/Getaran (head crash = rusak permanen).

Cara Kerja SSD

SSD (Solid State Drive) — menggunakan NAND flash memory (elektronik, tanpa moving part). Data disimpan dalam floating gate transistor — trap elektron = bit 0/1. Akses elektronik ~1000x lebih cepat dari mekanik HDD.

SSD terdiri dari controller (mengatur read/write, wear leveling, garbage collection) + NAND chips + opsional DRAM cache (untuk mapping table, boost performance).

Tipe NAND Flash (Density vs Endurance)

TipeBit/CellP/E CyclesEnduranceHargaUntuk
SLC1100,000Tertinggi$$$$$Enterprise, server
MLC210,000Tinggi$$$$Prosumer, workstation
TLC33,000Standar$$Konsumer (standar 2024)
QLC41,000Rendah$Storage besar, budget
PLC5~100Sangat rendah$Archive (baru 2024+)

3D NAND — teknologi stacking vertical (32/64/128/176 layer) untuk density tinggi tanpa menambah luas. Modern SSD semua pakai 3D NAND.

Interface & Bandwidth Storage

TipeInterfaceMax SpeedIOPSForm Factor
HDD SATASATA III (6Gbps)100-200 MB/s~1003.5"
SSD SATASATA III (6Gbps)500-550 MB/s~100K2.5"
NVMe Gen3PCIe 3.0 x43000-3500 MB/s~500KM.2
NVMe Gen4PCIe 4.0 x47000-7500 MB/s~1MM.2
NVMe Gen5PCIe 5.0 x412000-14000 MB/s~1.5MM.2 (with heatsink)

Evolusi Storage: Generasi ke Generasi

HDD
19565 MB
IBM RAMAC
HDD
19805 MB
Seagate ST-506
SSD
2008Intel X25-M
First SSD
SATA
2009SATA III
550 MB/s
G3
2013NVMe Gen3
3.5 GB/s
G4
2019NVMe Gen4
7 GB/s
G5
2022NVMe Gen5
14 GB/s
Evolusi NAND Flash (klik untuk expand)
SLC (1990s) — Single-Level Cell, 1 bit/cell, 100,000 P/E cycles. Enterprise only.
MLC (2000s) — Multi-Level Cell, 2 bit/cell, 10,000 P/E. Consumer SSD pertama.
TLC (2010s) — Triple-Level Cell, 3 bit/cell, 3,000 P/E. Standar consumer.
QLC (2018) — Quad-Level Cell, 4 bit/cell, 1,000 P/E. Kapasitas besar, budget.
3D NAND (2013+) — Vertical stacking (32/64/128/176 layer). Density tinggi.
PLC (2024+) — Penta-Level Cell, 5 bit/cell, ~100 P/E. Archive storage.
5 MB→
HDD pertama (1956)
24 TB
HDD terbesar (2024)
5M x
Capacity growth

DRAM Cache vs DRAM-less SSD

  • Dengan DRAM cache — mapping table di DRAM (cepat). Consistent performance. Contoh: Samsung 990 Pro, WD Black SN850X.
  • DRAM-less — mapping table di NAND (lebih lambat). Lebih murah. HSL (Host Memory Buffer) pinjam RAM CPU. Contoh: Crucial P3, WD Blue SN580.
  • Untuk OS: selalu pilih SSD dengan DRAM cache untuk consistent performance.

Cara Memilih Storage

  1. OS drive: NVMe Gen4 minimum (7000 MB/s). 500GB-1TB. Samsung 990 Pro, WD SN850X, Crucial T700.
  2. Game library: NVMe Gen4 1-2TB atau SSD SATA untuk budget.
  3. Data/archive: HDD 2-8TB untuk file besar (murah per GB).
  4. Cek endurance (TBW): Total Bytes Written. SSD 1TB TLC biasanya 600TBW. QLC lebih rendah (~200TBW).
  5. Warranty: SSD 5 tahun standar, HDD 2-3 tahun.
// VISUAL: PERBANDINGAN KECEPATAN STORAGE
HDD
150 MB/s
SSD SATA
550 MB/s
NVMe G3
3500 MB/s
NVMe G4
7500 MB/s
NVMe G5
14000 MB/s
NVMe Gen5 ~93x lebih cepat dari HDD! Upgrade dari HDD ke SSD NVMe = percepat boot 10x.
ANALOGI: HDD vs SSD vs NVMe
HDD = mencari buku di perpustakaan besar (jalan ke rak, cari, buka halaman). SSD SATA = buku sudah di meja, tinggal buka. NVMe = buku sudah terbuka di halaman yang dibutuhkan!
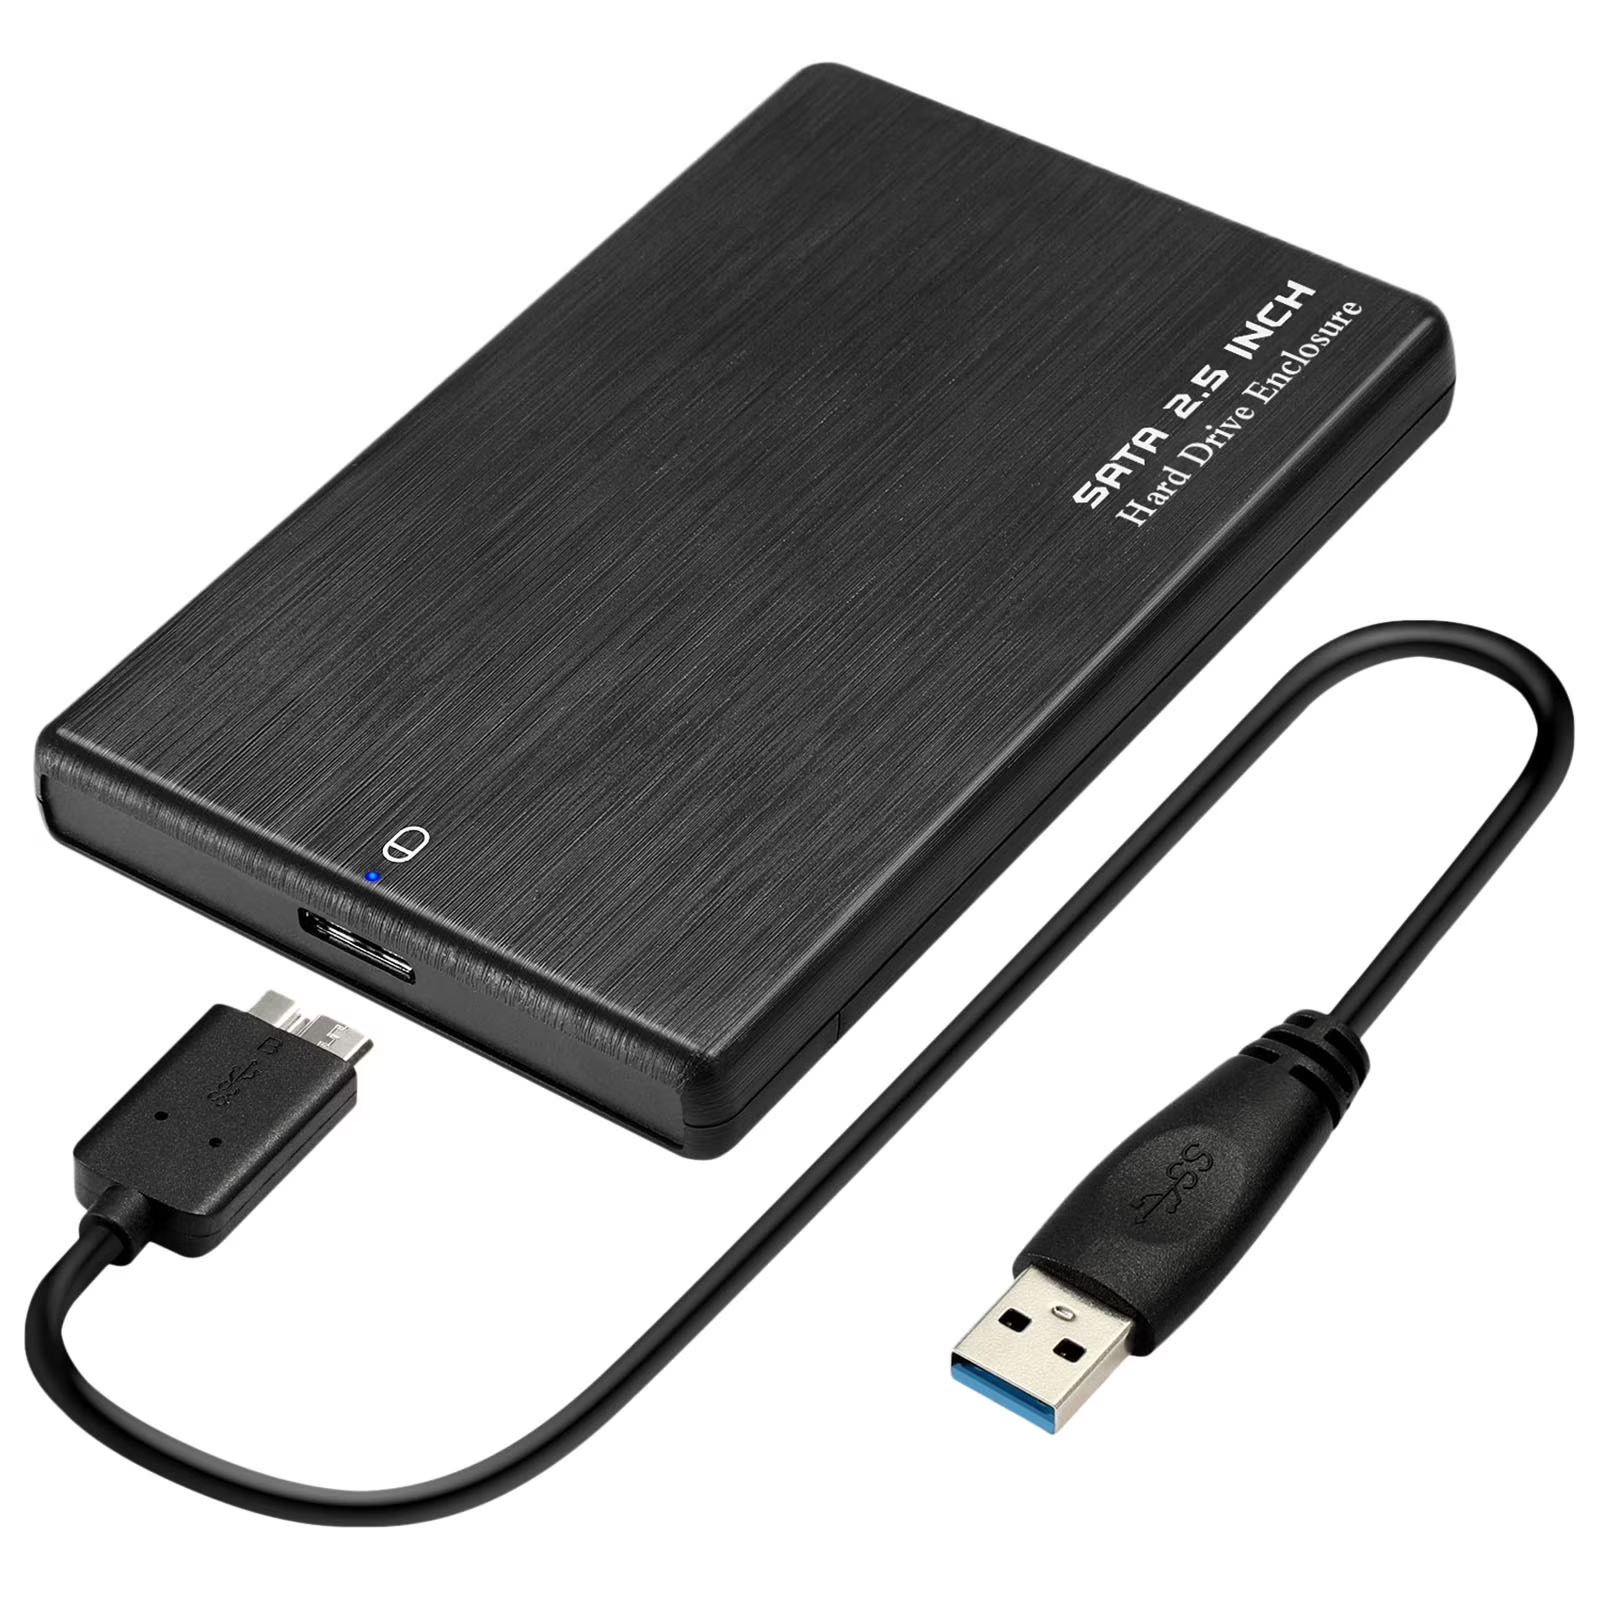
HDD ExternalHDD External
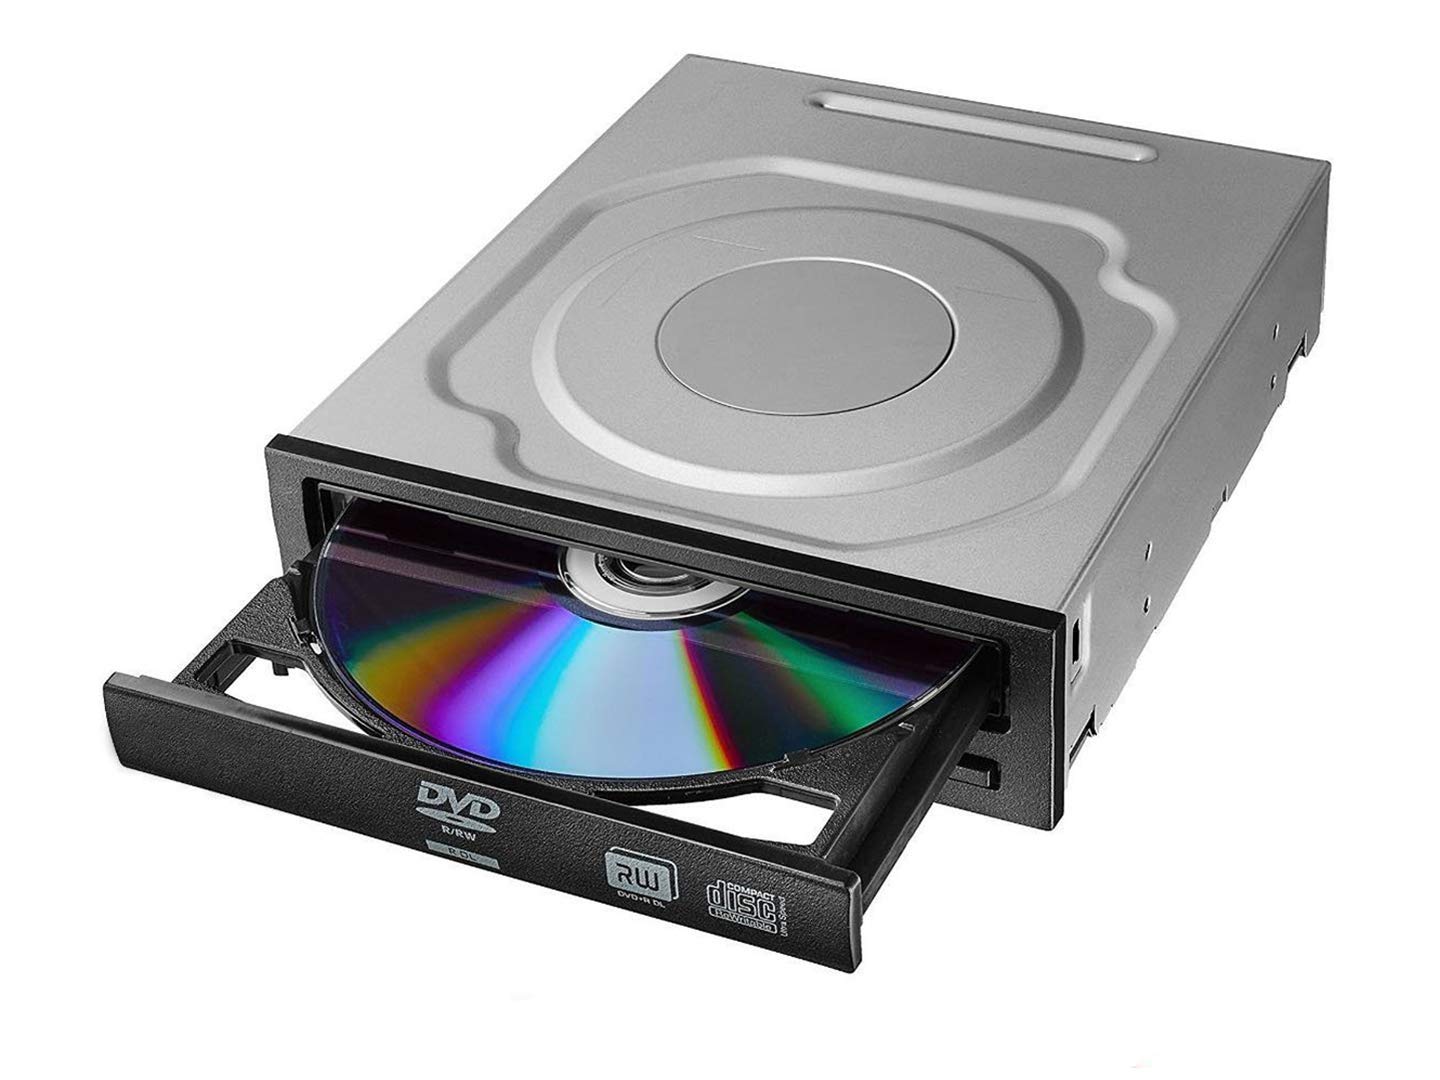
CD-ROM DriveCD-ROM Drive
Sumber: PCI-SIG (pcisig.com), NVM Express (nvmexpress.org), SATA-IO (sata-io.org)

3.6 GPU (Graphics Processing Unit)

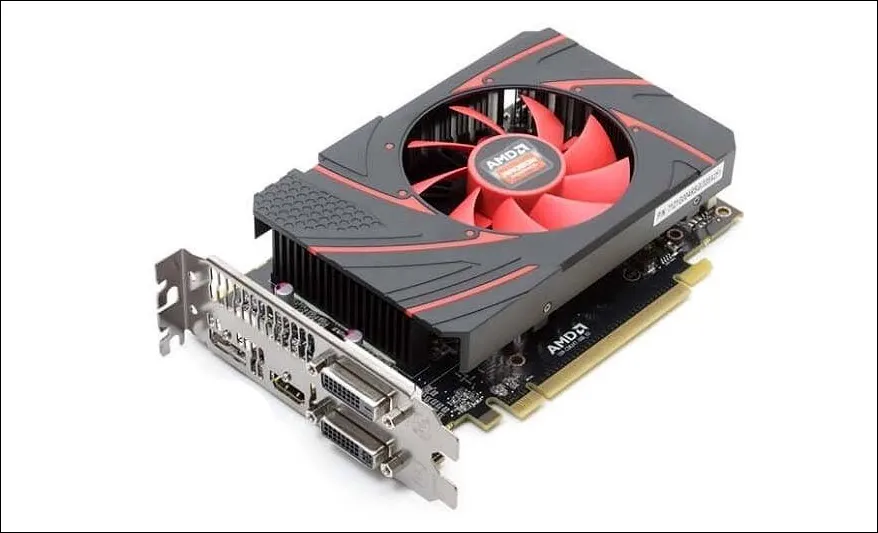
GPU VGA Card

GPU memproses grafis secara paralel (ribuan core, vs CPU ~8-16 core). Awalnya untuk rendering grafis game, sekarang juga untuk: AI/ML, video editing, 3D render, crypto, scientific computing.

Cara Kerja GPU

CPU = sequential (instruksi kompleks satu per satu). GPU = parallel (instruksi sederhana ribuan sekaligus). GPU menerima geometry data dari CPU, lalu render pixel di layar melalui graphics pipeline: Vertex → Geometry → Rasterization → Pixel → Output.

Modern GPU tambah Ray Tracing (simulate cahaya realistis) dan AI upscaling (DLSS/FSR — render lower res, upscale AI ke higher res, boost FPS).

Arsitektur GPU

  • CUDA Cores (NVIDIA) / Stream Processors (AMD) — unit pemroses paralel. Ribuan (RTX 4090: 16,384 CUDA cores).
  • RT Cores — hardware ray tracing (Bvh traversal, ray-triangle intersection). RTX 4090: 128 RT cores.
  • Tensor Cores (NVIDIA) — akselerasi AI/ML (matrix multiply). Untuk DLSS, AI training. RTX 4090: 512 tensor cores.
  • VRAM — memori khusus GPU. GDDR6/GDDR6X/GDDR7/HBM3. Higher bandwidth = higher res texture.
  • ROPs (Render Output Units) — final pixel output. Lebih banyak = higher fill rate.
  • TMUs (Texture Mapping Units) — texture sampling & filtering.

GPU Modern (2024-2026)

VendorArchContohVRAMTDPUntuk
NVIDIAAda LovelaceRTX 4060, 4070, 4080, 40908-24GB GDDR6X115-450WGaming, creator
NVIDIABlackwellRTX 5070, 5080, 509012-32GB GDDR7250-575WHigh-end gaming, AI
AMDRDNA 3RX 7600, 7700 XT, 7900 XTX8-24GB GDDR6165-355WGaming, value
AMDRDNA 4RX 9070, 9070 XT12-16GB GDDR6220-310WMid-high gaming
IntelXe2 BattlemageArc B580, B57010-12GB GDDR6150-190WEntry-mid gaming

Evolusi GPU: Generasi ke Generasi

1995
NV1
First NVIDIA GPU
Quadratic texture mapping
FIRST GPU
1999
GeForce 256
GPU pertama
Hardware T&L
DDR VRAM
FIRST "GPU"
2004
GeForce 6800
Shader Model 3.0
SLI support
16-22 pixel pipes
SM 3.0
2006
GeForce 8800 GTX
Unified shader
128 CUDA cores
DX10, 575 MHz
CUDA BORN
2010
GeForce GTX 480
Fermi architecture
DX11, 480 CUDA
250W TDP
DX11 FERMI
2014
GTX 980 (Maxwell)
2048 CUDA
165W TDP
Energy efficient
MAXWELL EFFICIENCY
2016
GTX 1080 (Pascal)
2560 CUDA
16nm FinFET
180W, 8GB GDDR5X
PASCAL
2018
RTX 2080 Ti (Turing)
RT Cores + Tensor
4352 CUDA
DLSS 1.0
RAY TRACING ERA
2020
RTX 3080 (Ampere)
8704 CUDA
2nd gen RT
10GB GDDR6X
AMPERE
2022
RTX 4090 (Ada)
16384 CUDA
3rd gen RT + Tensor
DLSS 3 Frame Gen
450W
DLSS 3 + 24GB
2025
RTX 5090 (Blackwell)
32GB GDDR7
4th gen RT
575W TDP
BLACKWELL AI
2000
Radeon 256
ATI (sebelum AMD)
Charisma Engine
Pixel Tapestry
FIRST RADEON
2007
HD 2900 XT
Unified shader
512MB GDDR4
214W
UNIFIED SHADER
2012
HD 7970 (Tahiti)
GCN architecture
3GB GDDR5
28nm
GCN ARCH
2017
RX Vega 64
Vega architecture
HBM2 memory
8GB, 295W
VEGA + HBM2
2019
RX 5700 XT
RDNA architecture
7nm, 2560 SP
225W
RDNA BORN
2020
RX 6900 XT (Big Navi)
RDNA 2
5120 SP, 16GB
Ray Tracing
AMD RT + 16GB
2022
RX 7900 XTX
RDNA 3
6144 SP
24GB GDDR6, 355W
RDNA 3 + 24GB
2025
RX 9070 XT (RDNA 4)
RDNA 4
16GB GDDR6
310W
RDNA 4
ANALOGI: EVOLUSI GPU
Evolusi GPU seperti evolusi pabrik: GeForce 256 = workshop kecil 1 orang (hardware T&L), GTX 8800 = pabrik dengan 128 pekerja (CUDA), RTX 2080 = pabrik robotik (RT cores + AI), RTX 4090 = mega pabrik 16,384 robot dengan AI autopilot (DLSS 3 Frame Generation)!

Teknologi GPU Modern

  • DLSS 3 (NVIDIA) — AI upscaling + Frame Generation (AI generate frame baru). Boost FPS 2-3x.
  • FSR 3 (AMD) — upscaling + Frame Generation. Open source, works on all GPU.
  • XeSS (Intel) — AI upscaling, cross-platform.
  • Ray Tracing — realistic lighting/reflection. Heavy performance cost. RT cores accelerate.
  • Path Tracing — ray tracing full scene (Cyberpunk 2077, Alan Wake 2). Very heavy, but photorealistic.
  • VR Ready — untuk VR headset (Meta Quest, Valve Index). Butuh high FPS (90+).
  • Multi-monitor — GPU support 3-4 monitor. Butuh VRAM cukup.

Cara Memilih GPU

  1. Resolusi target: 1080p → RTX 4060/RX 7600. 1440p → RTX 4070/RX 7700 XT. 4K → RTX 4080/RX 7900 XTX.
  2. VRAM: 8GB minimum 1080p, 12GB+ untuk 1440p/4K dan content creation.
  3. TDP & PSU: cek PSU watt cukup (lihat Bab 3.7). Sertakan kabel PCIe/12VHPWR.
  4. Panjang GPU vs casing: GPU high-end panjang (300-360mm). Cek casing clearance.
  5. Ports: HDMI 2.1 (8K60), DisplayPort 2.1 (8K165). Cek monitor support.
  6. Ray Tracing: jika ingin RT gaming, pilih RTX (lebih baik RT performance).
Sumber: NVIDIA Developer (developer.nvidia.com), AMD Radeon Specs (amd.com), Intel Arc (intel.com)

3.7 PSU (Power Supply Unit)

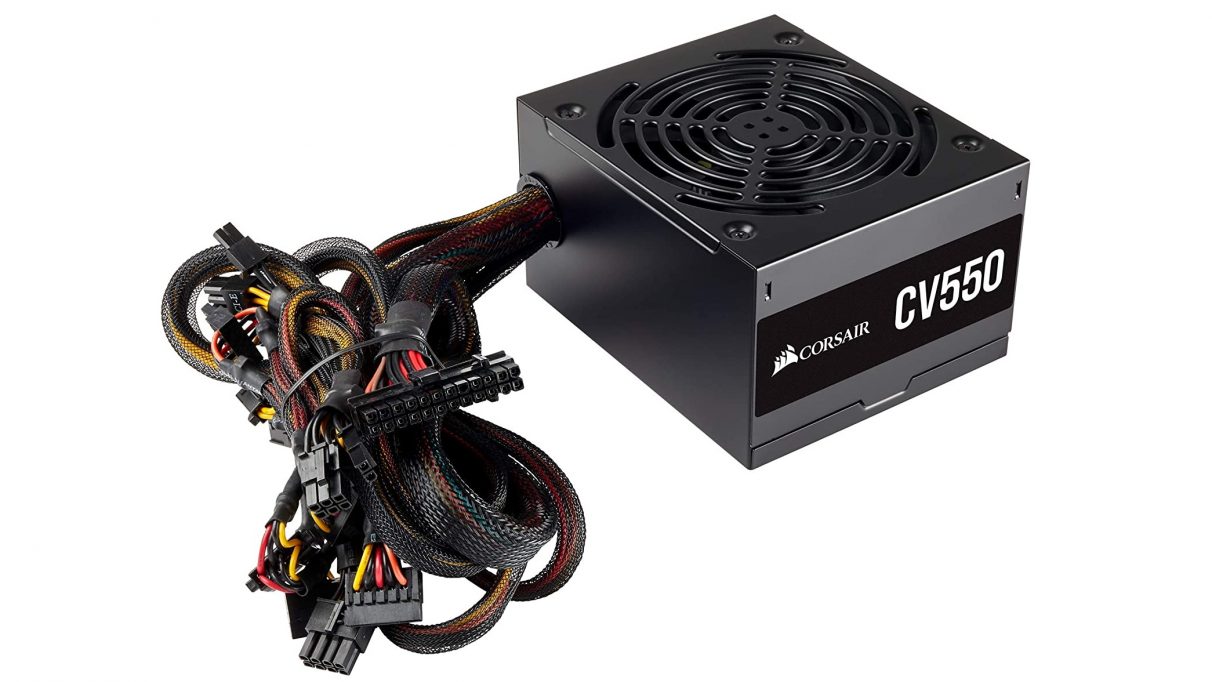
PSU Power Supply

PSU mengubah AC 220V/110V dari PLN menjadi DC 3.3V/5V/12V untuk komponen. PSU itu jantung PC — jika PSU buruk, bisa merusak semua komponen. Jangan hemat di PSU!

Cara Kerja PSU

PSU melakukan 4 tahap konversi:

  1. EMI Filter — filter noise EMI dari listrik PLN, cegah gangguan ke komponen.
  2. Rectifier — AC → DC (pulse).
  3. PFC (Power Factor Correction) — perbaiki power factor (Active PFC lebih baik).
  4. Switching — DC → high freq AC → transformer → DC smooth (3.3V/5V/12V).

PSU modern menggunakan switching mode (SMPS) — efisien, compact. Rail 12V utama untuk CPU/GPU. Rail 5V/3.3V untuk motherboard, USB, storage.

Efficiency Rating (80 PLUS)

RatingEfficiency (115V)Power FactorRekomendasi
White80%0.70Basic, budget (hindari)
Bronze82-85%0.85Entry gaming
Silver85-88%0.88Mid (jarang dipakai)
Gold87-90%0.90Recommended untuk gaming
Platinum89-92%0.95High-end, server
Titanium90-94%0.95Enthusiast, server premium

Efficiency = output power / input power. PSU Gold 500W load: ambil ~575W dari wall (85% effisien), 75W jadi panas. PSU White: ambil ~625W (80%), 125W panas. Lebih efisien = hemat listrik + lebih dingin.

Proteksi PSU (Wajib Cek)

  • OVP (Over Voltage Protection) — cegah tegangan kelebihan.
  • UVP (Under Voltage Protection) — cegah tegangan kurang.
  • OCP (Over Current Protection) — cegah arus berlebih.
  • OPP (Over Power Protection) — cegah daya berlebih.
  • SCP (Short Circuit Protection) — cegah short circuit.
  • OTP (Over Temperature Protection) — cegah overheat.

Modular vs Non-Modular

  • Non-modular — semua kabel permanen. Lebih murah, kabel berantakan.
  • Semi-modular — kabel essential permanen (24-pin, EPS), lainnya detachable.
  • Full-modular — semua kabel detachable. Termahal, cable management terbaik.

Estimasi Watt PC

BuildCPUGPUEstimasi LoadPSU Rec.
Office (iGPU)65W-~120W300W Bronze
Entry gaming100W115W (RTX 4060)~280W500W Bronze+
Mid gaming100W200W (RTX 4070)~380W650W Gold
High gaming150W320W (RTX 4080)~550W850W Gold
Enthusiast200W450W (RTX 4090)~750W1000W Platinum
// WARNING PSU Jangan sekali-kali membuka casing PSU! Capacitor di dalam menyimpan tegangan tinggi (400V+) yang berbahaya bahkan setelah dicabut dari listrik. PSU = service by professional only. Beli PSU dari brand reputable (Corsair, Seasonic, EVGA, be quiet!, NZXT, Antec).
Sumber: 80 PLUS Certified (clearwatt.org/plugloadsolutions.com), Intel ATX Power Supply Design Guide

3.8 Cooling System

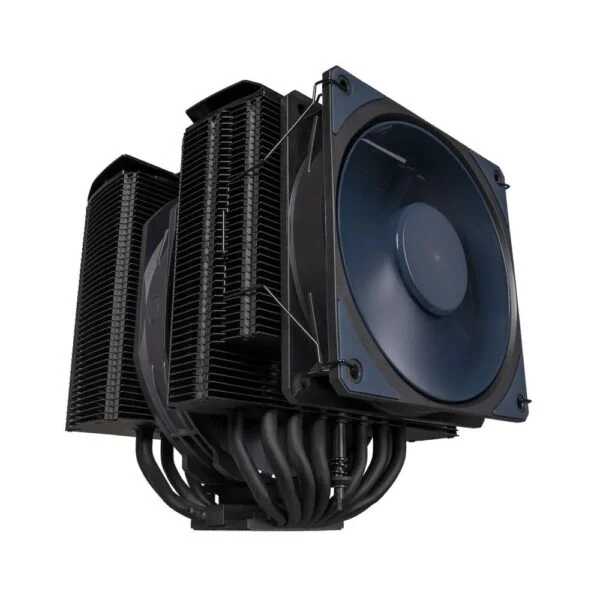
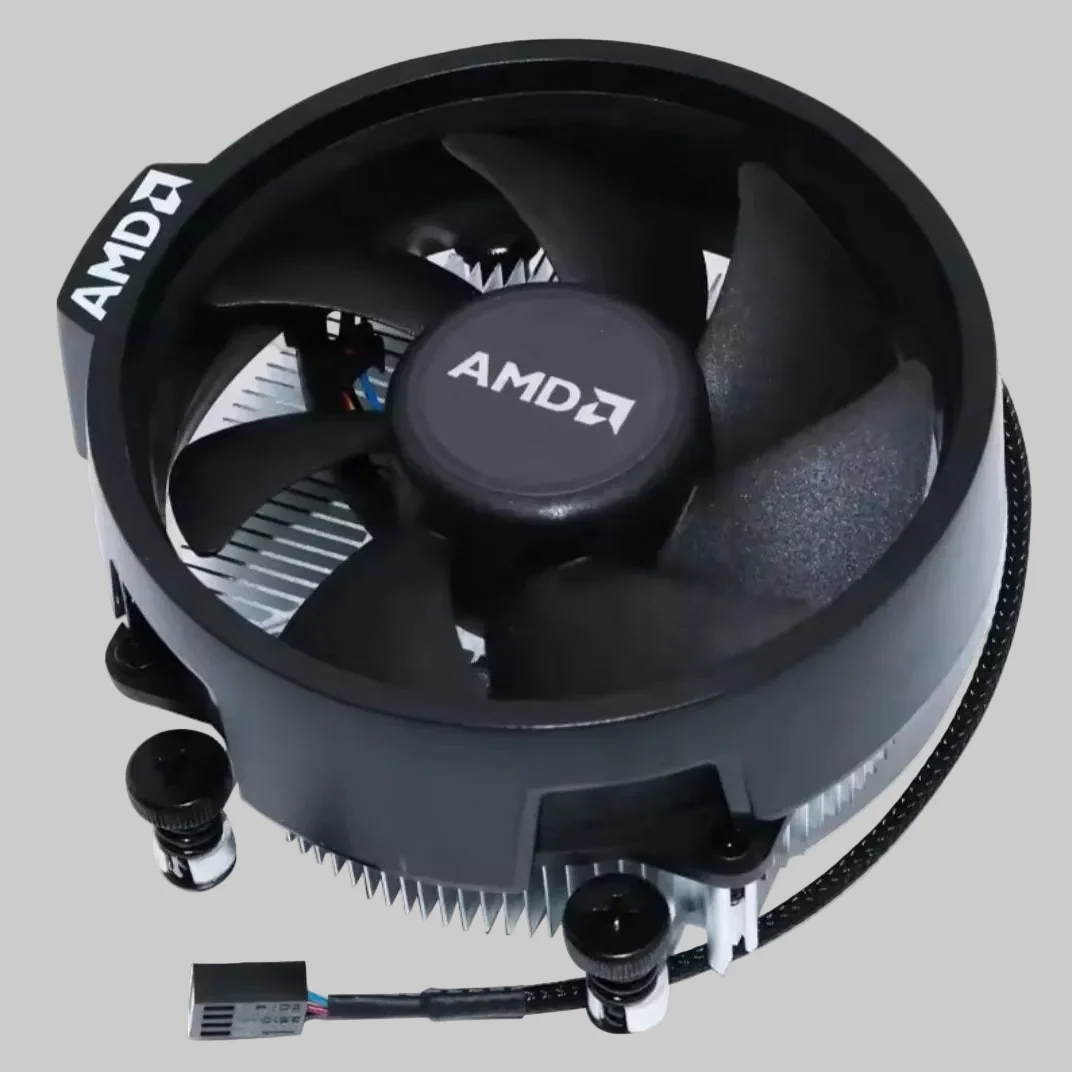
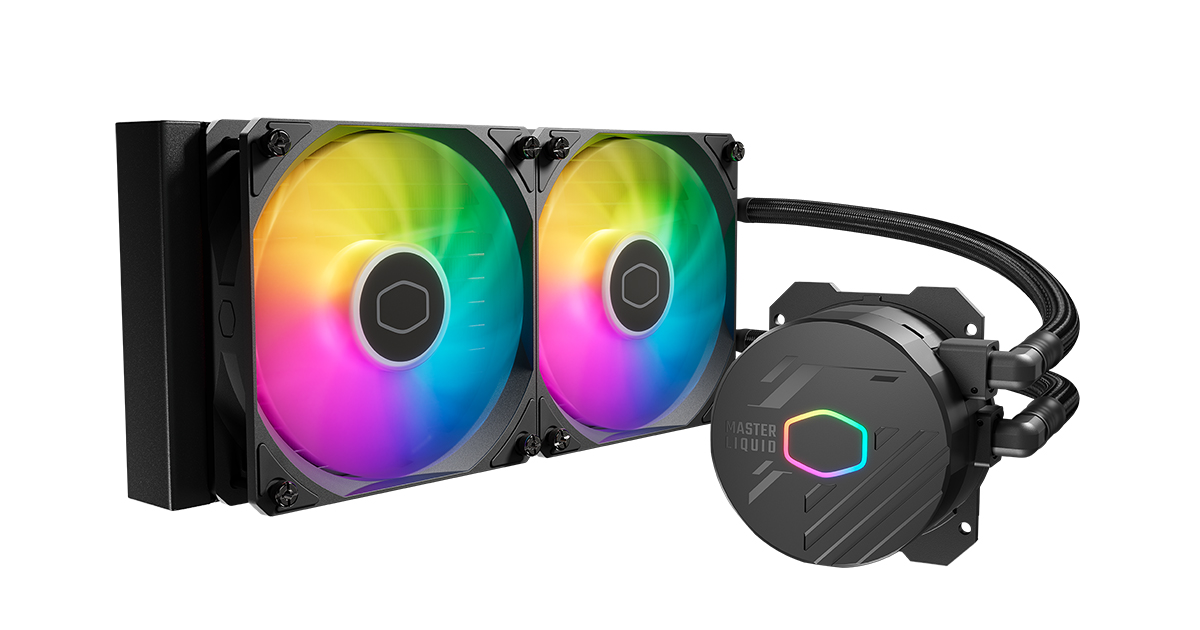
CPU CoolerHeatsink FanLiquid Cooler

Cooling menjaga suhu CPU/GPU di rentang aman (idle 30-50°C, load 60-85°C). Tanpa cooling, CPU overheat >90°C → thermal throttle (turunkan clock) atau rusak permanen.

Cara Kerja Air Cooling

Air cooler menggunakan konduksi + konveksi: heatpipe (pipa berisi cairan) menyerap panas dari CPU → cairan menguap → naik ke atas heatsink → kondensasi (jadi cairan) → turun kembali. Fan meniup heatsink untuk dissipasi panas ke udara.

Komponen: baseplate (kontak CPU), heatpipe (transfer panas), heatsink fins (dissipasi), fan (airflow). Material: tembaga (konduktifitas tinggi) atau aluminium (ringan, murah).

Cara Kerja Liquid Cooling (AIO)

AIO (All-in-One) liquid cooler menggunakan closed loop: pump sirkulasi cairan coolant → waterblock (di CPU, serap panas) → tube (bawa cairan panas) → radiator (dissipasi dengan fan) → tube (bawa cairan dingin kembali).

Keunggulan: pendinginan lebih efektif (kapasitas termal cairan > udara), lebih senyap di load tinggi, estetika. Kerugian: lebih mahal, risiko leak (rare tapi catastrophic), lebih kompleks.

Tipe Cooling

  • Stock Cooler — fan bawaan CPU (box cooler). Cukup untuk default speed, office.
  • Air Tower — heatsink besar + fan. Contoh: Noctua NH-D15, DeepCool AK620, be quiet! Dark Rock Pro 5.
  • Dual Tower — 2 heatsink + 2 fan. Untuk overclocking.
  • AIO 120mm — radiator 1x120mm. Entry liquid, compact.
  • AIO 240mm — radiator 2x120mm. Mid-range, balance.
  • AIO 280mm — radiator 2x140mm. Quiet + performance.
  • AIO 360mm — radiator 3x120mm. High-end, overclock.
  • AIO 420mm — radiator 3x140mm. Enthusiast, maximum cooling.
  • Custom Loop — water cooling custom (GPU+CPU block, reservoir, pump, radiator besar).

Thermal Paste

Thermal paste (thermal compound/thermal grease) mengisi celah mikroskopis antara permukaan CPU dan heatsink. Dua logam tidak rata sempurna — ada gap mikroskopis berisi udara (insulator). Paste mengganti udara dengan material konduktif panas.

TipeKonduktivitasContohUntuk
Silicone-basedRendah (1-3 W/mK)Cooler stockBasic
CeramicMenengah (3-8 W/mK)Arctic MX-6, Noctua NT-H2Standar
Metal-basedTinggi (8-15 W/mK)Thermal Grizzly KryonautHigh-end, OC
Liquid MetalSangat tinggi (70+ W/mK)Thermal Grizzly ConductonautExtreme OC (HATI-HATI: konduktif listrik, korosi aluminium)

Cara Memilih Cooling

  1. TDP CPU: stock cooler untuk TDP ≤65W. Aftermarket untuk >65W atau overclock.
  2. Casing clearance: air tower butuh tinggi casing (160mm+). AIO butuh slot radiator.
  3. Socket compatibility: cek cooler support socket (LGA 1700, AM5, dll).
  4. Noise level: fan <30 dBA = senyap. Cek spec.
  5. RGB vs non-RGB: estetika, tidak pengaruhi performa.
// THERMAL PASTE APPLICATION Metode "pea" — titik sebesar biji kacang di tengah CPU, heatsink tekan merata. Jangan sebar manual (udara terjebak). Re-paste tiap 2-3 tahun. Bersihkan paste lama dengan isopropyl alcohol 90%+ + microfiber.

3.9 Casing & Form Factor

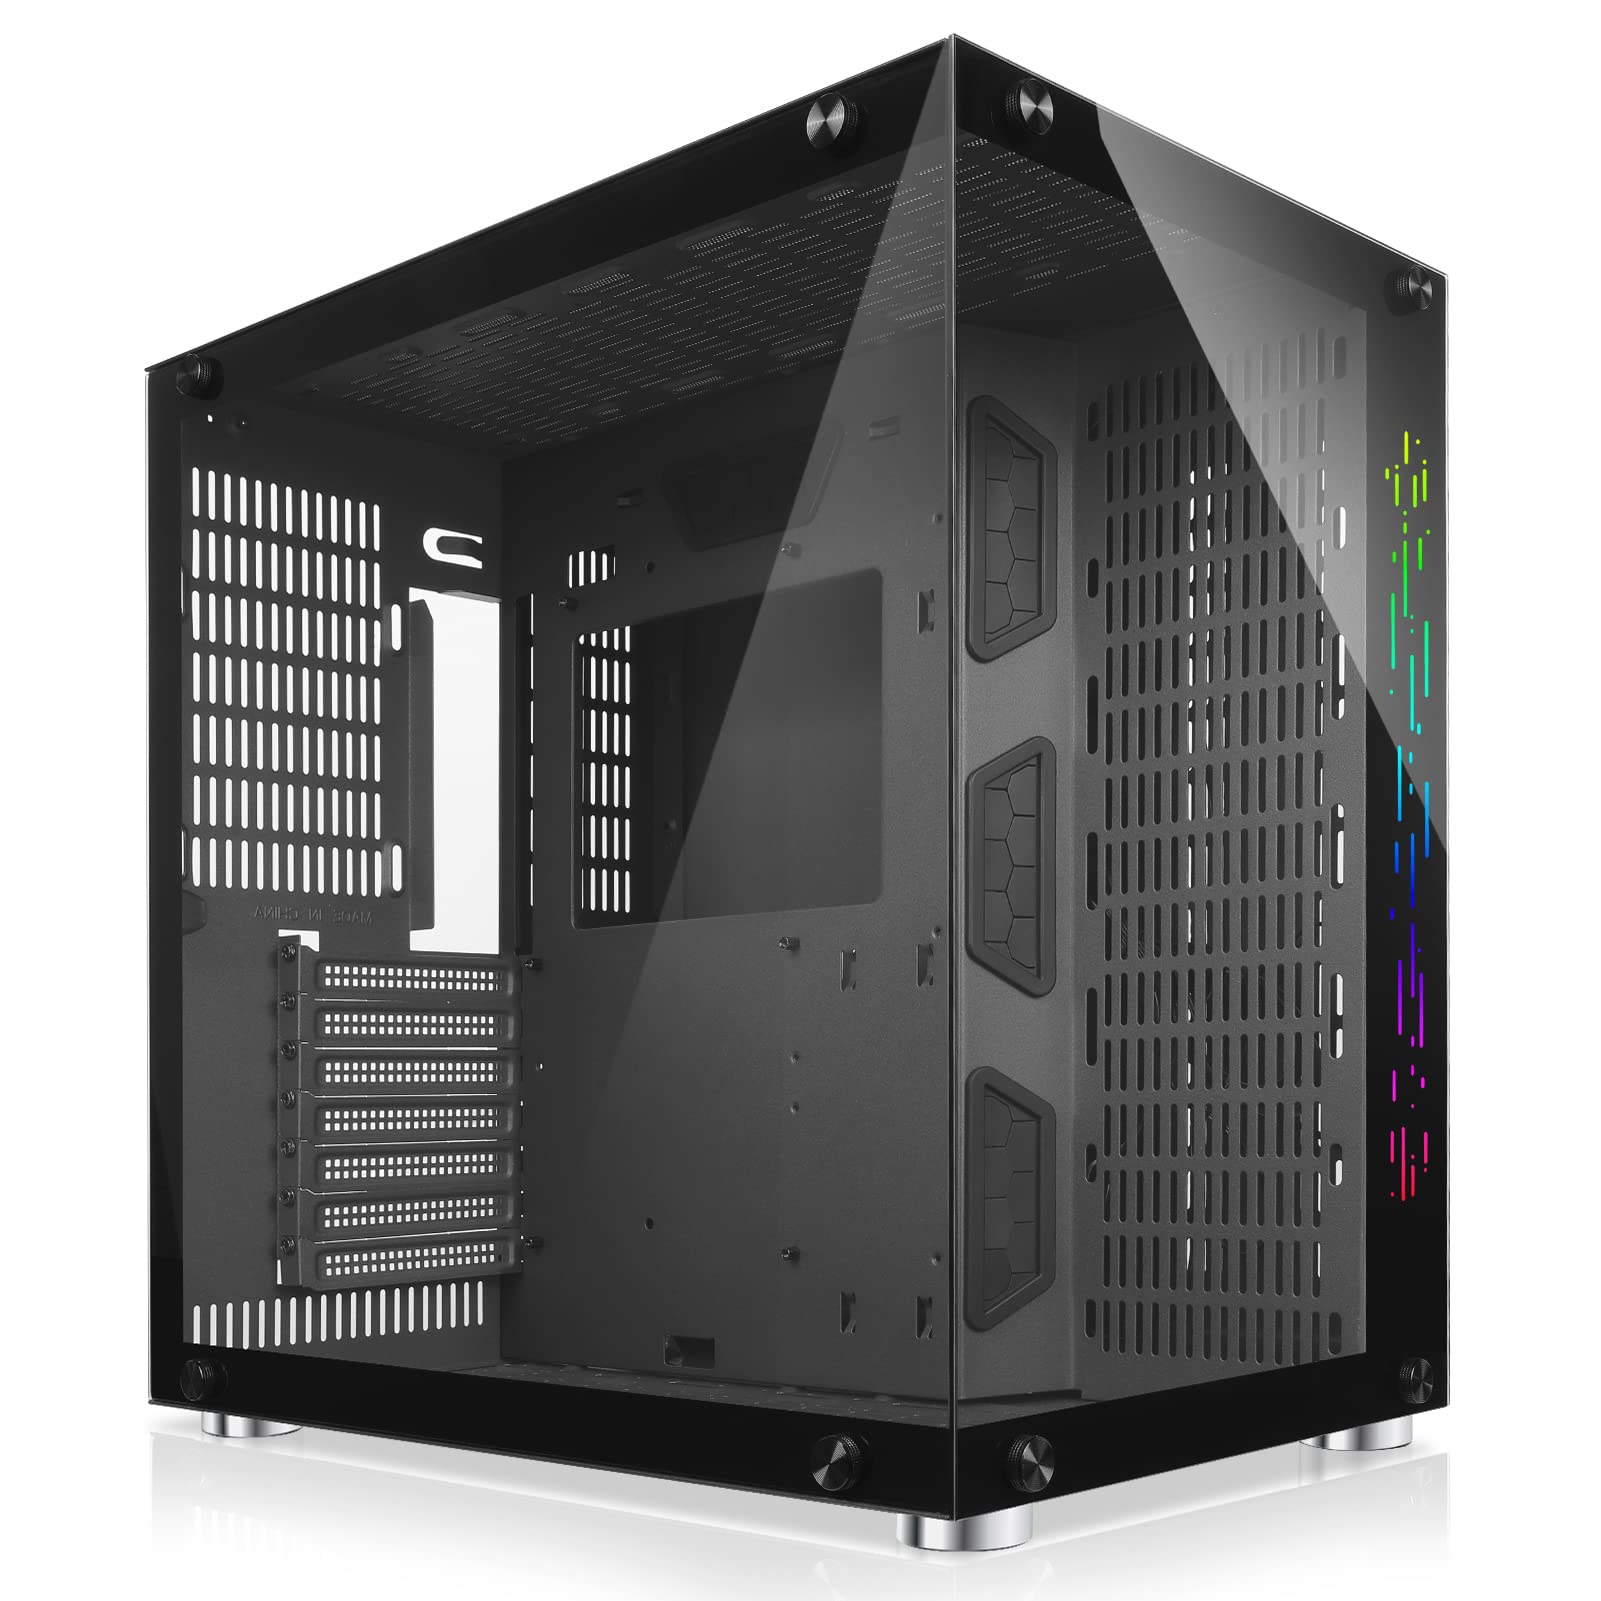
PC Casing

Casing (case/chassis) adalah wadah yang melindungi komponen, mengatur airflow, dan menyediakan estetika. Casing yang baik = airflow optimal + cable management + build quality.

Tipe Casing

TipeMotherboardGPU MaxRadiatorUntuk
Full TowerE-ATX/ATX400mm+480mmWorkstation, HEDT
Mid TowerATX/M-ATX350-400mm360mmStandar gaming
M-ATX TowerM-ATX/Mini-ITX320mm240mmCompact gaming
Mini-ITX (SFF)Mini-ITX300mm120-240mmSmall form factor

Airflow Design

  • Front intake — fan tarik udara dingin dari depan.
  • Rear/top exhaust — fan buang udara panas ke belakang/atas.
  • Positive pressure — intake > exhaust. Kurang debu (udara keluar dari gap).
  • Negative pressure — exhaust > intake. Lebih dingin tapi lebih banyak debu.
  • Mesh front — airflow maksimal, tapi kurang senyap.
  • Solid front — senyap, estetik, tapi airflow terbatas.
// DIAGRAM: AIRFLOW CASING
↑ TOP EXHAUST
→ FRONT
INTAKE
CPU
GPU
RAM
← REAR
EXHAUST
PSU
Udara dingin masuk dari depan (hijau), melewati komponen, buang panas ke atas & belakang (merah).

Fan Placement

  • Front: 2-3 fan intake (120mm atau 140mm).
  • Rear: 1 fan exhaust (120mm).
  • Top: 2-3 fan exhaust (optional, untuk AIO radiator).
  • Bottom: 1-2 fan intake (untuk PSU atau fresh air GPU).
  • Side: 1-2 fan intake (langsung ke GPU, untuk cooling GPU).

Cara Memilih Casing

  1. Form factor motherboard: ATX butuh Mid Tower+, Mini-ITX bisa SFF.
  2. GPU clearance: cek panjang GPU vs spec casing. High-end GPU 330-360mm.
  3. Cooler height: air tower butuh clearance 160-170mm.
  4. Radiator support: jika AIO, cek slot radiator (top/front).
  5. Airflow: mesh front lebih baik dari solid. Fan included atau beli terpisah.
  6. Cable management: panel belakang dengan cutout + ties + rubber grommet.
  7. Dust filter: magnetic/removable di intake. Mudah dibersihkan.
  8. Build quality: steel (0.8-1.0mm) untuk struktur, tempered glass side panel.
  9. I/O panel: USB-C, USB 3.2, audio, fan controller.

3.10 Peripheral & I/O

Peripheral adalah perangkat eksternal yang terhubung ke PC untuk input/output.

Input Device

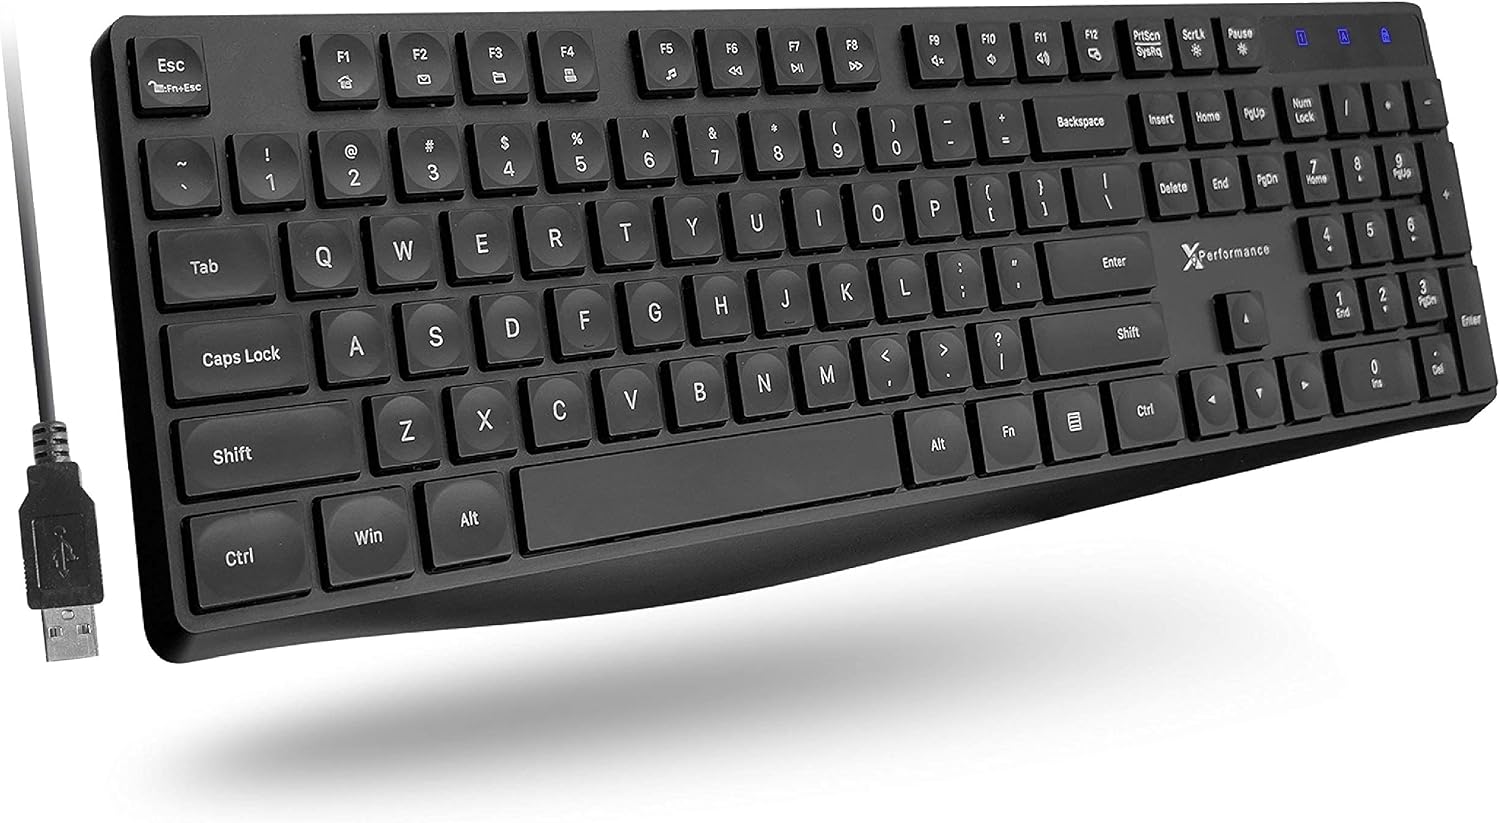
  • Keyboard — mechanical (switch Cherry MX/Gateron, tactile feedback), membrane (rubber dome, murah). Gaming: RGB, macro, n-key rollover.
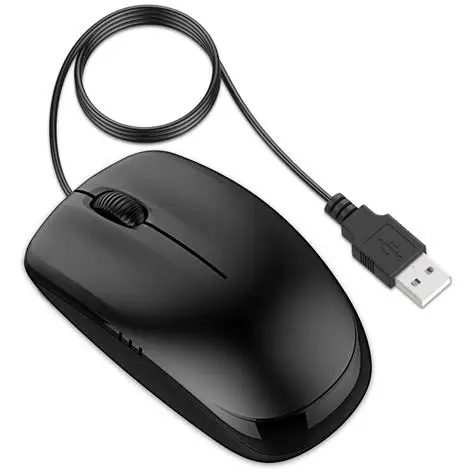
  • Mouse — sensor optik (DPI 400-26000), wired/wireless. Gaming: lightweight, side button, adjustable DPI.
  • Webcam — 1080p/4K, autofocus, untuk meeting/streaming.
  • Microphone — USB condenser, untuk podcast/streaming.
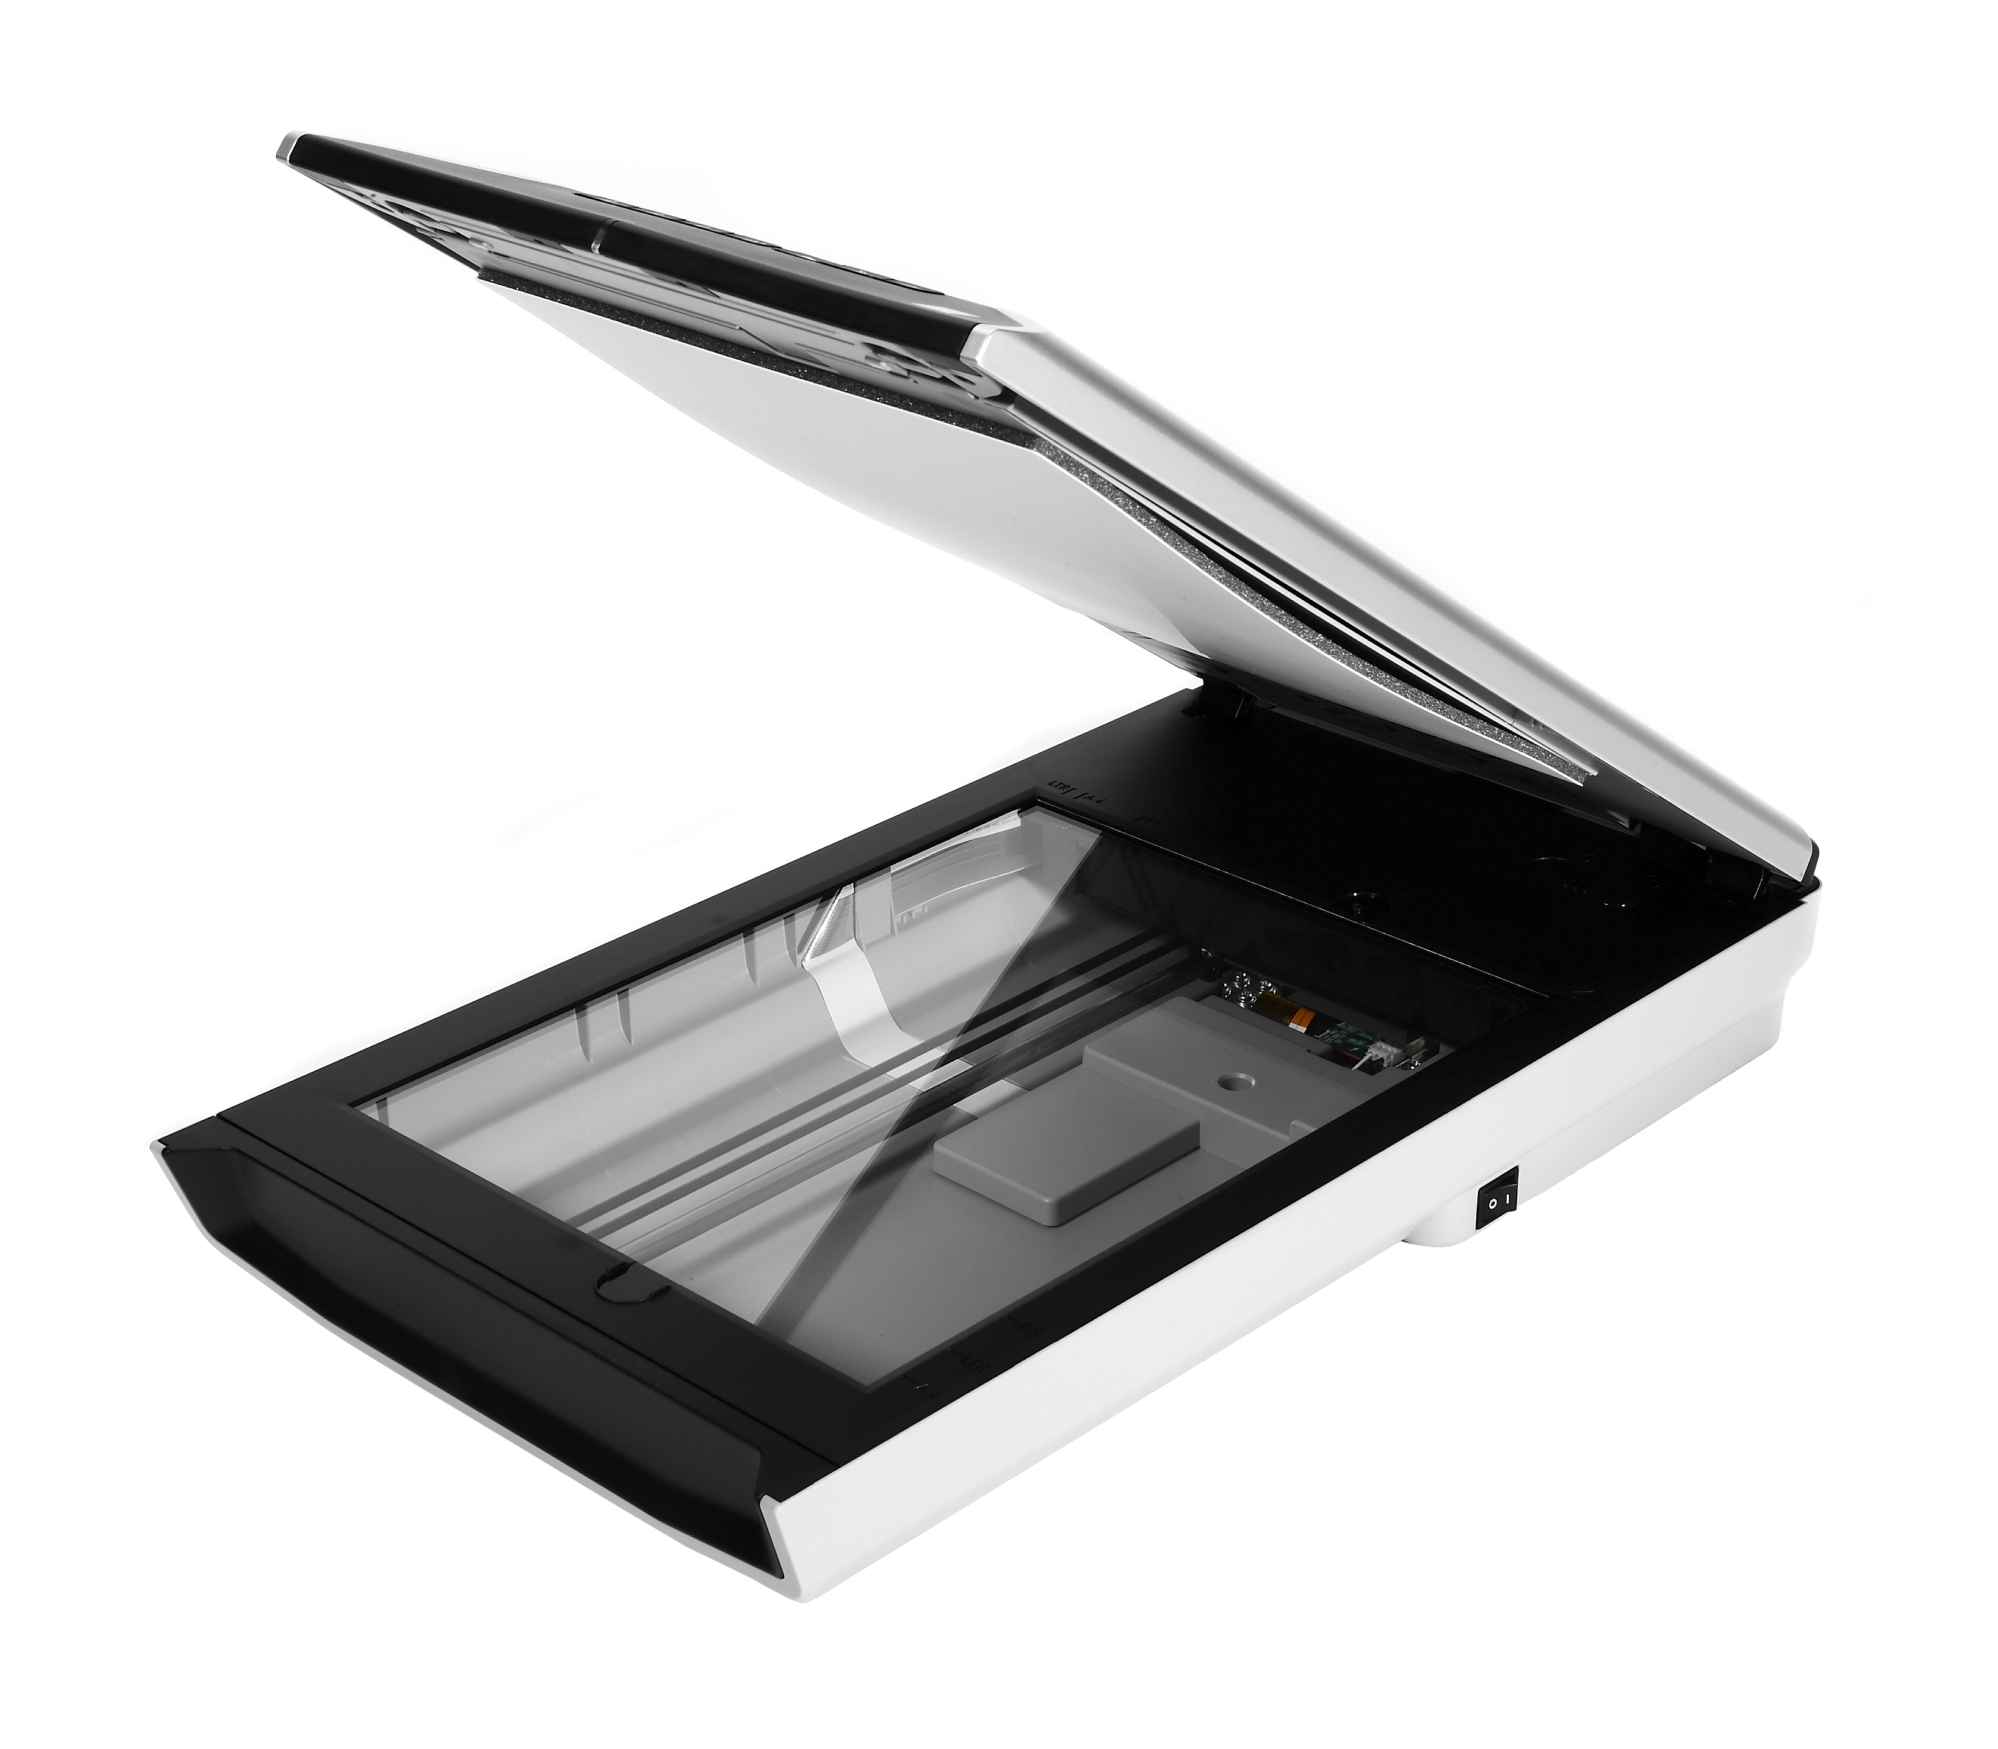
  • Scanner — document/foto, flatbed/sheetfed.

Output Device

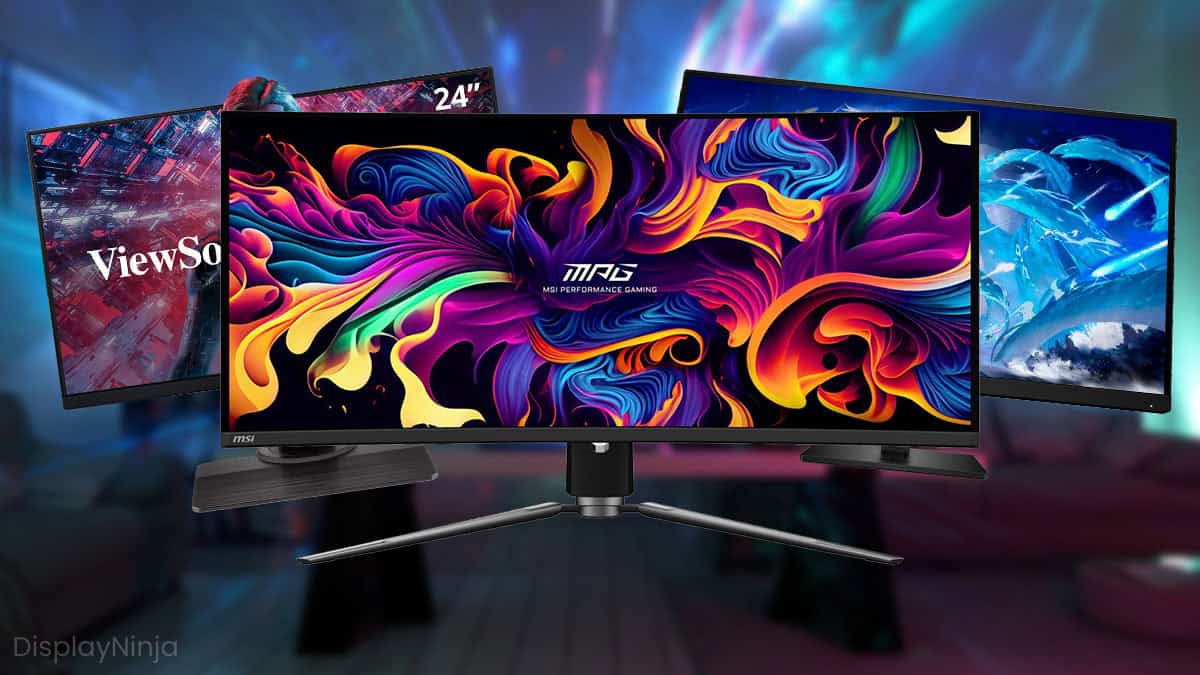
  • Monitor — resolusi (1080p/1440p/4K), refresh rate (60/144/240/360Hz), panel (IPS/VA/TN/OLED), response time (1-5ms).
  • Speaker — 2.0/2.1/5.1/7.1 channel.
  • Headphone — wired/wireless, gaming (surround virtual), studio (flat response).
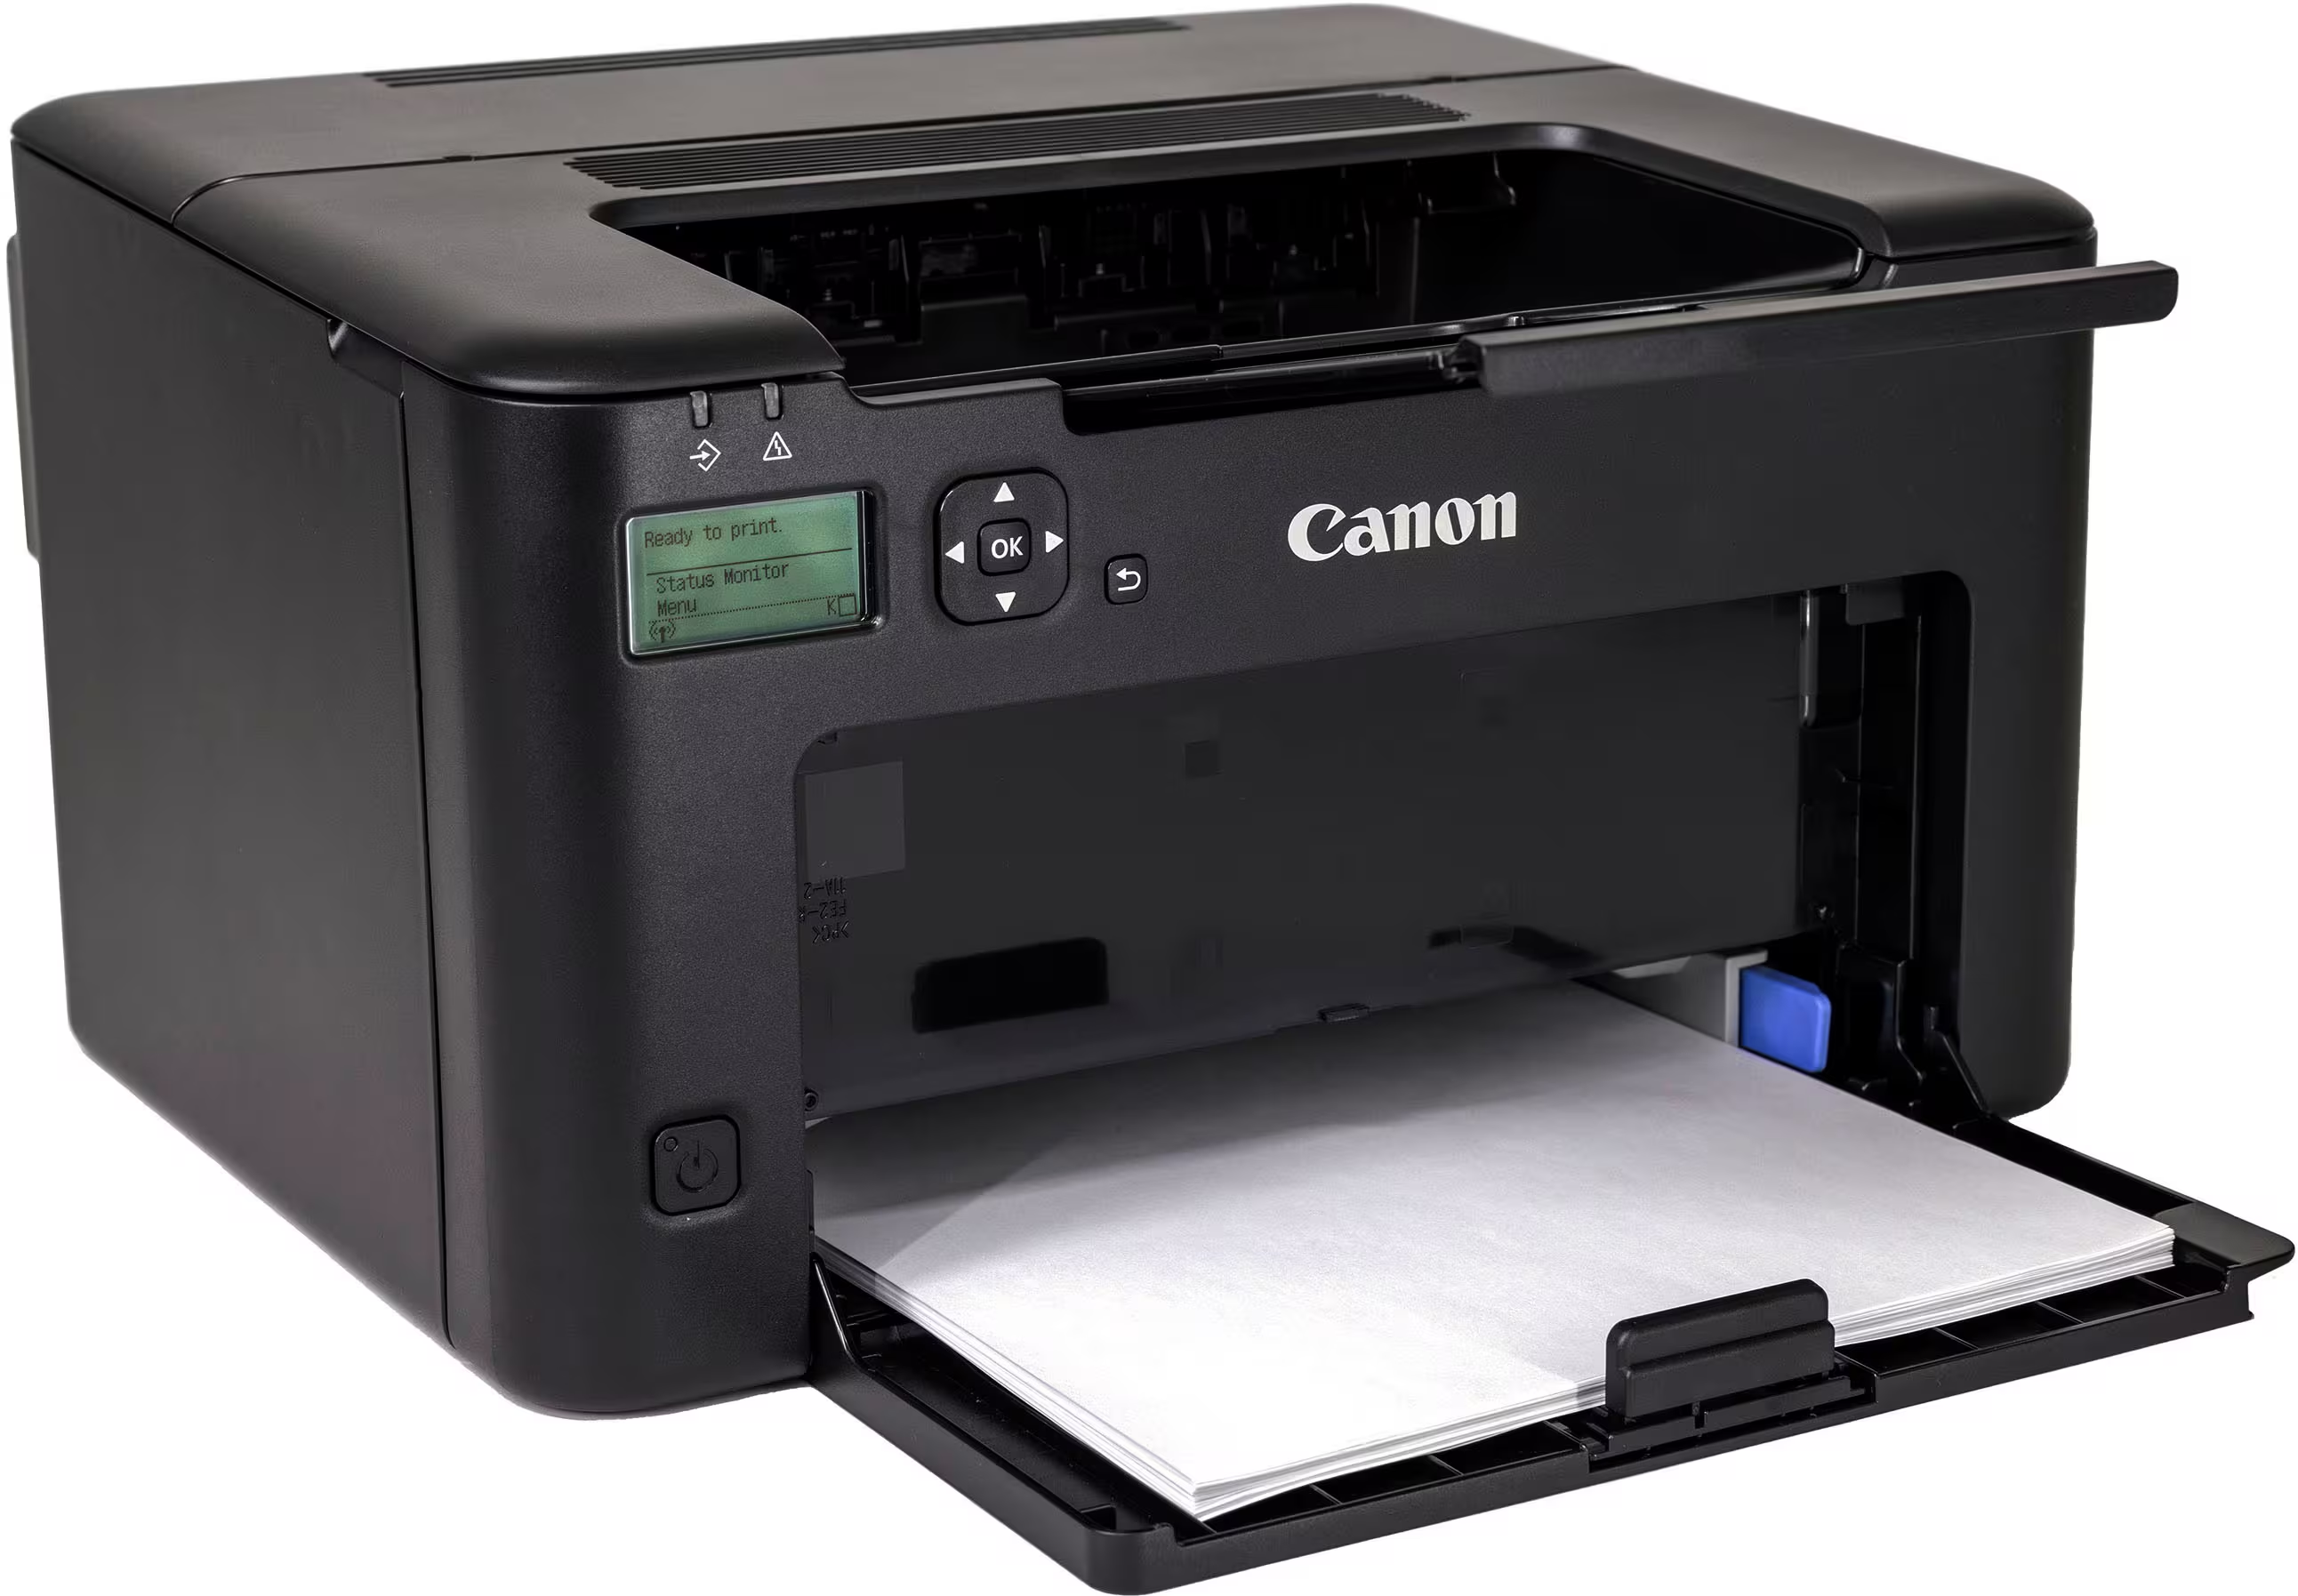
  • Printer — inkjet (foto), laser (dokumen cepat).
  • Projector — untuk presentasi, home theater.

Port & Konektor Modern

PortFungsiSpeed
USB-A 3.2 Gen 2Universal peripheral10 Gbps
USB-C 4Reversible, power+data+display40 Gbps
HDMI 2.1Audio + video digital48 Gbps (8K60, 4K120)
DisplayPort 2.1Video digital (PC)80 Gbps (16K60)
Ethernet RJ-45Jaringan kabel1/2.5/5/10 Gbps
3.5mm Audio JackAnalog audio-
Thunderbolt 4USB-C + PCIe + DisplayPort40 Gbps
MonitorMonitor
KeyboardKeyboard
MouseMouse
PrinterPrinter
ScannerScanner
Sumber: USB-IF (usb.org), HDMI Forum (hdmi.org), VESA DisplayPort (vesa.org)

3.11 Sound Card & Audio System

Sound card memproses audio digital ↔ analog. Modern: terintegrasi di motherboard (codec Realtek ALC). Untuk audiophile/gaming: dedicated PCIe atau USB DAC.

  • DAC (Digital-to-Analog Converter) — ubah audio digital (0/1) ke sinyal analog (gelombang suara) untuk speaker/headphone.
  • ADC (Analog-to-Digital Converter) — ubah suara mikrofon (analog) ke digital untuk recording.
  • Codec — chip audio di motherboard (Realtek ALC1220, etc). Decode/encode audio stream.
  • SNR (Signal-to-Noise Ratio) — rasio signal vs noise. Higher = lebih bersih. Audiophile: >110dB. Motherboard standar: ~90-100dB.
  • Sample Rate — 44.1kHz (CD), 48kHz (DVD), 96kHz/192kHz (Hi-Fi). Higher = lebih detail.
  • Bit Depth — 16-bit (CD), 24-bit (studio). Higher = lebih dynamic range.

Audio Interface Modern

  • 3.5mm Jack — analog, standar headphone/speaker.
  • USB Audio — DAC external via USB (bypass motherboard). Contoh: Schiit Hel, FiiO E10K.
  • Optical TOSLINK — digital audio via fiber optic. Untuk home theater (5.1/7.1 surround).
  • HDMI/DisplayPort — audio + video digital ke monitor/TV.
  • Bluetooth — wireless audio (codec: SBC, AAC, aptX, LDAC).
ANALOGI: DAC/ADC
DAC = penerjemah buku digital (e-book) ke suara audiobook (digital → analog). ADC = sebaliknya — diktat suara ke teks (analog → digital). Semakin baik penerjemah (DAC quality), semakin jernih suaranya!

3.12 Network Card (NIC)

NIC (Network Interface Card) menghubungkan PC ke jaringan. Modern: terintegrasi di motherboard. Tipe: Ethernet (kabel), WiFi (wireless), Bluetooth (short range).

Ethernet (Wired)

  • Speed: 1 Gbps (standar), 2.5 Gbps (modern), 5/10 Gbps (high-end).
  • Chip: Intel i225/i226 (2.5G), Realtek RTL8125 (2.5G).
  • Keunggulan: stabil, low latency, full duplex.
  • Kabel: Cat5e (1G), Cat6 (10G/55m), Cat6a (10G/100m).

WiFi (Wireless)

StandarIEEEMax SpeedBandYear
WiFi 4802.11n600 Mbps2.4/5 GHz2009
WiFi 5802.11ac3.5 Gbps5 GHz2013
WiFi 6802.11ax9.6 Gbps2.4/5 GHz2019
WiFi 6E802.11ax9.6 Gbps2.4/5/6 GHz2020
WiFi 7802.11be46 Gbps2.4/5/6 GHz2024
  • M.2 WiFi card — module kecil di motherboard (CNVi atau standard M.2 E-key).
  • PCIe WiFi card — kartu PCIe dengan antenna external (better range).
  • USB WiFi adapter — plug-and-play, portable (untuk PC tanpa WiFi built-in).
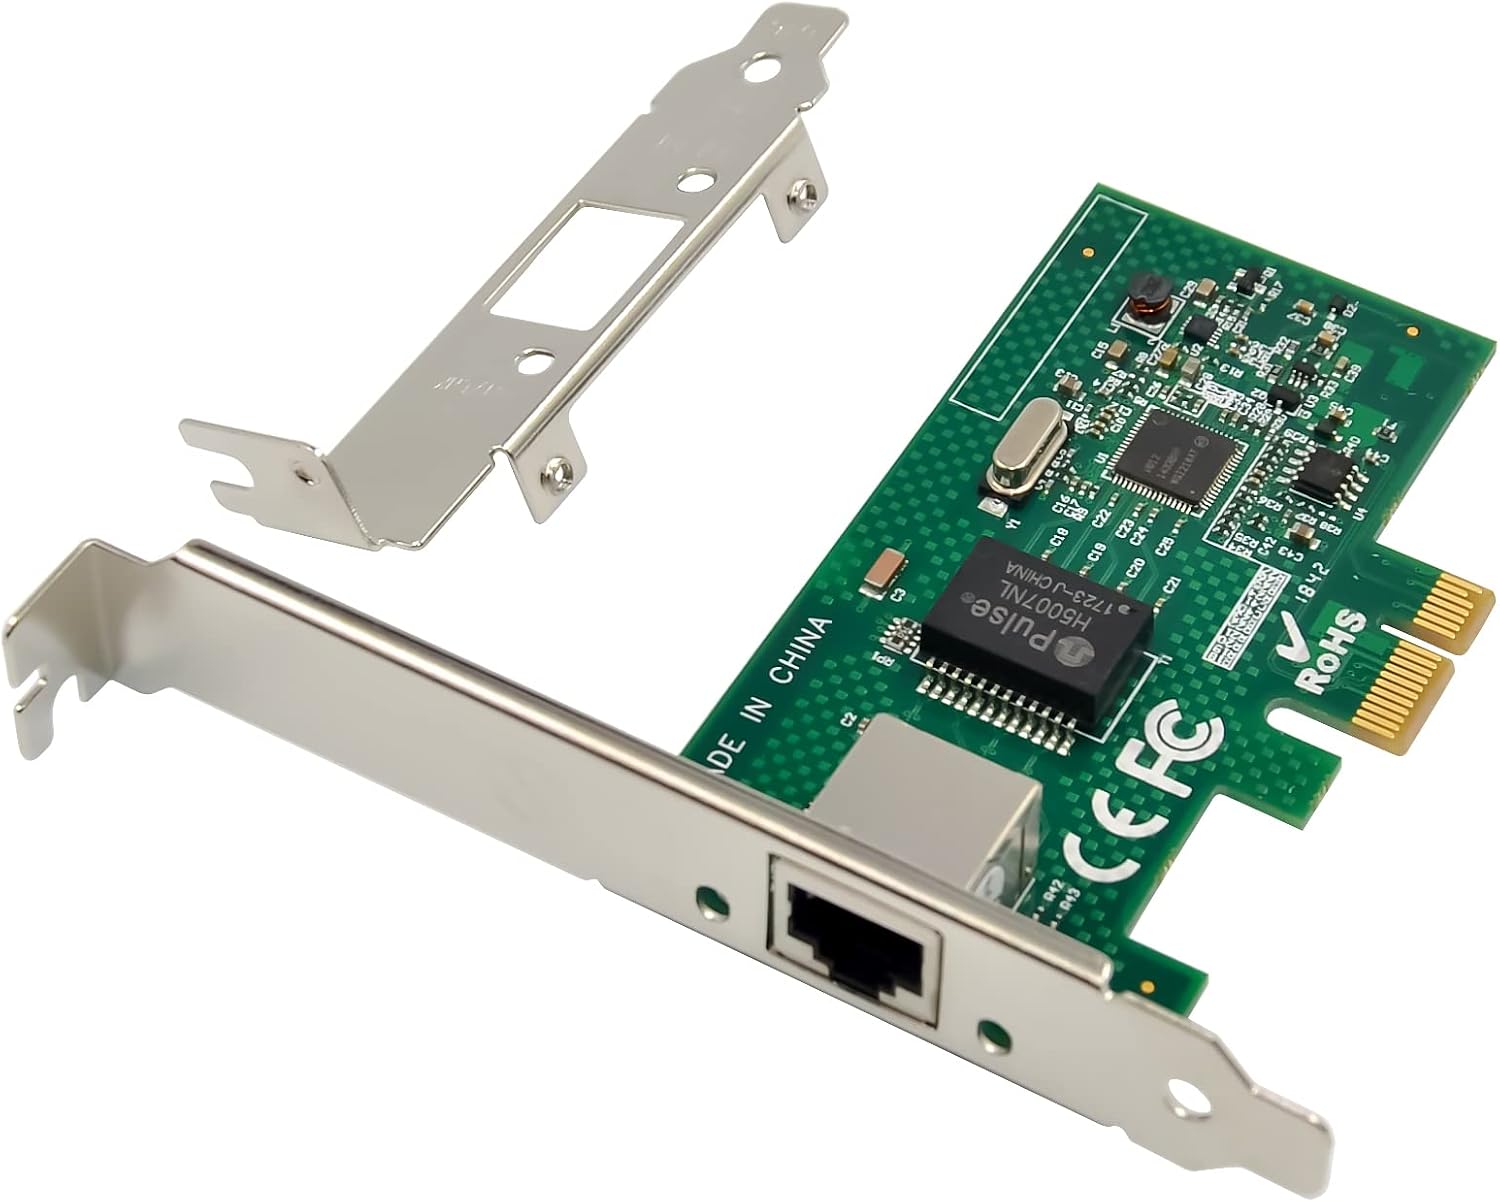
LAN CardLAN Card (Ethernet)
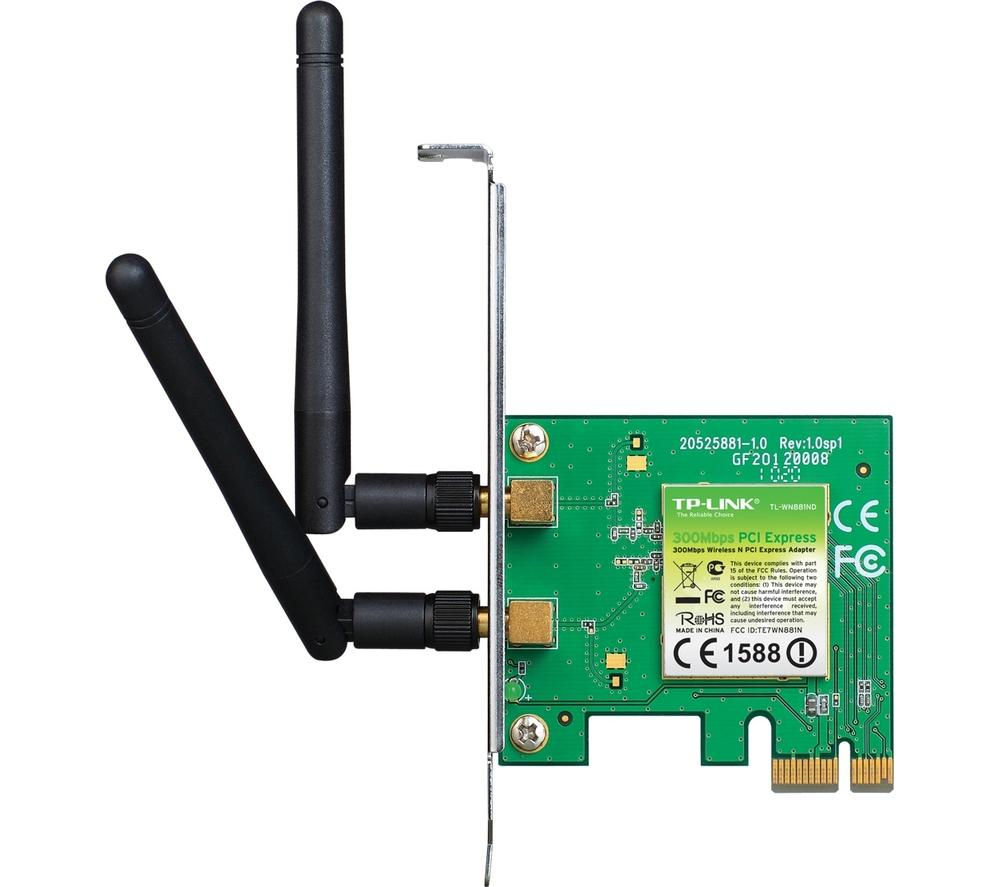
WiFi CardWLAN Card (WiFi)
Sumber: IEEE 802.11 Working Group, Wi-Fi Alliance (wi-fi.org)

3.13 Sensor & Monitoring System

Motherboard modern punya sensor bawaan untuk monitoring suhu, voltage, fan speed, dan power consumption. Data ini dibaca via software (HWiNFO, AIDA64) atau BIOS.

  • Temperature sensor — CPU (internal), GPU (internal), motherboard (multiple points), SSD (SMART), PSU (high-end).
  • Voltage sensor — cek rail 12V/5V/3.3V, CPU VCore, RAM VDIMM, GPU.
  • Fan tachometer — RPM setiap fan header (CPU_FAN, CHA_FAN1-4).
  • Power monitoring — CPU package power, GPU power, total system power (high-end motherboard).

Fan Control Systems

  • DC fan (3-pin) — kontrol via voltage (5-12V). Lower volt = slower RPM.
  • PWM fan (4-pin) — kontrol via pulse width modulation. Lebih presisi, minimum RPM lebih rendah.
  • Fan curve — set RPM berdasarkan suhu di BIOS. Idle: 30-40% RPM, load: 70-100% RPM.
  • AIO pump — pump speed adjustable (performance/silent mode).
// MONITORING SOFTWARE HWiNFO64 — paling lengkap (free). AIDA64 — GUI bagus + benchmark. Core Temp — CPU suhu minimalis. MSI Afterburner — GPU + overlay FPS. Fan Control — custom fan curve advanced.
BAB 4

PERAKITAN KOMPUTER

Prosedur lengkap merakit PC: alat, safety, urutan, kabel, dan first boot

4.1 Alat dan Bahan

Alat Wajib

  • Obeng Phillips (Plus) #2 — sekrup motherboard, storage, casing
  • Anti-static wrist strap — cegah ESD, wajib untuk komponen sensitif
  • Thermal paste — antarmuka panas CPU-heatsink
  • Isopropyl alcohol 90%+ — bersihkan pasta lama, degreaser
  • Microfiber cloth/lint-free — lap bersih
  • Tang pinch — kabel kecil, standoff
  • Flashlight/LED — penerangan area sempit
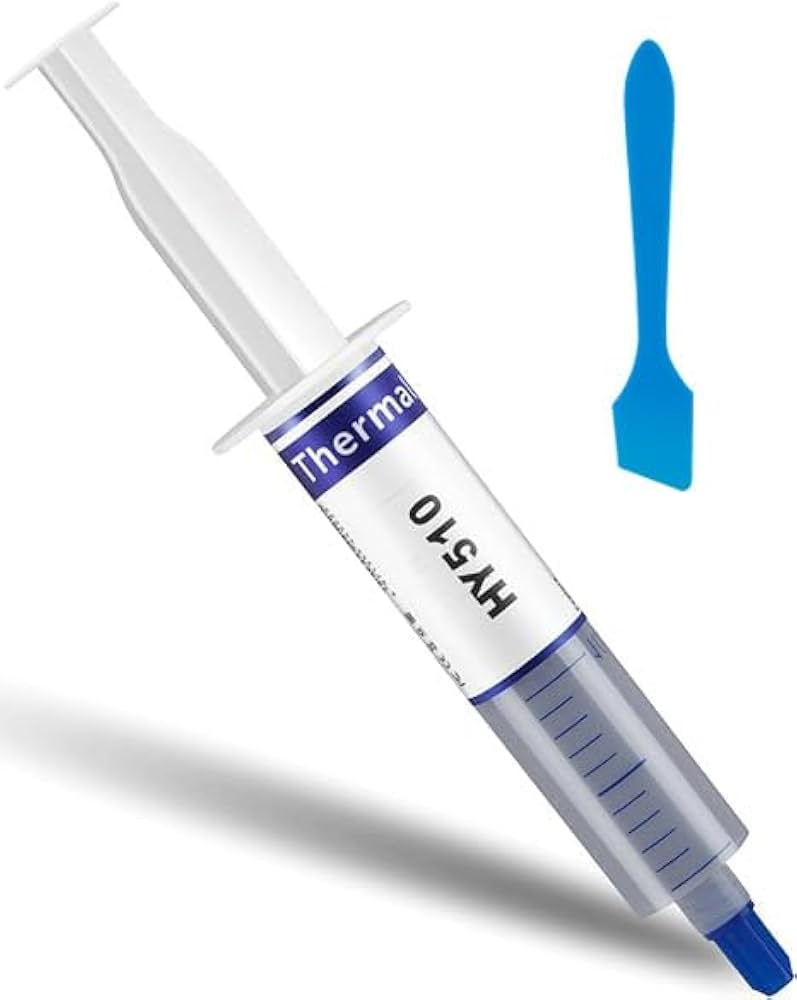
Thermal Paste HY510 Thermal Paste (HY510)

Komponen PC (cek semua sebelum mulai)

  • CPU + Heatsink/Fan (stock atau aftermarket)
  • RAM (tipe sesuai motherboard: DDR4/DDR5)
  • Motherboard (socket sesuai CPU)
  • PSU (watt cukup, efisiensi 80+)
  • Storage (SSD NVMe M.2 atau SATA SSD/HDD)
  • GPU (opsional jika CPU punya iGPU)
  • Casing + fans
  • I/O Shield (jika motherboard non-integrated)

4.2 Keselamatan Kerja (ESD Prevention)

// ESD DANGER Listrik statis dari tubuh (3.000-35.000V) bisa rusakin komponen elektronik (CPU, RAM, motherboard) permanen (gak bisa diperbaiki). Gejala: komponen gagal langsung atau umur pendek.
  1. Matikan PSU (switch I/O ke O), cabut kabel power dari outlet
  2. Pakai anti-static wrist strap, klip ke bagian metal casing (tidak cat/plastik)
  3. Kerja di permukaan non-logam (meja kayu) atau anti-static mat
  4. Jangan sentuh pin/kontak emas komponen langsung — pegang bagian edge/plastik
  5. Hindari area berkarpet/berpakaian wol (statis tinggi)
  6. Jauhkan dari air/cairan — area kering saja
  7. Simpan komponen di anti-static bag saat tidak dipasang
Sumber: ANSI/ESD S20.20 Standard, ESD Association (esda.org)

4.3 Urutan Perakitan

Mending ikuti urutan ini untuk kemudahan dan keamanan (di luar casing dulu):

  1. Persiapan — siapkan alat + anti-static
  2. Pasang CPU ke socket motherboard (di luar casing)
  3. Pasang RAM ke slot DIMM
  4. Aplikasi thermal paste + pasang heatsink
  5. Pasang M.2 SSD (jika ada)
  6. Pasang I/O shield ke casing (jika tidak integrated)
  7. Pasang motherboard ke casing (standoff + sekrup)
  8. Pasang PSU ke casing
  9. Pasang GPU ke slot PCIe
  10. Pasang storage SATA/HDD ke bay casing
  11. Hubungkan kabel power: 24-pin ATX, 4/8-pin EPS, 6/8-pin PCIe, SATA
  12. Hubungkan kabel front panel: power/reset switch, LED, USB, audio
  13. Hubungkan fan: CPU fan, casing fans
  14. Test POST di BIOS, cek semua komponen terdeteksi

4.4 Pemasangan CPU

// CRITICAL — JANGAN PAKSA CPU harus masuk dengan gravitasi saja, tanpa tekanan. Jika tidak masuk, periksa orientasi triangle/arrow di pojok CPU. Paksaan = pin bengkok = rusak permanen (terutama AMD PGA).
  1. Buka lever socket retention bracket
  2. Buka retention plate (untuk LGA) atau lift bracket (PGA)
  3. Perhatikan triangle/arrow di pojok CPU — samakan dengan triangle di socket
  4. Letakkan CPU lembut — gravitasi cukup, tidak perlu tekan
  5. Tutup retention plate, klik lever (akan sedikit menekan — normal)
  6. Verifikasi CPU duduk sempurna, tidak miring
// INTEL LGA vs AMD PGA LGA (Intel) — pin di socket motherboard, CPU tanpa pin (contact pad). Hati-hati motherboard pin. PGA (AMD AM4) — pin di CPU, socket tanpa pin. Hati-hati CPU pin. LGA (AMD AM5) — pin di socket, sama dengan Intel.

4.5 Pemasangan RAM

  1. Buka clip di kedua ujung slot DIMM
  2. Perhatikan notch di golden finger RAM — samakan dengan slot (anti-mismatch)
  3. Masukkan RAM tegak, tekan kedua ujung dengan tekanan merata
  4. Tekan hingga klik — clip otomatis tertutup
  5. Verifikasi kedua clip tertutup sempurna
// DUAL CHANNEL OPTIMAL Pasang 2 stick RAM di slot warna sama (biasanya A2+B2). Motherboard label: DIMM_A2, DIMM_B2. Aktifkan XMP (Intel) atau EXPO (AMD) di BIOS untuk full speed. 4 stick = quad-channel (CPU tertentu saja, DDR5 dual-channel native).

4.6 Thermal Paste & Heatsink

  1. Bersihkan permukaan CPU dengan isopropyl alcohol + microfiber
  2. Aplikasikan thermal paste: sebesar biji kacang di tengah CPU
  3. Pasang heatsink sejajar, jangan miring
  4. Sekrup diagonal (X pattern) — sedikit demi sedikit, jangan langsung kencang
  5. Final tighten dengan urutan sama (merata)
  6. Hubungkan kabel fan ke header CPU_FAN motherboard
Thermal Paste dengan spatula Thermal Paste + Spatula (HY510)

Metode Aplikasi Thermal Paste

  • Pea method — titik di tengah, heatsink tekan merata. Paling populer.
  • Line method — garis horizontal untuk CPU memanjang (Intel)
  • Spread method — sebar manual dengan card (hati-hati: udara terjebak)
  • X pattern — 4 garis membentuk X (overkill, tapi even coverage)
// JANGAN BERLEBIHAN Thermal paste berlebihan: menghambat transfer panas (insulator), tumpah ke pin (short), susah dibersihkan. Lapisan tipis saja — cukup mengisi celah mikroskopis.

4.7 Motherboard ke Casing

  1. Pasang standoff di casing sesuai form factor motherboard (ATX: 9 standoff)
  2. Pasang I/O shield ke casing (jika motherboard tidak integrated) — klik dari dalam
  3. Letakkan motherboard ke casing, sejajarkan port dengan I/O shield
  4. Sekrup motherboard ke standoff — jangan terlalu kencang (strip head)
  5. Urutan sekrup: tengah dulu, lalu pojok (mencegah warp)

4.8 GPU & Storage Installation

GPU

  1. Buka slot PCIe cover di casing belakang (1-2 slot tergantung GPU)
  2. Buka PCIe clip di motherboard
  3. Masukkan GPU ke slot PCIe x16, tekan hingga klik
  4. Sekru GPU ke casing bracket (anti-sag)
  5. Pasang kabel power PCIe 6+2-pin dari PSU (1-3 kabel tergantung GPU)

M.2 SSD

  1. Buka slot M.2 (baut standoff)
  2. Masukkan M.2 sudut 30° ke slot
  3. Tekan ke bawah, sekrup ke standoff
  4. Pasang heatsink M.2 (jika motherboard punya)

SATA SSD/HDD

  1. Pasang ke bay casing (slide-in atau sekrup)
  2. Hubungkan kabel SATA data — motherboard ke storage
  3. Hubungkan kabel SATA power — PSU ke storage

4.9 Kabel Power

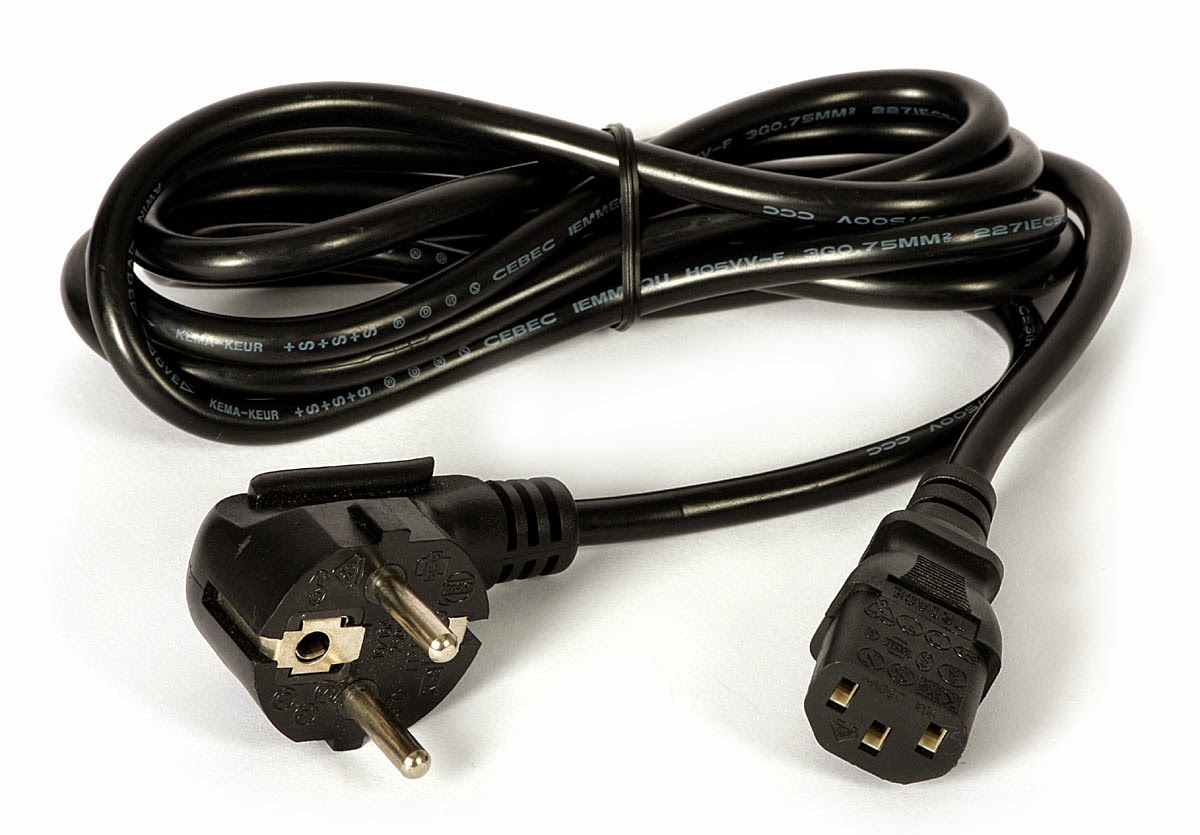
Kabel Power PSU Kabel Power PSU (IEC C13 → ATX)
KabelPasang keFungsi
24-pin ATXMotherboard (ATX_PWR)Daya utama board (3.3V/5V/12V)
4/8-pin EPSMotherboard (CPU_PWR/EPS)Daya CPU (12V)
6/8-pin PCIeGPU (VGA)Daya GPU dedicated (12V)
16-pin 12VHPWRGPU RTX 40/50Daya GPU baru (600W)
SATA powerHDD/SSD SATADaya storage (3.3V/5V/12V)
MolexFan, legacyDaya aksesori (legacy)

4.10 Front Panel & Cable Management

Kabel front panel casing (paling tricky, perhatikan polarity +/-):

  • PWR_SW — power switch (tidak polar)
  • RESET_SW — reset switch (tidak polar)
  • PWR_LED +/− — LED power (polar)
  • HDD_LED +/− — LED aktivitas HDD (polar)
  • SPEAKER — buzzer POST (4-pin)
  • F_USB — front USB header (9-pin atau 19-pin untuk USB-C)
  • F_AUDIO — front audio (HD Audio 9-pin)
// CABLE MANAGEMENT TIPS Routing di belakang motherboard tray. Pakai velcro/cable ties. Pisahkan kabel power dari kabel data. PSU modular = kurangi clutter. Hasil rapi = airflow optimal + estetika.

4.11 First Boot & BIOS Setup

  1. Colok kabel power, nyalakan PSU (switch ke I)
  2. Tekan tombol power casing
  3. Tekan Del atau F2 saat boot untuk masuk BIOS
  4. Cek tab Hardware Monitor: suhu CPU, deteksi RAM, storage, fan
  5. Cek boot priority — set USB installer sebagai first boot
  6. Aktifkan XMP/EXPO untuk RAM full speed
  7. Aktifkan Resizable BAR (untuk GPU performa lebih)
  8. Cek Secure Boot dan TPM (wajib Windows 11)
  9. Save & Exit → masuk installer OS
// POST BERHASIL Tanda POST sukses: fan berputar, tampil logo motherboard, 1 beep pendek (AMI BIOS), masuk BIOS. Jika tidak POST, lihat Bab 5: Troubleshooting.

4.12 Cable Management Best Practices

Cable management bukan hanya estetika — mempengaruhi airflow, suhu, dan kemudahan upgrade. Kabel berantakan = airflow terganggu = suhu naik = thermal throttle.

Teknik Cable Management

  1. Routing di belakang motherboard tray — kabel melalui cutout rubber grommet, keluar hanya di titik needed.
  2. Velcro cable ties — reusable, tidak merusak kabel (vs zip ties yang bisa terlalu kencang).
  3. Pisahkan power vs data — kabel power (24-pin, EPS, PCIe) terpisah dari kabel data (SATA, front panel) untuk reduksi interference.
  4. PSU modular — hanya pasang kabel yang dibutuhkan, kurangi clutter.
  5. Cable comb untuk GPU power — rapikan beberapa kabel PCIe paralel.
  6. Hidden storage — PSU shroud untuk sembunyikan kabel berlebih.
// TIPS PRO Pasang kabel power dulu (24-pin, EPS), lalu kabel data (SATA, front panel). Rapikan tiap layer sebelum lanjut. Foto tiap tahap untuk dokumentasi.

4.13 Benchmark & Stress Test

Setelah perakitan, lakukan benchmark & stress test untuk verifikasi stabilitas dan performa sistem.

ToolUntukTest
Cinebench R23/2024CPU performanceMulti-core + single-core render
Prime95CPU stabilityStress test (small FFT = max heat)
MemTest86RAM stabilityMemory error detection (boot USB)
3DMarkGPU performanceGaming benchmark (Time Spy, Port Royal)
FurMarkGPU stressGPU burn-in test (max heat)
CrystalDiskMarkStorage speedRead/write sequential + random
HWiNFO64MonitoringSuhu, voltage, fan, power real-time
AIDA64All-in-oneStress + benchmark + monitoring

Stability Test Protocol

  1. MemTest86 — jalankan minimal 2 pass (2+ jam) untuk verifikasi RAM stabil.
  2. Prime95 Small FFT — 30 menit, suhu CPU harus stabil <85°C, tidak ada error.
  3. FurMark — 15 menit, suhu GPU <80°C, tidak crash/artifact.
  4. Cinebench multi-loop — 10 run, skor konsisten (tidak drop >5%).
  5. Gaming test — mainkan game berat 1 jam, cek FPS stabil dan tidak crash.
// STABILITY CRITERIA Sistem dianggap stabil jika: tidak crash/freeze/BSOD selama 1 jam stress test, suhu CPU <85°C, GPU <80°C, tidak ada throttling signifikan.

4.14 BIOS Optimization

Setelah POST sukses, optimize BIOS untuk performa optimal:

  • XMP/EXPO — aktifkan profil RAM ke rated speed (DDR5-6000 bukan default 4800).
  • Resizable BAR (Above 4G) — CPU akses seluruh VRAM GPU, boost gaming 5-15%.
  • PBO (AMD) / Multi-Core Enhancement (Intel) — boost clock otomatis.
  • C-States — power saving idle (aktif untuk efficiency).
  • Fan curve — set custom (silent di idle, performance di load).
  • Undervolt — turunkan voltage offset (-0.05V) untuk suhu lebih dingin tanpa performance loss.
  • Secure Boot + TPM 2.0 — wajib untuk Windows 11.
  • Fast Boot — skip POST check (boot lebih cepat).
Mengapa XMP/EXPO tidak aktif default padahal RAM dibeli dengan spec DDR5-6000? Karena JEDEC default (4800 MT/s) adalah spec standar yang dijamin kompatibel. XMP adalah "overclock profile" dari manufacturer — user harus explicitly enable untuk full speed.
BAB 5

TROUBLESHOOTING & MAINTENANCE

Diagnosa POST, beep codes, debug LED, common issues, dan perawatan PC

5.1 POST Beep Codes (AMI BIOS)

Beep PatternMasalahSolusi
1 pendekNormal, POST OKLanjut boot OS
1 panjangRAM tidak terdeteksiCek pemasangan RAM, ganti slot DIMM, bersihkan kontak dengan penghapus (khusus RAM gold)
1 panjang, 1 pendekMotherboard errorCek motherboard, reset CMOS
1 panjang, 2 pendekVideo/display errorCek GPU, reseat, ganti kabel monitor
1 panjang, 3 pendekVGA/GPU error (no video)Cek pemasangan GPU di PCIe, power PCIe 6/8-pin, ganti GPU test
1 panjang, 9 pendekBIOS ROM errorRe-flash BIOS (lakukan profesional)
2 pendekParity error (RAM)Ganti RAM, cek kompatibilitas
3 panjangKeyboard errorCek keyboard, ganti port USB
Continous beepPower/RAM errorCek PSU, cek semua RAM
Alternating beepCPU overheatCek heatsink, fan, thermal paste
Sumber: AMI BIOS Beep Codes Reference, Award BIOS/Phoenix Beep Codes

5.2 Debug LED Motherboard

Motherboard modern punya 4 LED debug (Q-LED) yang menyala saat POST gagal di tahap tertentu:

LEDWarnaArtiTroubleshoot
CPUMerahCPU errorCek pemasangan CPU, pin, power EPS 8-pin
DRAMKuningRAM errorCek RAM, ganti slot, cek kompatibilitas
VGAHijauGPU errorCek GPU, power PCIe, ganti slot
BOOTPutih/KuningBoot device errorCek storage, boot priority, OS

5.3 Common Issues & Solutions

GejalaKemungkinan PenyebabSolusi
PC tidak nyala (mati total)PSU mati, kabel power, switchCek kabel, switch PSU, test PSU (paperclip test)
Fan berputar, no displayRAM, GPU, kabel monitor, CMOSReseat RAM/GPU, cek kabel monitor, reset CMOS
Blue Screen (BSOD)Driver, RAM, storage, overclockUpdate driver, cek RAM (memtest), cek storage health
Auto restartOverheat, PSU kurang, RAM errorCek suhu, upgrade PSU, cek RAM
PC lambatRAM penuh, HDD, malware, background appUpgrade RAM, SSD, scan malware, disable startup
Internet putus-putusDriver LAN/WiFi, kabel, routerUpdate driver, ganti kabel, restart router
Blue screen saat gamingGPU driver, overclock, PSUUpdate GPU driver, set default clock, cek PSU
Audio tidak adaDriver, port, default deviceUpdate driver, ganti port, set default device

5.4 No POST Troubleshooting

Jika PC baru dirakit tidak POST (no display, no beep), ikuti langkah sistematis:

  1. Verifikasi kabel power — 24-pin ATX + 4/8-pin EPS terhubung rapat ke motherboard
  2. Cek RAM — pastikan terpasang kokoh, coba 1 stick di slot A2 (recommended slot)
  3. Cek CPU — terpasang benar, tidak ada pin bengkok (untuk PGA)
  4. Reset CMOS — cabut baterai CR2032 5 menit atau jumper CLR_CMOS
  5. Breadboard test — keluarkan motherboard dari casing, test minimal (CPU+RAM+PSU+GPU) di atas karton/non-conductive
  6. Ganti PSU yang diketahui berfungsi (test dengan PSU lain)
  7. Cek debug LED motherboard (CPU/DRAM/VGA/BOOT)
  8. Test GPU — pakai iGPU jika ada, atau ganti GPU
  9. Cek speaker/buzzer — pasang speaker ke header SPEAKER untuk dengar beep code
  10. Update BIOS — jika motherboard support BIOS FlashBack (tanpa CPU/RAM)
  11. Eskalasi — jika semua gagal, kemungkinan motherboard/CPU rusak. Bawa ke teknisi.

5.5 BIOS/UEFI Configuration

  • Boot Priority — urutan boot device (USB > SSD > HDD > Network)
  • XMP/EXPO — aktifkan profil RAM kecepatan penuh (manufacturer profile)
  • Secure Boot — keamanan boot, verifikasi signature. Wajib Windows 11.
  • TPM 2.0 — Trusted Platform Module, wajib Windows 11. Intel PTT atau AMD fTPM.
  • Virtualization (VT-x/AMD-V) — untuk VM (VirtualBox, VMware, Hyper-V, WSL2)
  • Resizable BAR — GPU akses seluruh VRAM, boost gaming (CUDA, DLSS)
  • C-States — power saving CPU (idle clock turun)
  • Fan Curve — atur kecepatan fan berdasarkan suhu (silent/performance)
  • RGB Sync — kontrol LED RGB via motherboard (Aura Sync, Mystic Light)
Sumber: Microsoft Windows 11 System Requirements, Intel/AMD BIOS Documentation

5.6 Maintenance & Perawatan

  • Bersihkan debu — tiup dengan compressed air tiap 3-6 bulan. Jangan pakai vacuum (statis).
  • Cek suhu — gunakan HWMonitor, HWiNFO64, Core Temp. CPU idle <50°C, load <85°C. GPU <80°C.
  • Update driver — GPU (NVIDIA/AMD), chipset, LAN, audio dari website resmi. Hindari driver booster.
  • Update BIOS — hati-hati, ikuti panduan vendor. Jangan matikan listrik saat update.
  • Backup data — ke cloud (Google Drive, OneDrive) atau external HDD. Rule 3-2-1: 3 copy, 2 media, 1 offsite.
  • Cek kesehatan storage — CrystalDiskInfo (SMART), HD Tune (scan bad sector).
  • Ganti thermal paste — tiap 2-3 tahun untuk CPU (degradasi).
  • Defrag HDD — tiap 3 bulan (jangan defrag SSD! Trim saja).
  • SSD Trim — aktifkan di Windows (otomatis), maintain performance SSD.
  • UPS (Uninterruptible Power Supply) — cegah kerusakan akibat listrik mati mendadak, beri waktu save.
  • Surge protector — cegah spike tegangan dari petir/listrik.

5.7 Performance Optimization

  • SSD untuk OS — pindah dari HDD ke SSD NVMe = percepat boot 10x
  • RAM upgrade — 8GB → 16GB banget buat multitasking
  • Dual channel RAM — boost bandwidth 2x vs single channel
  • GPU driver update — Game Ready driver untuk game terbaru
  • Game Mode Windows — optimasi resource untuk gaming
  • Disable startup app — Task Manager > Startup, disable yang tidak perlu
  • Clean install OS — tiap 1-2 tahun, bersih dari bloatware
  • Overclocking — naikkan clock CPU/GPU (hati-hati, butuh cooling lebih)
  • Undervolt — turunkan voltage CPU/GPU, suhu lebih dingin tanpa performance loss

5.8 Software Troubleshooting

Tidak semua masalah hardware. Banyak issue disebabkan software (OS, driver, application).

GejalaKemungkinan SoftwareSolusi
BSOD (Blue Screen)Driver conflict, RAM error, OS corruptionCek error code, update driver, sfc /scannow
Freeze/hangRAM penuh, CPU 100%, malwareTask Manager cek process, scan malware, reboot
Crash appApp bug, compatibility, corrupt installUpdate app, reinstall, compatibility mode
Slow bootStartup app banyak, SSD penuh, malwareDisable startup, cleanup SSD, scan malware
No internetDriver network, DNS, IP conflictUpdate driver, ipconfig /release+renew, restart router
No audioDriver, default device salah, muteUpdate driver, set default device, cek volume

Windows Diagnostic Commands

  • sfc /scannow — System File Checker, repair OS file corrupt
  • DISM /Online /Cleanup-Image /RestoreHealth — repair Windows image
  • chkdsk /f — cek & repair disk error
  • ipconfig /all — network info lengkap
  • ping [host] — test connectivity
  • tracert [host] — trace route network
  • taskmgr — Task Manager (Ctrl+Shift+Esc)
  • msconfig — System Configuration (startup, services)

5.9 Hardware Diagnostic Tools

ToolUntuk KomponenFungsi
HWiNFO64AllSensor suhu, voltage, fan, power — paling lengkap
CrystalDiskInfoSSD/HDDSMART health, temperature, TBW, bad sector
MemTest86RAMBoot USB, thorough memory error detection
Prime95CPUStress test, stability & error detection
FurMarkGPUGPU burn-in, artifact detection
AIDA64AllAll-in-one: benchmark, stress, monitoring
MSI AfterburnerGPUOverclock, monitoring, overlay FPS
ThrottlestopCPUUndervolt, monitor throttling
Motherboard Debug LEDPOST4 LED (CPU/DRAM/VGA/BOOT) untuk POST issue
MultimeterPSUCek voltage rail (3.3V/5V/12V) akurasi

5.10 Component Lifespan & Failure Signs

KomponenUmur TipikalTanda Akan Gagal
CPU10-20 tahunRandom crash, BSOD, overheat (thermal paste kering)
RAM10-15 tahunBSOD random, MemTest86 error, beep code RAM
SSD5-10 tahun (TBW limit)CrystalDiskInfo "Warning/Caution", slow, corrupt file
HDD3-5 tahunKlik/ketak, slow, SMART bad sector, corrupt file
PSU5-10 tahun (capacitor)Random restart, noise, burning smell, voltage drop
GPU5-10 tahunArtifact, crash game, fan noise, overheat
Motherboard7-15 tahunRandom issue, capasitor bengkak, USB port mati
Fan/Cooler3-7 tahun (bearing)Noise berputar, getaran, RPM drop
// WARNING SIGNS Burning smell = matikan PC segera! PSU/cable/komponen terbakar. Spark/asap = hubung singkat. Jangan nyalakan sampai diperiksa teknisi.
BAB 6

SISTEM OPERASI & SOFTWARE

Instalasi Windows, Linux, driver, dan software essential

6.1 Jenis Sistem Operasi

OSKernelDeveloperLisensiUntuk
Windows 11NT HybridMicrosoftProprietary ($)Gaming, office, umum
Windows 10NT HybridMicrosoftProprietary ($)Legacy, luas
macOS SonomaXNU (Darwin)AppleProprietary (Apple hw)Mac, creative
Ubuntu 24.04Linux 6.xCanonicalOpen source (GPL)Dev, server, umum
Fedora 40Linux 6.xRed HatOpen source (GPL)Dev, bleeding edge
ChromeOSLinuxGoogleProprietary (hw)Education, web

6.2 Instalasi Windows 11

Persyaratan Windows 11 (Microsoft resmi):

  • CPU: 1 GHz+, 2 core, 64-bit, daftar kompatibel (Intel 8th gen+, AMD Ryzen 2000+)
  • RAM: 4 GB minimum (8GB+ recommended)
  • Storage: 64 GB minimum
  • Firmware: UEFI, Secure Boot capable
  • TPM: Trusted Platform Module 2.0 (Intel PTT atau AMD fTPM)
  • Display: 720p+, 9" diagonal
  • Graphics: DirectX 12+ / WDDM 2.0
Sumber: Microsoft Learn — Windows 11 Specifications (microsoft.com/windows/windows-11-specifications)

Langkah Instalasi

  1. Download Media Creation Tool dari microsoft.com/software-download/windows11
  2. Buat bootable USB (8GB+) dengan Media Creation Tool atau Rufus
  3. Colok USB ke PC target, masuk BIOS (Del/F2), set boot priority ke USB
  4. Save & Exit → boot dari USB
  5. Pilih bahasa, waktu, keyboard → Next → Install Now
  6. Masukkan product key (atau "I don't have a key" untuk aktivasi nanti)
  7. Pilih edisi (Home/Pro) → Accept license
  8. Pilih Custom: Install Windows only
  9. Pilih SSD/HDD (format jika perlu) → Next
  10. Tunggu instalasi (~15-30 menit), PC akan restart beberapa kali
  11. Setup OOBE: region, keyboard, Microsoft account (atau offline), privacy
  12. Buat user, password → desktop siap
  13. Aktivasi Windows (Settings > Activation)

6.3 Instalasi Linux (Ubuntu)

  1. Download Ubuntu ISO dari ubuntu.com/download
  2. Buat bootable USB dengan Rufus (Windows) atau balenaEtcher (cross-platform)
  3. Boot dari USB, pilih Try or Install Ubuntu
  4. Pilih bahasa → Install Ubuntu
  5. Pilih keyboard layout → Continue
  6. Pilih Normal installation (atau Minimal) + download updates + third-party software
  7. Pilih Erase disk and install Ubuntu (atau Something else untuk dual-boot)
  8. Pilih timezone → buat user + password
  9. Tunggu instalasi (~15-30 menit) → restart → login
Sumber: Ubuntu Documentation (ubuntu.com/tutorials), Canonical Ltd

6.4 Driver Installation

  • Chipset driver — dari vendor motherboard (Intel/AMD). Penting untuk stabilitas.
  • GPU driver — NVIDIA (geforce.com/drivers), AMD (amd.com/support). Hindari Windows Update untuk GPU (versi lama).
  • LAN/WiFi driver — dari motherboard vendor atau Realtek/Intel.
  • Audio driver — Realtek HD Audio, dari motherboard vendor.
  • USB driver — biasanya native Windows. Update chipset untuk USB 3.x.
  • Bluetooth — Windows Update atau vendor.
// HINDARI DRIVER BOOSTER Jangan pakai software "Driver Booster" semacamnya — sering install driver generic/wrong, atau bundle adware. Selalu dari website resmi vendor.

6.5 Software Essential

KategoriWindowsLinux (apt)
BrowserChrome, Firefox, Edgefirefox, chromium
OfficeMS Office, LibreOfficelibreoffice
PDF ReaderSumatra, Acrobatevince, okular
Media PlayerVLC, MPC-HCvlc
Image ViewerIrfanView, ImageGlassnomacs, eog
Archiver7-Zip, WinRARfile-roller, p7zip
AntivirusWindows Defender (cukup)clamav (optional)
Code EditorVS Code, Notepad++code, vim, nano
System MonitorTask Manager, HWMonitorhtop, glances

6.6 Update & Patch Management

  • Windows Update — Settings > Windows Update. Aktifkan auto-update untuk security.
  • Driver update — manual dari vendor, atau Windows Update (basic).
  • Software update — auto-update per app, atau winget/scoop (Windows), apt/pacman (Linux).
  • BIOS update — hati-hati, ikuti panduan vendor. Jangan matikan saat update.
  • Security patch — penting! Update tiap bulan (Patch Tuesday Microsoft).

6.7 Dual Boot & Virtual Machine

Dual boot — install 2+ OS di partisi berbeda, pilih saat boot. Untuk: Windows + Linux, Windows + macOS (Hackintosh).

Virtual Machine (VM) — OS berjalan di dalam OS host. Software: VirtualBox (free), VMware Workstation, Hyper-V (Windows Pro).

AspekDual BootVirtual Machine
PerformaFull (native hardware)Overhead (share resource)
KemudahanReboot untuk switchSwitch instant (window)
IsolasiTidak (sama hardware)Ya (sandboxed)
GamingFull performanceLimited (GPU passthrough complex)
DiskPartisi terpisahVirtual disk file (.vdi/.vmdk)

WSL2 (Windows Subsystem for Linux) — jalankan Linux di Windows tanpa VM tradisional. Ringan, integrate dengan Windows file system. Untuk developer.

Container (Docker) — lebih ringan dari VM, share kernel host. Untuk deployment aplikasi (microservices).

6.8 System Recovery & Reset

Jika Windows bermasalah (corrupt, malware persistent, tidak boot), ada beberapa opsi recovery:

  1. System Restore — rollback ke restore point sebelumnya (Control Panel > Recovery).
  2. Startup Repair — auto-fix boot issue (boot dari USB installer > Repair).
  3. Safe Mode — boot minimal driver untuk troubleshooting (Shift+Restart > Advanced).
  4. Reset This PC — factory reset (Settings > Recovery > Reset). Pilih: Keep files atau Remove all.
  5. Clean Install — reinstall Windows dari USB (wipe disk, install fresh). Paling bersih.
  6. Recovery Drive — USB bootable untuk recovery (control panel > Recovery > Create recovery drive).
// BACKUP DULU! Sebelum reset/clean install, backup data penting ke external drive/cloud. Reset/clean install akan wipe data di disk!
BAB 7

JARINGAN KOMPUTER DASAR

Konsep, tipe, topologi, IP addressing, dan setup jaringan

7.1 Konsep Jaringan

Jaringan komputer adalah dua atau lebih komputer terhubung untuk berbagi resource (data, printer, internet). Manfaat: sharing data, resource, komunikasi, akses internet.

TipeCakupanContoh
PAN (Personal Area Network)~10mBluetooth headset, smartwatch
LAN (Local Area Network)Ruangan/gedungLab komputer, kantor, rumah
MAN (Metropolitan Area Network)KotaJaringan kampus antar gedung
WAN (Wide Area Network)Negara/duniaInternet, VPN antar cabang
WLAN (Wireless LAN)Ruangan, hotspotWiFi rumah/kantor

7.2 Topologi Jaringan

TopologiDiagramKelebihanKekurangan
BusLinier 1 kabelHemat kabelPutus 1 = semua mati
StarHub di tengahMudah manage, 1 mati tidak ganggu lainHub mati = semua mati
RingLingkaranTeratur1 putus = semua mati
MeshSemua terhubung semuaRedundansi tinggiMahal, kompleks
TreeHierarkiSkalabelRoot mati = masalah

Modern: Star dominan (hub/switch di tengah). Mesh untuk WiFi 6/7 (multiple AP).

7.3 IP Address & Subnet

IP Address — alamat unik tiap perangkat di jaringan. Versi:

  • IPv4 — 32-bit, 4 oktet (192.168.1.1). ~4.3 miliar alamat. Hampir habis.
  • IPv6 — 128-bit, 8 grup hex (2001:db8::1). ~3.4×10³⁸ alamat. Hampir unlimited.

Kelas IP (Private Range, RFC 1918)

KelasRangeSubnetHost
A10.0.0.0 - 10.255.255.255/8 (255.0.0.0)16 juta
B172.16.0.0 - 172.31.255.255/12 (255.240.0.0)1 juta
C192.168.0.0 - 192.168.255.255/16 (255.255.0.0)65 ribu

DHCP — Dynamic Host Configuration Protocol, assign IP otomatis. Static IP — di-set manual (untuk server/printer). DNS — Domain Name System, translate domain ke IP (google.com → 142.250.x.x).

Sumber: IETF RFC 1918, RFC 791 (IPv4), RFC 8200 (IPv6), ICANN

7.4 Kabel UTP & Crimping

UTP (Unshielded Twisted Pair) — kabel jaringan standar (Cat5e/Cat6/Cat6a/Cat7).

KategoriMax SpeedFrekuensiJarak
Cat5e1 Gbps100 MHz100m
Cat610 Gbps (55m)250 MHz100m
Cat6a10 Gbps500 MHz100m
Cat710 Gbps600 MHz100m
Cat825/40 Gbps2000 MHz30m

Standar Wiring (TIA/EIA-568)

  • T568A — hijau-putih, hijau, oranye-putih, biru, biru-putih, oranye, coklat-putih, coklat
  • T568B — oranye-putih, oranye, hijau-putih, biru, biru-putih, hijau, coklat-putih, coklat
  • Straight cable — T568B di kedua ujung. Untuk hubung perangkat berbeda (PC-switch, router-switch).
  • Cross cable — T568A di satu ujung, T568B di ujung lain. Untuk hubung perangkat sama (PC-PC, switch-switch). Modern: auto-MDIX (otomatis).
Sumber: TIA/EIA-568 Standard, IEEE 802.3 Ethernet

7.5 Network Devices

  • Hub — broadcast ke semua port (kuno, collision tinggi).
  • Switch — kirim ke port tujuan (MAC address). Modern, smart.
  • Router — hubungkan jaringan berbeda (LAN-WAN), routing IP, NAT, firewall.
  • Access Point (AP) — WiFi, kabel ke router/switch.
  • Modem — modulasi/demodulasi sinyal ISP (kabel/fiber/DSL).
  • Firewall — filter traffic berdasarkan rule (hardware/software).

7.6 Setup WiFi

  1. Hubungkan router ke modem (port WAN)
  2. Hubungkan PC ke router (port LAN) atau WiFi default
  3. Akses admin (biasanya 192.168.1.1 atau 192.168.0.1)
  4. Login (default: admin/admin — ganti!)
  5. Set SSID (nama WiFi)
  6. Set security: WPA3 (modern) atau WPA2-AES (kompatibel)
  7. Set password kuat (12+ karakter, huruf+angka+simbol)
  8. Set channel (auto atau manual, hindari crowded)
  9. Aktifkan guest network (jika perlu)
  10. Save, restart router
Standar WiFiIEEEMax SpeedBand
WiFi 4802.11n600 Mbps2.4/5 GHz
WiFi 5802.11ac3.5 Gbps5 GHz
WiFi 6802.11ax9.6 Gbps2.4/5 GHz
WiFi 6E802.11ax9.6 Gbps2.4/5/6 GHz
WiFi 7802.11be46 Gbps2.4/5/6 GHz
Sumber: IEEE 802.11 Working Group, Wi-Fi Alliance (wi-fi.org)

7.7 Troubleshooting Jaringan

  1. cek kabel — UTP terpasang baik, lampu port menyala
  2. ipconfig (Windows) / ifconfig/ip a (Linux) — cek IP
  3. ping 127.0.0.1 — test TCP/IP stack lokal
  4. ping [gateway] — test koneksi ke router
  5. ping 8.8.8.8 — test koneksi internet (Google DNS)
  6. ping google.com — test DNS
  7. tracert google.com — trace route, lihat di mana putus
  8. nslookup — DNS lookup manual
  9. netsh winsock reset — reset winsock (Windows)
  10. Restart router/modem (power cycle 30 detik)

7.8 Cloud Services

Cloud computing menyediakan layanan IT via internet. Tiga model utama:

ModelArtiContohUntuk
SaaSSoftware as a ServiceGmail, Office 365, ZoomEnd user
PaaSPlatform as a ServiceHeroku, Google App EngineDeveloper
IaaSInfrastructure as a ServiceAWS EC2, Azure VMSysadmin
  • AWS (Amazon Web Services) — market leader, EC2 (VM), S3 (storage), RDS (database).
  • Microsoft Azure — enterprise integration, Windows ecosystem.
  • Google Cloud Platform (GCP) — AI/ML strong, BigQuery.
  • Cloudflare — CDN, DNS, DDoS protection.
  • DigitalOcean / Vultr — simple VPS untuk developer/small business.
ANALOGI: CLOUD MODEL
SaaS = makan di restoran (tinggal pesan, semua disiapkan). PaaS = sewa dapur siap pakai (masak sendiri, equipment disediakan). IaaS = sewa lahan kosong (bangun sendiri dari nol).

7.9 Advanced Network Troubleshooting

Tools advanced untuk diagnosa jaringan:

  • Wireshark — packet analyzer, capture & analisis traffic (deep inspect).
  • nmap — network scanner, cek host up, port open, OS detection.
  • iperf3 — bandwidth test antara 2 node (throughput real).
  • Speedtest (Ookla) — test internet speed (download/upload/ping).
  • Fing — network scanner mobile, cek perangkat di jaringan.
  • traceroute / tracert — trace path ke tujuan, identifikasi hop bermasalah.
  • nslookup / dig — DNS query manual, cek resolve domain.
  • netstat -an — cek koneksi aktif, listening port.

OSI Layer Troubleshooting

  1. Layer 1 (Physical) — kabel putus? Port lampu menyala? WiFi signal?
  2. Layer 2 (Data Link) — MAC address conflict? Switch port?
  3. Layer 3 (Network) — IP conflict? Routing? Ping gateway?
  4. Layer 4 (Transport) — Port blocked? Firewall?
  5. Layer 7 (Application) — DNS resolve? HTTP error? App config?
Sumber: Cisco CCNA Curriculum, CompTIA Network+ Objectives
BAB 8

KEAMANAN & CYBERSECURITY

Ancaman, proteksi, password security, backup, dan data privacy

8.1 Jenis Ancaman (Threats)

AncamanDefinisiContoh
VirusKode menempel file lain, aktif saat file dijalankanWannaCry, ILOVEYOU
WormSelf-replicate via jaringanConficker, Stuxnet
TrojanDisguise sebagai app legit, backdoorEmotet, Zeus
RansomwareEncrypt file, tebusanCryptoLocker, REvil
SpywareMonitor aktivitas, curi dataPegasus, keylogger
AdwareTampil iklan, redirect browserPop-up, browser hijack
PhishingPenipuan email/web palsuEmail bank palsu
RootkitHide di kernel, akses rootBootkit, kernel rootkit
Sumber: NIST Cybersecurity Framework, ENISA Threat Landscape, MITRE ATT&CK

8.2 Antivirus & Firewall

  • Windows Defender — built-in Windows, gratis, cukup baik untuk umum.
  • Kaspersky, Bitdefender, ESET — third-party, fitur lebih (VPN, password manager, parental).
  • Malwarebytes — anti-malware (complement antivirus).
  • Firewall — Windows Firewall (built-in), atau hardware firewall (router UTM).
  • Scan terjadwal — mingguan, full scan.
  • Real-time protection — aktif, scan file saat diakses.
// TIPS ANTIVIRUS Windows Defender + Windows Firewall sudah cukup untuk user rumah. Tambah Malwarebytes untuk scan anti-malware. Jangan install 2 antivirus real-time (conflict).

8.3 Password Security

  • Panjang — minimal 12 karakter (16+ ideal)
  • Kompleksitas — huruf besar+kecil+angka+simbol
  • Unik — beda password untuk tiap akun
  • Jangan pakai: tanggal lahir, nama, 123456, password, qwerty
  • Password Manager — Bitwarden, 1Password, KeePass (generate + simpan)
  • 2FA/MFA — Two-Factor: SMS, Authenticator (Google/Microsoft), hardware key (YubiKey)
  • Passkey — pengganti password modern (WebAuthn, biometric)
  • Have I Been Pwned — cek apakah email/password pernah leak
// PASSWORD SALAH "Password123", "Admin123", tanggal lahir, nama+angka = mudah ditebak/dibrute force. 8 karakter = 2 jam crack, 12 karakter = 226 tahun, 16 karakter = 1 triliun tahun (brute force).

8.4 Backup & Recovery

Rule 3-2-1 — standar backup professional:

  • 3 copy data (1 original + 2 backup)
  • 2 media berbeda (SSD + cloud, atau HDD + SSD)
  • 1 offsite (cloud atau HDD di tempat lain)

Tipe Backup

  • Full backup — semua data (lama, besar, lengkap)
  • Incremental — hanya yang berubah sejak backup terakhir (cepat, kecil)
  • Differential — yang berubah sejak full backup terakhir (tengah)
  • Mirror — copy real-time (RAID 1, sync)

Tools Backup

  • Windows File History — built-in, versi file
  • Macrium Reflect, AOMEI Backupper — image-based backup
  • Cloud: Google Drive, OneDrive, Dropbox — sync + versioning
  • RAID 1/5/10 — redundancy hardware

8.5 Physical Security

  • Kunci casing — cegah akses fisik ke komponen
  • Kensington lock — kunci laptop ke meja
  • UPS — cegah kerusakan akibat listrik mati/spike
  • Biometric — fingerprint, face unlock
  • BitLocker / FileVault — encrypt disk penuh, cegah akses jika dicuri
  • Jauhkan dari air/cairan
  • Suhu ruangan — 18-24°C ideal untuk PC

8.6 Data Privacy

  • GDPR (EU) — regulasi data pribadi Eropa
  • UU PDP (Indonesia) — Perlindungan Data Pribadi, efektif 2024
  • Jangan share data sensitif (KTP, password, OTP)
  • Baca privacy policy sebelum install app
  • Cek permission app — mengapa app butuh akses tersebut?
  • VPN — encrypt koneksi internet, terutama di WiFi publik
  • Tor Browser — anonimitas tinggi (slow)
  • Encrypt email — PGP, atau Signal untuk messaging
Sumber: NIST Cybersecurity Framework (nist.gov/cyberframework), GDPR (gdpr.eu), UU PDP Indonesia (uu-pdp.go.id)

8.7 Social Engineering

Social engineering — manipulasi psikologis buat dapetin info/akses. Tidak hack sistem, hack manusia. 90% cyberattack dimulai dengan social engineering.

TeknikCaraContoh
PhishingEmail/web palsu meniru institusiEmail "bank" minta update password
Spear PhishingPhishing targeted ke individu spesifikEmail ke CEO minta transfer dana
PretextingAlasan palsu untuk minta info"Saya dari IT, butuh password Anda"
BaitingUmpan fisik/digitalUSB di parking lot, "Bonus Gaji 2024.xlsx"
TailgatingIkut masuk area restricted"Tangan saya penuh, tolong bukakan pintu"
VishingVoice phishing (telepon)Telepon "pajak" minta bayar denda
SMiShingSMS phishingSMS "paket tertahan, klik link"
DeepfakeVideo/audio palsu AIVideo CEO minta transfer dana
// DEFENSE Verifikasi sebelum action: cek email sender (domain), tidak klik link mencurigakan, tidak download lampiran nggak diminta, verifikasi via channel lain (telepon bank), never share OTP/password.

8.8 Incident Response

Incident response — prosedur saat terjadi security incident (hack, malware, data breach). Framework NIST:

  1. Preparation — siapkan policy, tool, team training, backup.
  2. Detection & Analysis — identifikasi incident via SIEM, log, alert. Analisis scope.
  3. Containment — isolasi sistem terinfeksi (disconnect network), cegah penyebaran.
  4. Eradication — hapus malware, close vulnerability, patch system.
  5. Recovery — restore dari backup, verifikasi clean, bring system online.
  6. Lessons Learned — post-mortem analysis, update policy, prevent recurrence.
ANALOGI: INCIDENT RESPONSE
Bayangkan kebakaran rumah: Detection = alarm asap berbunyi. Containment = tutup pintu ruang terbakar. Eradication = padamkan api. Recovery = perbaiki/bangun ulang. Lessons Learned = pasang alarm lebih banyak, cek instalasi listrik.
Sumber: NIST SP 800-61 (Computer Security Incident Handling Guide), SANS Institute
APPENDIX A

FAQ (FREQUENTLY ASKED QUESTIONS)

Pertanyaan yang sering diajukan tentang perakitan komputer

Apa beda HDD dan SSD? Mana yang lebih baik?

HDD pakai piringan magnetik berputar (mekanik), SSD pakai flash memory (elektronik). SSD 10-100x lebih cepat (550-14000 MB/s vs 100-200 MB/s), lebih ringan, anti-guncangan, hemat daya. Untuk OS, wajib SSD NVMe. HDD cocok untuk storage data besar (arsip, video) dengan harga murah per GB.

Berapa RAM yang saya butuhkan?

8GB — basic office/web. 16GB — gaming/productivity standar (rekomendasi minimum 2024). 32GB — content creation (video editing, 3D render, VM). 64GB+ — profesional (video 4K/8K, machine learning, multi-VM).

Bagaimana memilih PSU yang tepat?

Hitung total watt komponen (CPU TDP + GPU TDP + ~100W lain), tambah margin 30-50%. Pilih efisiensi 80+ Gold minimum untuk gaming. Brand reputable: Corsair, Seasonic, EVGA, be quiet!, NZXT. Hindari PSU generik murah — bisa merusak komponen.

Apa itu overclocking dan apakah aman?

Overclocking = naikkan clock CPU/GPU di atas default untuk performa lebih. Risiko: suhu naik, umur komponen pendek, instabilitas, void warranty. Aman jika: cooling memadai, voltage kontrol, benchmark stabilitas. Untuk pemula: gunakan XMP/EXPO untuk RAM (aman, manufacturer profile), PBO (AMD) / Multi-Core Enhancement (Intel).

Apa beda Intel dan AMD? Mana yang lebih baik?

Keduanya kompetitif. Intel: strong single-core, hybrid P-Core/E-Core (12th+), good for gaming+productivity. AMD: efficient, 3D V-Cache untuk gaming (7800X3D), strong multi-core (Ryzen 9). Pilih berdasarkan budget, motherboard yang tersedia, dan use case. Tidak ada jawaban mutlak — cek benchmark terbaru.

Apa itu thermal throttling?

Saat CPU/GPU mencapai suhu tertentu (biasanya 90-100°C), mereka otomatis turunkan clock untuk mencegah kerusakan. Gejala: FPS drop, lag mendadak. Solusi: improved cooling (heatsink lebih baik, thermal paste baru, airflow casing).

Kenapa PC saya tidak POST (no display)?

Kemungkinan: RAM tidak terpasang benar, GPU tidak terdeteksi, kabel power (24-pin/EPS) longgar, CPU rusak, motherboard rusak. Ikuti Bab 5.4: No POST Troubleshooting — mulai dari cek kabel power, reseat RAM, reset CMOS, breadboard test.

Bagaimana cek suhu CPU?

Software: HWMonitor, HWiNFO64, Core Temp, AIDA64. Atau via BIOS (Hardware Monitor). Suhu ideal: idle 30-50°C, load 60-85°C, critical >90°C. Jika suhu tinggi: cek heatsink, thermal paste, airflow casing, fan.

Apa beda BIOS dan UEFI?

BIOS — legacy firmware (1980s), 16-bit, text mode, MBR partition (disk <2.2TB). UEFI — modern (2000s), 32/64-bit, GUI+mouse, GPT partition (disk >2.2TB), Secure Boot, fast boot. PC modern semua UEFI (2012+).

Apakah Windows 11 wajib untuk PC baru?

Windows 11 butuh: CPU kompatibel (Intel 8th+/AMD Ryzen 2000+), TPM 2.0, Secure Boot, 4GB+ RAM, 64GB+ storage. Jika hardware memenuhi — ya, install Windows 11 (support sampai 2031). Jika tidak, Windows 10 masih didukung sampai Oktober 2025, lalu perlu Linux atau upgrade hardware.

Berapa lama merakit PC?

Pemula: 2-3 jam (hati-hati, baca panduan). Berpengalaman: 30-60 menit. Pro: 15-20 menit. Faktor: cable management (rapi vs cepat), kompleksitas (water cooling, RGB, banyak fan).

Apakah saya butuh GPU dedicated?

Jika CPU punya iGPU (Intel UHD/Iris, AMD Radeon Graphics), tidak wajib untuk: office, web, video, light gaming (CS:GO, LoL, Minecraft). Wajib untuk: gaming AAA (RTX/RX), content creation (video 4K, 3D render), AI/ML, multiple monitor 4K.

Bagaimana cara install Windows tanpa DVD?

Buat bootable USB dengan Media Creation Tool (Microsoft) atau Rufus. USB 8GB+. Boot dari USB (set BIOS boot priority), install dari USB. Lihat Bab 6.2.

Apa itu XMP dan EXPO?

XMP (Extreme Memory Profile) — profil overclock RAM oleh manufacturer (Intel standard). EXPO (Extended Profiles for Overclocking) — versi AMD. Aktifkan di BIOS agar RAM jalan di rated speed (mis. DDR5-6000, bukan default JEDEC 4800).

Bisakah saya upgrade CPU tanpa ganti motherboard?

Hanya jika CPU baru sama socket dengan yang lama. Contoh: AM5 mendukung Ryzen 7000/9000 (multi-generasi). LGA 1700 mendukung Intel 12/13/14th gen. Cek motherboard CPU support list di website vendor. Mungkin perlu BIOS update dulu.

Apa itu NVMe dan bedanya dengan SSD SATA?

NVMe — protokol via PCIe, jauh lebih cepat (3000-14000 MB/s). SSD SATA — via SATA III, 550 MB/s. NVMe 10-25x lebih cepat. Bentuk: M.2 (kecil, motherboard slot) atau add-in card PCIe. Untuk OS, NVMe sangat recommended (boot 5-10 detik).

Apa itu TPM dan kenapa wajib Windows 11?

TPM (Trusted Platform Module) — chip kriptografi untuk: secure key storage, BitLocker encryption, Secure Boot, Windows Hello. Windows 11 wajib TPM 2.0 untuk security. Intel: PTT (firmware TPM). AMD: fTPM. Aktifkan di BIOS.

Bagaimana cek komponen kompatibel sebelum beli?

PCPartPicker.com — cek kompatibilitas otomatis (CPU-motherboard, RAM- motherboard, PSU-wattage, casing-GPU length). Cek: socket CPU, tipe RAM (DDR4/5), watt PSU, panjang GPU vs casing, form factor motherboard vs casing.

Apa itu Resizable BAR?

Fitur PCIe yang mengizinkan CPU akses seluruh VRAM GPU sekaligus (bukan 256MB chunk). Boost gaming 5-15% di game tertentu. Butuh: CPU+motherboard+GPU+driver yang support. Aktifkan di BIOS (Above 4G Decoding + Resizable BAR).

Berapa watt PSU untuk RTX 4090?

RTX 4090 TDP 450W. CPU high-end 150-200W. Lain 100W. Total ~750W load. Rekomendasi PSU 1000W 80+ Gold/Platinum. Gunakan kabel 12VHPWR native (jangan adapter). Headroom untuk spike transient.

Apakah RGB mempengaruhi performa?

Tidak, RGB hanya estetika. Tapi konsumsi daya RGB sedikit naik (~5-10W). Joke internet: "RGB = +10 FPS" — tidak benar. Yang penting: spec komponen, bukan warna.

Bagaimana cek kesehatan SSD/HDD?

Software CrystalDiskInfo — baca SMART data (health status, temperature, bad sector, total write). HD Tune/SeaTools — scan bad sector. SSD: cek TBW (Total Bytes Written) vs TBW rating. Warna: hijau = good, kuning = warning, merah = replace.

Apa itu dual channel RAM dan kenapa penting?

2 stick RAM dijalankan paralel, double bandwidth vs single channel. CPU akses 128-bit vs 64-bit. Boost performa 10-20% (gaming, APU iGPU 30%+). Pasang di slot warna sama (A2+B2). 2x8GB dual-channel lebih baik dari 1x16GB single.

Bisakah saya merakit PC tanpa anti-static strap?

Bisa tapi nggak direkomendasiin. Alternatif: sentuh metal casing (grounded) sebelum ambil komponen, kerja di lantai kayu (bukan karpet), pakai pakaian non-sintetis (cotton). Risiko: ESD bisa rusak komponen permanen (gak bisa diperbaiki) (3000V+ dari tubuh). Anti-static strap murah (~$5), komponen mahal — invest.

Apa itu undervolting?

Turunkan voltage CPU/GPU di bawah default, dengan clock tetap. Benefit: suhu turun 10-20°C, fan lebih senyap, daya turun, tanpa performance loss (jika stabil). Tools: Throttlestop, Intel XTU (CPU), MSI Afterburner (GPU). Aman, tidak void warranty.

Berapa sering ganti thermal paste?

2-3 tahun untuk pemakaian normal. Tanda perlu ganti: suhu CPU naik 10°C+ dari biasa, thermal throttling. Gunakan paste kualitas: Arctic MX-6, Noctua NT-H2, Thermal Grizzly Kryonaut. Hindari paste murah generik.

Apa itu 12VHPWR dan kenapa banyak yang bermasalah?

12VHPWR — kabel power baru untuk GPU RTX 40/50 series (600W, 16-pin). Masalah awal: kabel tidak terhubung rapat → panas → meleleh. Solusi: colok sampai klik (pastikan fully seated), jangan bend kabel dekat connector, gunakan native PSU cable (bukan adapter).

Apa itu logic gates dan mengapa penting?

Logic gates (AND, OR, NOT, NAND, dll) adalah blok dasar sirkuit digital. Dibangun dari transistor. CPU, RAM, GPU — semua dibangun dari miliaran logic gates. NAND disebut "universal gate" karena semua gate lain bisa dibuat dari NAND saja.

Apa beda CISC dan RISC?

CISC (Complex) = banyak instruksi kompleks, variable cycle. Contoh: x86 (Intel/AMD). RISC (Reduced) = instruksi sederhana, fixed 1 cycle. Contoh: ARM (smartphone), RISC-V. Modern x86 decode internal ke micro-ops (RISC-like).

Apa itu cloud computing?

Cloud = komputasi via internet, bayar sesuai pakai. Model: SaaS (software ready, Gmail), PaaS (platform untuk developer, Heroku), IaaS (infrastructure/VM, AWS EC2). Tidak perlu beli server sendiri — sewa via cloud.

Bagaimana cara cek stabilitas PC baru?

Jalankan stress test: MemTest86 (RAM, 2+ jam), Prime95 Small FFT (CPU, 30 menit), FurMark (GPU, 15 menit). Sistem stabil jika: tidak crash/BSOD, suhu CPU <85°C, GPU <80°C.

Apa itu social engineering?

Social engineering = manipulasi psikologis buat dapetin info/akses. 90% cyberattack dimulai dengan ini. Contoh: phishing (email palsu), vishing (telepon palsu), baiting (USB berisi malware di parking lot). Defense: verifikasi sebelum action, never share OTP/password.

Apa itu dual boot vs virtual machine?

Dual boot = install 2 OS di partisi berbeda, pilih saat boot. Full performance tapi harus reboot untuk switch. VM = OS dalam OS (VirtualBox, VMware), switch instant tapi ada overhead. Untuk developer: WSL2 atau Docker lebih ringan.

Berapa umur komponen PC?

CPU: 10-20 tahun. RAM: 10-15 tahun. SSD: 5-10 tahun (cek TBW). HDD: 3-5 tahun. PSU: 5-10 tahun (capacitor aging). GPU: 5-10 tahun. Tanda gagal: random crash, BSOD, noise, burning smell, SMART warning.

APPENDIX B

GLOSSARIUM

Istilah teknis yang sering digunakan dalam perakitan komputer

ALU (Arithmetic Logic Unit)Bagian CPU yang melakukan operasi aritmatika (+, -, ×, ÷) dan logika (AND, OR, NOT).
APU (Accelerated Processing Unit)CPU dengan iGPU terintegrasi kuat. Istilah AMD.
BIOS (Basic Input/Output System)Firmware lama motherboard, lakukan POST dan inisialisasi hardware saat boot.
BusJalur komunikasi antar komponen (address, data, control bus).
CacheMemori cepat di CPU (L1/L2/L3), lebih dekat = lebih cepat.
ChipsetIC pengatur aliran data motherboard. Intel: Z/B/H. AMD: X/B/A.
CMOSBaterai CR2032 di motherboard, simpan pengaturan BIOS saat power off.
CoreUnit pemroses fisik di CPU. Multi-core = paralel.
CPU (Central Processing Unit)Otak komputer, eksekusi instruksi program.
DDR (Double Data Rate)Standar RAM. Generasi: DDR3, DDR4, DDR5.
DHCPProtokol assign IP otomatis ke perangkat jaringan.
DIMM (Dual Inline Memory Module)Form factor RAM desktop. SO-DIMM untuk laptop.
DNS (Domain Name System)Translate domain (google.com) ke IP address.
DRAMDynamic RAM, memori utama (volatile, perlu refresh).
DriverSoftware agar OS berkomunikasi dengan hardware.
Dual Channel2 RAM paralel, double bandwidth.
ECC (Error Correction Code)RAM dengan koreksi error bit, untuk server/workstation.
ESD (Electrostatic Discharge)Listrik statis dari tubuh, bisa rusak komponen elektronik.
EthernetStandar jaringan kabel (IEEE 802.3). Speed: 1/2.5/5/10/40 Gbps.
EXPOProfil RAM overclock AMD (mirip XMP).
FirewallSistem filter traffic jaringan, cegah akses tidak authorized.
Form FactorStandar ukuran fisik (ATX, M-ATX, Mini-ITX untuk motherboard).
FPS (Frames Per Second)Satu ukuran kehalusan grafis game. Higher = smoother.
GPU (Graphics Processing Unit)Pemroses grafis. iGPU (di CPU) atau dedicated (PCIe card).
HDD (Hard Disk Drive)Storage magnetik, piringan berputar. Lambat, murah per GB.
HeatsinkBlok logam (aluminium/copper) menyerap panas dari CPU/GPU.
Hyper-Threading (HT)Teknologi Intel, 1 core fisik jadi 2 thread virtual. Sama dengan SMT AMD.
I/O (Input/Output)Perangkat masukan (keyboard) dan keluaran (monitor).
iGPU (Integrated GPU)GPU di dalam CPU. Hemat, tapi performa terbatas.
IP AddressAlamat unik perangkat di jaringan. IPv4 (32-bit) atau IPv6 (128-bit).
JEDECJedec Solid State Technology Association, standar memory (DDR).
LAN (Local Area Network)Jaringan area lokal (rumah, kantor, gedung).
LGA (Land Grid Array)Socket CPU dengan pin di socket, CPU contact pad. Intel & AMD AM5.
M.2Form factor SSD kecil (gumstick). NVMe atau SATA.
MotherboardPapan utama, hubungkan semua komponen.
MT/s (MegaTransfers/second)Satuan kecepatan RAM. DDR5-6000 = 6000 MT/s.
NAND FlashMemori flash non-volatile untuk SSD. SLC/MLC/TLC/QLC.
NVMe (Non-Volatile Memory Express)Protokol SSD via PCIe, jauh lebih cepat dari SATA.
OS (Operating System)Sistem operasi (Windows, Linux, macOS).
OverclockingNaikkan clock di atas default untuk performa lebih. Risiko: panas, umur pendek.
PCIe (PCI Express)Standar bus ekspansi (GPU, SSD NVMe, network). Gen 3/4/5.
PGA (Pin Grid Array)Socket CPU dengan pin di CPU (AMD AM4).
POST (Power-On Self Test)Cek hardware oleh BIOS saat power on, sebelum boot OS.
PSU (Power Supply Unit)Komponen ubah AC ke DC untuk komponen PC.
RAM (Random Access Memory)Memori volatile, akses cepat, hilang saat power off.
RAIDRedundant Array of Independent Disks, gabung beberapa disk untuk performance/redundancy.
RegisterMemori super cepat di dalam CPU (<1ns).
Resizable BARFitur PCIe, CPU akses seluruh VRAM GPU, boost gaming.
ROM (Read-Only Memory)Memori non-volatile, simpan firmware (BIOS).
SATAInterface storage (HDD/SSD), 6 Gbps (~550 MB/s).
Secure BootFitur UEFI, verifikasi signature bootloader, cegah malware boot.
SMARTSelf-Monitoring Analysis Reporting Technology, cek kesehatan storage.
SMT (Simultaneous Multithreading)1 core = 2 thread. AMD equivalent Hyper-Threading.
SocketSlot CPU di motherboard. LGA 1700, AM5, dll.
SSD (Solid State Drive)Storage flash NAND, cepat, anti-guncangan.
StandoffMur logam pendek, angkat motherboard dari casing (cegah short).
TDP (Thermal Design Power)Konsumsi daya maksimum CPU/GPU, dasar pilih cooler.
Thermal PastePasta konduktif panas, antarmuka CPU-heatsink.
ThreadEksekusi paralel virtual. 6 core/12 thread = 6 core fisik, 12 thread virtual.
TPM (Trusted Platform Module)Chip kriptografi. Wajib Windows 11.
UEFIPengganti BIOS modern, GUI, Secure Boot, GPT, fast boot.
UndervoltTurunkan voltage CPU/GPU, kurangi suhu tanpa performance loss.
UPS (Uninterruptible Power Supply)Baterai backup saat listrik mati, cegah kerusakan.
USB (Universal Serial Bus)Standar port universal. USB 3.2, USB-C, USB4, Thunderbolt 4.
VRAMVideo RAM, memori khusus GPU (GDDR6/HBM).
VRM (Voltage Regulator Module)Regulasi tegangan CPU di motherboard.
WAN (Wide Area Network)Jaringan area luas (internet, VPN antar kota).
WiFiStandar wireless (IEEE 802.11). WiFi 4/5/6/6E/7.
XMP (Extreme Memory Profile)Profil RAM overclock Intel. Aktifkan di BIOS.
APPENDIX C

REFERENSI & SUMBER RESMI

Sumber valid dan resmi untuk verifikasi dan pembelajaran lanjutan

C.1 Standard Organization

  • JEDEC Solid State Technology Association — Standar RAM (DDR3/4/5), JESD79 series. jedec.org
  • PCI-SIG (PCI Special Interest Group) — Standar PCIe (Gen 3/4/5/6). pcisig.com
  • IEEE (Institute of Electrical and Electronics Engineers) — Standar 802.3 (Ethernet), 802.11 (WiFi). ieee.org
  • IETF (Internet Engineering Task Force) — RFC standar internet (TCP/IP, RFC 1918 private IP). ietf.org
  • NVM Express — Standar NVMe SSD. nvmexpress.org
  • SATA-IO (SATA International Organization) — Standar SATA. sata-io.org
  • USB-IF (USB Implementers Forum) — Standar USB. usb.org
  • HDMI Forum — Standar HDMI. hdmi.org
  • VESA — Standar DisplayPort. vesa.org
  • 80 PLUS (Plug Load Solutions) — Sertifikasi efisiensi PSU. clearwatt.org
  • ESD Association — Standar ESD prevention. esda.org
  • UEFI Forum — Standar UEFI. uefi.org

C.2 Vendor Documentation

  • Intel ARK — Spesifikasi lengkap CPU Intel. ark.intel.com
  • Intel Developer Zone — Dokumentasi teknis Intel. developer.intel.com
  • AMD Specifications — Spesifikasi CPU/GPU AMD. amd.com/en/products/specs
  • AMD Developer — Dokumentasi teknis AMD. developer.amd.com
  • NVIDIA Developer — Dokumentasi GPU NVIDIA, CUDA. developer.nvidia.com
  • Microsoft Learn — Dokumentasi Windows, instalasi. learn.microsoft.com
  • Microsoft Windows 11 Specifications — Requirement resmi. microsoft.com/windows/windows-11-specifications
  • Ubuntu Documentation — Install guide Linux. ubuntu.com/tutorials
  • Canonical — Developer Ubuntu. canonical.com

C.3 Sertifikasi & Kurikulum

  • CompTIA A+ 220-1101 / 220-1102 — Sertifikasi IT fundamental. comptia.org
  • CompTIA Network+ — Sertifikasi jaringan. comptia.org
  • CompTIA Security+ — Sertifikasi security dasar. comptia.org
  • Cisco CCNA — Sertifikasi jaringan Cisco. cisco.com/go/ccna
  • Microsoft Certified — Sertifikasi Microsoft. learn.microsoft.com/credentials
  • LPIC-1 / Linux+ — Sertifikasi Linux. linuxfoundation.org

C.4 Sejarah & Museum

  • Computer History Museum — Museum komputer Mountain View. computerhistory.org
  • IEEE Computer Society — Society profesional. computer.org
  • IEEE Annals of the History of Computing — Jurnal sejarah. computer.org/annals
  • Intel Museum — Museum Intel Santa Clara. intel.com/museum
  • Internet Society (ISOC) — Sejarah internet. internetsociety.org

C.5 Buku Referensi

  • Computer Architecture: A Quantitative Approach — Hennessy & Patterson, 6th ed.
  • Computer Organization and Design — Patterson & Hennessy, RISC-V edition
  • Operating System Concepts — Silberschatz, Galvin, Gagne, 10th ed.
  • CompTIA A+ Certification All-in-One Exam Guide — Mike Meyers
  • Tanenbaum's Computer Networks — Andrew S. Tanenbaum

C.6 Software Reference

  • HWiNFO64 — Hardware info & sensor monitoring. hwinfo.com
  • CrystalDiskInfo — SSD/HDD SMART monitoring. crystalmark.info
  • MSI Afterburner — GPU monitoring/overclock. msi.com/afterburner
  • PCPartPicker — Compatibility checker for PC build. pcpartpicker.com
  • UserBenchmark — Bandingkan performa komponen. userbenchmark.com
  • Rufus — Bootable USB creator. rufus.ie
APPENDIX D

INDEKS

Indeks alfabetis topik dalam buku ini

AAbacus (1.2), ALU (2.2), Antistatic (4.2), APU (3.2)
BBabcock (4.5), BIOS (2.7, 3.4, 4.11), Boot (4.11), Bus (2.6)
CCache (2.2, 2.7), Casing (3.9), Chipset (3.1), CMOS (3.1, 5.4), CompTIA (C.3), Cooling (3.8), CPU (2.2, 3.2)
DDDR3/4/5 (3.3), Defrag (5.6), DHCP (7.3), DIMM (3.3), DNS (7.3), Driver (6.4), Dual Channel (4.5)
EEthernet (7.4), ESD (4.2), EXPO (3.3, 4.11)
FFAQ (App A), Firewall (7.5, 8.2), Form Factor (3.1, 3.9)
GGenerasi Komputer (1.3), Glossarium (App B), GPU (3.6)
HHDD (3.5), Heatsink (3.8, 4.6), Hyper-Threading (2.2)
IiGPU (3.6), Indeks (App D), Instalasi OS (6.2, 6.3), IP Address (7.3), IPO (1.5)
JJEDEC (3.3)
KKabel Power (4.9), Klasifikasi (1.4)
LLAN (7.1), Linux (6.3), LGA (3.2)
MM.2 (3.5, 4.8), Maintenance (5.6), Motherboard (3.1, 4.7)
NNAND Flash (3.5), NVMe (3.5)
OOverclocking (FAQ), OS (6.1)
PPCIe (3.1, 3.5), POST (3.4, 5.1), PSU (3.7), Password (8.3), Phishing (8.1)
RRAM (3.3, 4.5), RAID (8.4), Referensi (App C), Resizable BAR (4.11), Router (7.5)
SSATA (3.5), Secure Boot (3.4), Sistem Bilangan (2.4), Socket (3.2), SSD (3.5), Standoff (4.7), Subnet (7.3)
TTDP (3.2), Thermal Paste (4.6), TPM (3.4, 6.2), Topologi (7.2), Troubleshooting (5.x)
UUEFI (3.4), UTP (7.4)
VVRAM (3.6), VRM (3.1)
WWiFi (7.6), Windows 11 (6.2)
XXMP (3.3, 4.11)